|
Painting the Hull
This page was last updated on 14 November
2008.
Hull
Preparation | Priming
| Topcoats
| Boottop
| Bottom
Safety
Considerations
| Awlgrip
Tips |
|
Primer
The first step before painting was to
tape off the outside of the mahogany toerail; I didn't bother taping off the
bottom of the topsides at the scribed waterlines, since this area will eventually
be sanded and covered with bottom paint, and since I was using expensive tape I
chose not to waste it there.
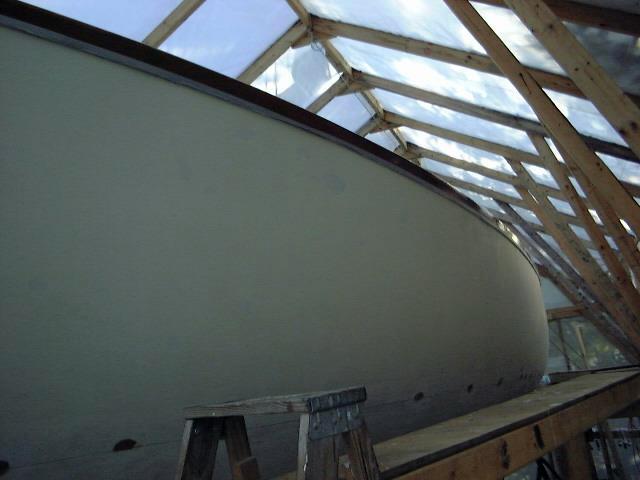 I
primed the hull in the same operation as priming the decks,
but did the topcoats in separate operations. However, priming was a very
nice thing to get out of the way. On the large surfaces of the hull, I
used a 3/16" nap Glasskoter roller to spread the primer, then tipped it off
with a brush. This left brush marks that did not level out, but I was
prepared for this since I had used the product before. (More description
on the product on the deck painting
page.) I started at the stern on one side and worked my way forward,
rolling about a 1-2' longitudinal area from rail to waterline, then tipping it
off and moving on. I only painted just past the top scribed line, which
used to indicate the top of the boottop, since I plan on raising the bottom
paint to this line and striking a new boottop above. I moved quickly to
avoid serious lap marks, since the primer dries very quickly. However,
significant sanding will be necessary anyway, so I wasn't too worried, and there
was nothing I could do about it anyway. I was also at a disadvantage since
the staging was set up for deck work, meaning I had to sit on the staging to be
at the proper height to work on the hull; when the decks are done, I will lower
the staging to make application of the Awlgrip on the hull much easier.
This will be done in a separate operation from the deck topcoat painting. I
primed the hull in the same operation as priming the decks,
but did the topcoats in separate operations. However, priming was a very
nice thing to get out of the way. On the large surfaces of the hull, I
used a 3/16" nap Glasskoter roller to spread the primer, then tipped it off
with a brush. This left brush marks that did not level out, but I was
prepared for this since I had used the product before. (More description
on the product on the deck painting
page.) I started at the stern on one side and worked my way forward,
rolling about a 1-2' longitudinal area from rail to waterline, then tipping it
off and moving on. I only painted just past the top scribed line, which
used to indicate the top of the boottop, since I plan on raising the bottom
paint to this line and striking a new boottop above. I moved quickly to
avoid serious lap marks, since the primer dries very quickly. However,
significant sanding will be necessary anyway, so I wasn't too worried, and there
was nothing I could do about it anyway. I was also at a disadvantage since
the staging was set up for deck work, meaning I had to sit on the staging to be
at the proper height to work on the hull; when the decks are done, I will lower
the staging to make application of the Awlgrip on the hull much easier.
This will be done in a separate operation from the deck topcoat painting.
The primer on the hull came out
really poorly. The brush marks were very difficult to sand out, and were
so deep that I ended up sanding through the primer over much of the hull,
probably 50% or more. This was unsatisfactory! Tipping just does not
work well with this particular product. (Awl-Quik epoxy primer, # D-8003;
Converter # D-9001)
I spent several difficult hours
sanding the hull primer, at first attempting to maintain a decent coating by
sanding with 220 grit and then, after about 1/3 of one side, I decided that
there was no point--the brush marks were just too deep, and there was no
avoiding sanding through. This was very discouraging and, to top things
off, the primer apparently becomes more difficult to sand the longer it
cures. When sanding the deck, the day after priming, I was able to easily
hand sand. The next day, however, it was next to impossible to easily sand
the hull! I ended up switching to 120 grit for the bulk of the sanding,
then finishing with 220. All in all, a very aggravating day.
I decided to reprime, although this
time I would not tip off the primer after rolling it on. I rolled on two coats, allowing about four hours between coats,
and the initial results appear
to be much better. There is roller stipple, of course, but the 1/8"
nap mohair rollers leave a fairly smooth surface, and it looks like it should
sand smooth without too much trouble.
|
Update: 2008
I chose the Awl-Quik primer for this job originally because the information
source I had at the time indicated that this was the choice for brushable primer
within the Awl-Grip system. Clearly, this source left something to be
desired, and perhaps even more clearly I learned much from this experience and
others throughout the years following this job, which led me to an improved
understanding of these paint systems and their application.
Here are the hard facts regarding high-build
primers like Awl-Quik: they simply do not self-level the way that the much
thinner finish primers so (Awl-grip 545, for example, or Alexseal 442 finish
primer). Even when applied with spray equipment and substantially thinned,
the very nature of high-build primers is to be heavy and thick; it helps to
think of high-build more as a sprayable fine filler than as a primer. I
believe that high-build primers are useful and virtually required on older boats
when attempting to achieve a fine finish.
Additionally, high-build primers are not meant,
nor ideal, for use as the final primer before applying LPU topcoats (Awl-Grip or
Alexseal). They are intended to be covered with finish primer in order to
provide the smoothest and optimal base for the thin, glossy topcoats.
This combination of factors led to some
less-than-ideal characteristics in my final paint job, which I originally
applied in September 2000. While I was extremely pleased with the quality
of the job overall, particularly when compared with how the boat looked to begin
with, it was a learning experience, and the finish was not as good as it could
have been. I blame this largely on the primer because using the
application techniques I had at the time, it was simply not possible (lacking a
potentially ridiculous buildup of coats for which I had neither time,
inclination, nor material) to perfectly sand the Awl-Quik to the surface
required for topcoat substrate.
In trying to avoid sanding through the primer
whilst smoothing it, I erred on the side of caution and sanded less, rather than
more. While this approach would have been sufficient for normal paints,
high-quality, super high-gloss LPU paint simply requires something better.
As a result, there was some stipple remaining from the roller primer
application--as well as brush marks from the failed roll-and-tip primer
application before--that ended up transferring through the topcoats. This
texture was so minor as to be nearly unnoticeable when I completed the primer
sanding, but the unforgiving nature of the topcoat simply couldn't and didn't
hide it.
Admittedly, I am being very critical of my
earlier work in this update. In general, my original paint job was better
than fair, and perhaps even approaching very good. Experience gained in
the years hence simply caused me to turn a more critical eye on the paint as
time went by.
All these factors, combined with a desire to do
better, refresh the appearance of the boat, and to finally repair, in a proper
manner, some earlier hull damage (at the bow) and the usual collection of minor
docking scars, led me to the decision to repaint the hull during the fall of
2008.
You can read more about the hull preparations
and new paint in the 2008
winter refit logs. |
Topcoats
The next day, following the multiple rolled-only
application of Awl-Quik primer, I spent about three hours sanding the hull with
220 grit. The coverage was much better than it had been before, although
still not perfect; I believe that four coats or more of the primer, applied with
the roller and thinned appropriately, may be desirable to ensure a thick enough
coat. However, I has a thin, constant
coat over the hull at this point, with only a few breaks, and I intended to call
it good. The primer was difficult and messy (dusty!) to sand, and, having
done the entire hull twice (four coats) I was not about to do it again. Overall, it
looked good and was a sufficient base for the Awlgrip. Please note the
observations in my 2008 update just above.
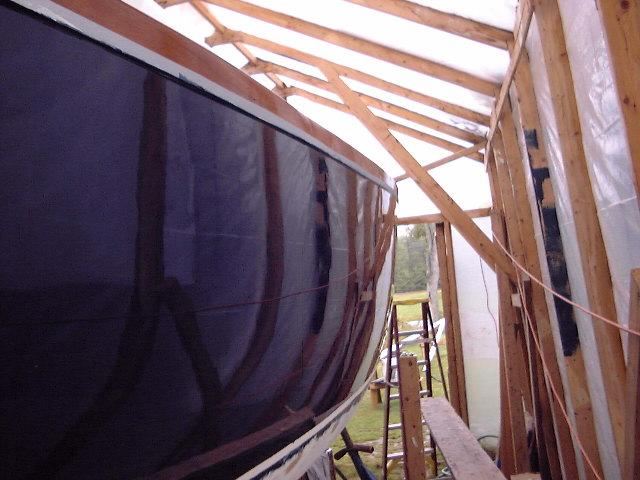
With the Awlgrip on the deck
done, I lowered my rickety staging several feet to give me a better position for
painting the hull. Then I applied the first coat of Flag Blue Awlgrip, #
5002. I mixed it the same way I did with the deck paint, but my
application was different. On the large hull surfaces, I used a Corona
Glasskoter 3/16" nap mohair roller on a 7" frame to spread the
paint evenly, then tipped it off with a 3" West Marine Flagship badger
brush. On this coat, I tipped the paint in a vertical direction--that is,
brushing from the toerail to the boottop. This is generally the
recommended method, but I thought I might try horizontal brushing on the next
coat--not for any particular reason, but the very top, beneath the toerail (with
my non-standard mahogany rail, that is) needs to he horizontally brushed to
properly smooth the paint and avoid runs. It might make a better, smoother
job if the whole area was brushed in the same direction...time will tell, maybe.
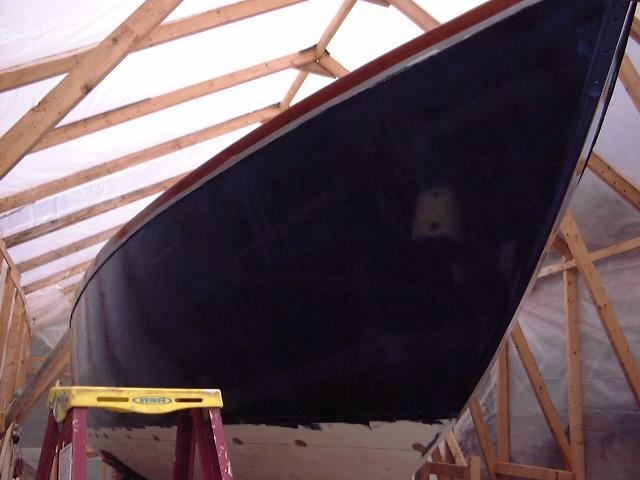 Anyway,
the first coat went on pretty well--it's only the first coat, after all, so it
doesn't have to be perfect. The dark blue did not cover the off white primer particularly
well, so plenty of white still showed through. However, the blue
transformed the boat, and it is going to look great when three coats have been
applied! Even though it is the first coat, there is still good gloss (see
the yellow top step of the ladder reflected?) and looks better than the boat
ever has since we have owned her. Anyway,
the first coat went on pretty well--it's only the first coat, after all, so it
doesn't have to be perfect. The dark blue did not cover the off white primer particularly
well, so plenty of white still showed through. However, the blue
transformed the boat, and it is going to look great when three coats have been
applied! Even though it is the first coat, there is still good gloss (see
the yellow top step of the ladder reflected?) and looks better than the boat
ever has since we have owned her.
The next day, I was able to sand the
first coat. I used 320 grit sandpaper to lightly scuff the entire area,
taking extra time to sand away any bugs or runs that were in the first
coat. I sanded entirely by hand, since an attempt to use my palm sander
removed entirely too much paint. The surface sanded easily by hand and
took about 2 hours to sand the entire hull in this manner.
|
|
I
applied the second coat much like the first (after vacuuming, solvent
washing and tacking off the surface), although this one was much more
satisfying. Immediately, the true color came out, since it covered so much
better over an existing coat. I ended up tipping the paint off in a
vertical direction once again, as this seemed to work the best--despite my
thoughts above. I started by painting the transom, rolling on an even coat
over half at a time and tipping vertically. I also painted the corners of
the transom so that when I painted the last corner of the hull later I wouldn't
have to worry about slopping any paint onto the by-then-tacky transom.
Next, I moved on to the port side, beginning at the counter and painting up to
the ridge in the centerline. This is the perfect place to begin, since,
with the ridge, there will be no lap marks here when I paint the other side an
hour or two after beginning the other side. Even if there were to be a
lap, this is a very inconspicuous place. I painted the entire
hard-to-reach area beneath the counter and partway up the hull before moving up
onto the staging to continue.
I moved forward on the port side,
painting about 2-3 linear feet from gunwale to waterline, then tipping off
before moving on. This effectively maintains a wet edge. I was very
careful at the transom corner not to create a drip or otherwise compromise the
paint already on the transom. It is also important to be careful of
starting a drip at the gunwale. After bushing each area, first from the
waterline upwards, then finishing from the gunwale downwards, I brushed a horizontal
brush width immediately beneath my overhanging toerail to finish off the area.
Working around the bow required some
quick movement and careful brushing, to maintain the wet edge, cover all
surfaces and avoid messing up the nearby paint, but soon I was past the bow and
working back down the starboard side towards the stern again. I had to add
more reducer to the paint several times as I went along, as it became slightly
more difficult to brush; the extra thinner made things much easier again,
ensuring that the paint would flow out properly. I finished up where I
started beneath the counter. Total time: about 1 1/2 - 2 hours.
After the second coat, the hull looked
great, but there were still a few areas where the white beneath showed through,
especially in direct sunlight. Therefore, I applied a third--and
final--coat a day after the second, following the same procedure.
|
|
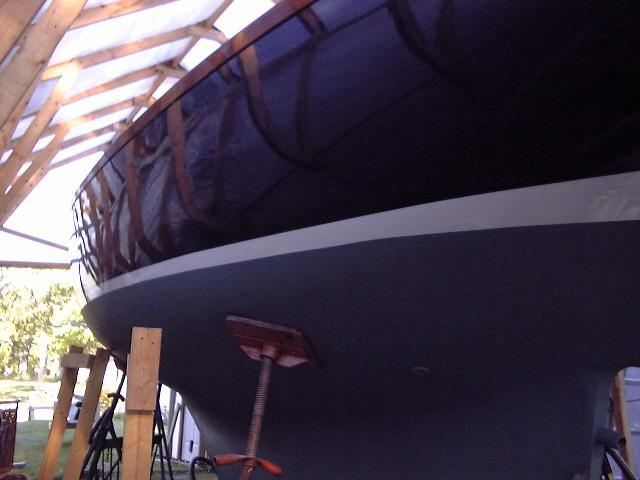
 I
was pleased with the painting results. The hull looked great, and was
extremely glossy and smooth--it looked like the paint was still wet even when it is
dry. I don't think this sort of lasting gloss can be obtained with
anything but a high quality liner polyurethane paint system like Awlgrip, and it
should last for 10 years or more with little appreciable deterioration--barring
some unforeseen circumstance. I think the extra cost is worth it. I
was pleased with the painting results. The hull looked great, and was
extremely glossy and smooth--it looked like the paint was still wet even when it is
dry. I don't think this sort of lasting gloss can be obtained with
anything but a high quality liner polyurethane paint system like Awlgrip, and it
should last for 10 years or more with little appreciable deterioration--barring
some unforeseen circumstance. I think the extra cost is worth it.
Flaws? Ok, there are some.
Are they noticeable to anyone but me? No. There are one or two small
drips that will be impossible to see once the boat is in the water, and a few
areas where bugs got into the wet paint; removing them after the paint dried
left only very small marks that will be invisible to anyone. Who knows, I
may even lose track of where these flaws are--and believe me, right now I know
where they all are!
Despite a part of me that is tempted to sand and repaint one more time, I think
I have gotten the best finish I realistically could under the conditions--that
is to say, it is about 95%, and equally as good as many professionally sprayed
boats I have seen. Of course, I have seen flawless pro jobs, but I can't
complain at my own results. As far as being able to tell is was brushed
instead of sprayed, you can't--except for the lack of orange peel that you might
see in a spray job.
|
|
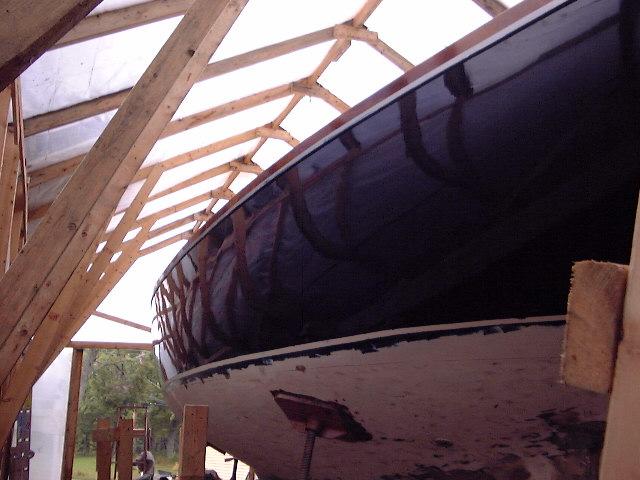
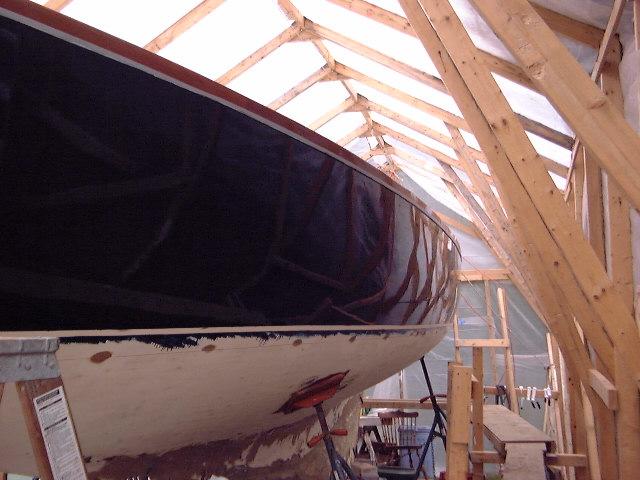
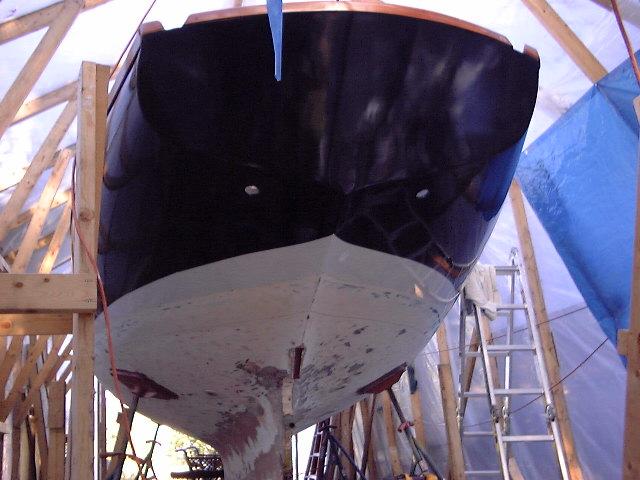
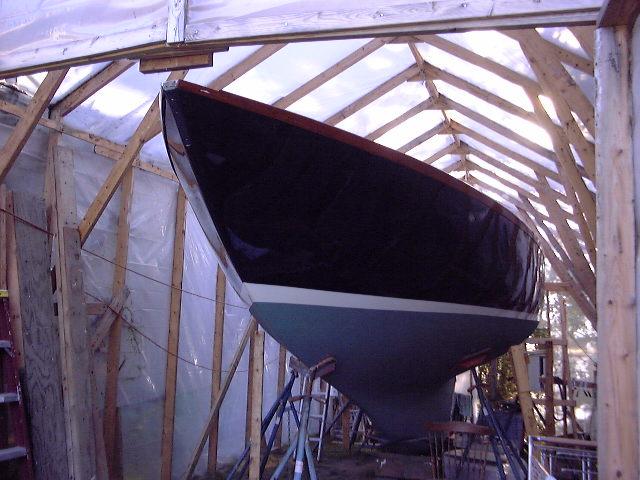
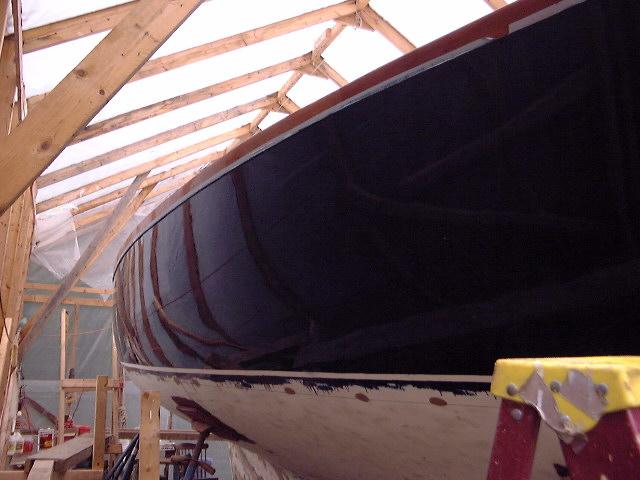 In the photos, the blue paint is
brought to the top scribed boottop line; the bottom paint will be brought up to
this line, and the new boottop will be struck above, covering over the bottom
portion of the blue. In the photos, the blue paint is
brought to the top scribed boottop line; the bottom paint will be brought up to
this line, and the new boottop will be struck above, covering over the bottom
portion of the blue.
|
|
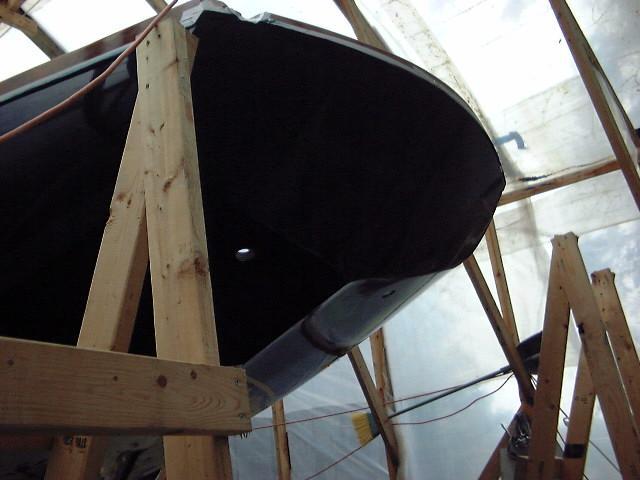
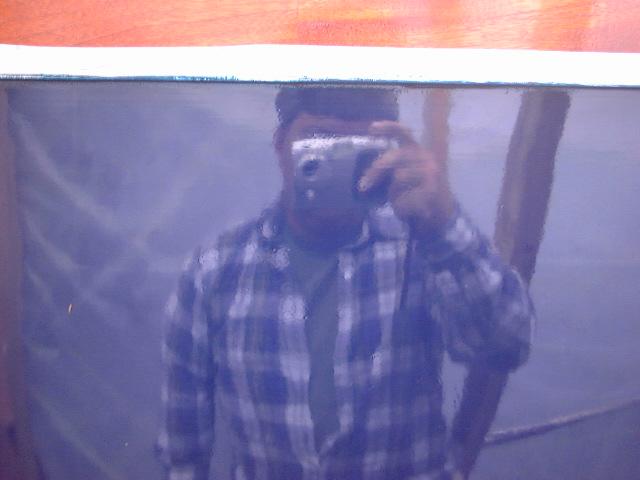 My reflection in the hull as I take a photo from a few feet
away... My reflection in the hull as I take a photo from a few feet
away...
|
|


|
|
Boottop
The day after the
final coat went on the topsides, I removed the remaining tape from the toerail
and the tape I ended up putting at the top scribe mark. The next step is
to strike a new line for the top of the boottop. This will be done
mostly by eye, since it is important to ensure that the line looks straight when
viewed from the side. You cannot just measure a set distance from the
first line and tape; this will result in a boottop that looks like it droops at
the bow and stern, a problem created by the curvature of the hull.
I first attempted to
lay out the rough location of the new boottop by measuring the height of the old
boottop (from bottom line to top) and transferring these measurements
upwards. however, the curvature of the hull is significantly different in
the new location, and this technique did not help. The new line was struck
pretty much entirely by eye, adjusted till it looked right. The trick is
to get your eye right at the same level as the new line, and to see if it looks
straight and level. This is particularly important beneath the counter,
where the strong curve of the hull requires a much wider stripe with some
interesting curves to it. I just kept moving the tape, standing back as
far as possible (with my shed, this was not as far as I would have liked, but it
was far enough) to see how the line looked. I did the same thing at the
bow, although here it was possible to stretch the tape from a point near the
chainplates all the way to the stem, thus creating a fair line that looked
appropriate. The stripe as it ended up is about 2" high at amidships,
approximately 3" at the stem, and about 6-7" beneath the counter.
With the first side
taped, I was able to transfer measurements to the opposite side to make laying
out that stripe easier. There was still the "eye factor",
however, to make sure the lines were fair and true. The molded scribe
lines were a little off here and there, resulting in bumps and dips in the line,
which had to be corrected.
When I was sure the
lines were in the right place, I checked them again, and again, and again, and
again...well, you get the point! I didn't want to end up with the boottop
being wrong, so I made sure before going ahead and sanding the area with 320
grit. After the light sanding, I cleaned with Awl Prep and tacked
off. I then applied the first coat of Snow White Awl Grip to the boottop,
directly over the hull color. I used the same quality brush as before and
just brushed the paint on, carefully brushing it out and making sure if flowed
properly. The coverage was pretty good, considering it was going on over
the dark blue of the hull.
|
|
 After letting the
paint cure for 24 hours, I sanded it lightly with 320 and repainted as before.
The second coat came out great--it covered well, leveled beautifully, and I am
very happy with it. After removing the tape, the boat really began to look
finished--the bright white offsetting the dark blue is very elegant
indeed. I am also happy with the line I struck--it looks straight and
even. It's a little hard to tell where the boottop is in the photo, but if
you look closely the distinction between the white Awlgrip and the old white
gelcoat on the bottom is obvious. After letting the
paint cure for 24 hours, I sanded it lightly with 320 and repainted as before.
The second coat came out great--it covered well, leveled beautifully, and I am
very happy with it. After removing the tape, the boat really began to look
finished--the bright white offsetting the dark blue is very elegant
indeed. I am also happy with the line I struck--it looks straight and
even. It's a little hard to tell where the boottop is in the photo, but if
you look closely the distinction between the white Awlgrip and the old white
gelcoat on the bottom is obvious.
UPDATE: After two seasons, I
decided I had to modify the location of the waterline and boottop. Careful
study while the boat was heavily loaded during our 2002 summer cruise indicated
that not only was the waterline too low, effectively, for our load level, but
the boottop was also sagged in the middle, the result of following the original
scribe marks. Please read more about this project here.
|
|
Bottom
 After sanding off any
Awlgrip that dripped and ran down over the tape onto the bottom, I rolled on a
couple coats of green West Marine CPP Ablative paint. I am doing this now
only because I want to see the finished product, and do not want to spend the
winter looking at the stripped white gelcoat and epoxy patches. I will
apply a third coat in the spring before launching, taking the time then to paint
behind the jackstands and in a few places that I left unpainted because of
pending repairs. After sanding off any
Awlgrip that dripped and ran down over the tape onto the bottom, I rolled on a
couple coats of green West Marine CPP Ablative paint. I am doing this now
only because I want to see the finished product, and do not want to spend the
winter looking at the stripped white gelcoat and epoxy patches. I will
apply a third coat in the spring before launching, taking the time then to paint
behind the jackstands and in a few places that I left unpainted because of
pending repairs.
|
|


The hull painting is
done!
|
|