|
Painting the Deck
This page was last updated on 23
September 2000.
Deck
Preparation |
Masking
| Priming
| Topcoats
Nonskid
|
Safety
Considerations |
|
Masking
off the Nonskid Areas
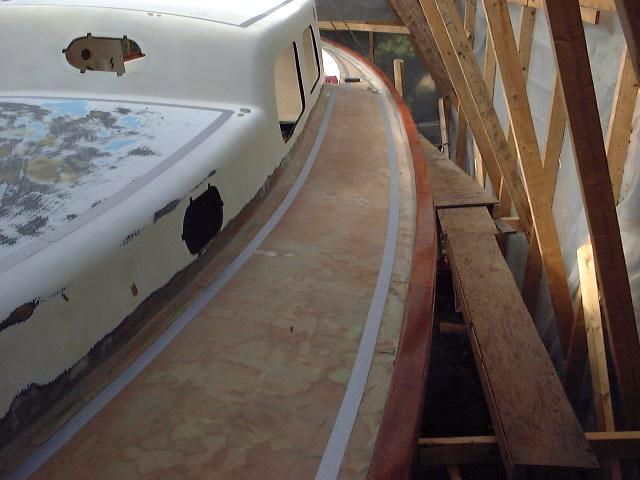
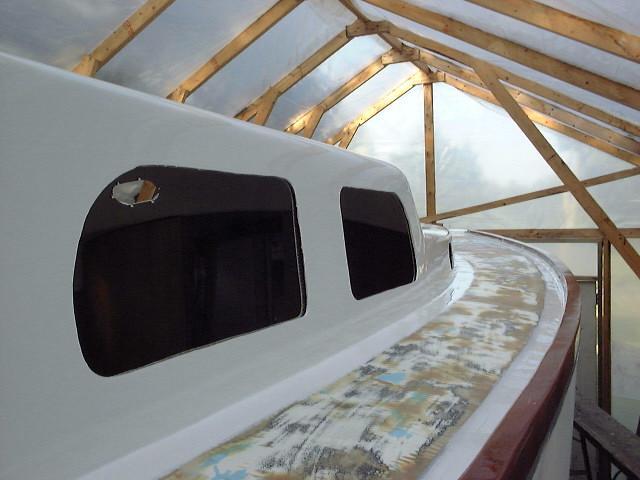
The first step when
preparing to paint the decks was to lay out and mask off the outline of the
nonskid areas. It is better to paint the smooth areas first, as it is
harder to get tape to stick well to a rough nonskid surface, so the taping
was done on the inside of my layout lines.
 I
elected to forgo any complex patterns and the like, since the original deck mold
did not include breaks in the nonskid other than the center of the coachroof and
foredeck. I prefer a clean, unbroken area of nonskid when it is painted
on, so I eliminated these divisions as well. My layout lines included 1
1/2" borders along the toerail and cabin trunk, which I drew using a
standard compass, and I
elected to forgo any complex patterns and the like, since the original deck mold
did not include breaks in the nonskid other than the center of the coachroof and
foredeck. I prefer a clean, unbroken area of nonskid when it is painted
on, so I eliminated these divisions as well. My layout lines included 1
1/2" borders along the toerail and cabin trunk, which I drew using a
standard compass, and  slightly
wider borders at the edges of the coachroof, exactly where the original line
was. I also decided to paint the top of the raised doghouse with nonskid,
rather than the smooth surface that was originally there, and laid out borders
similar to those on the forward coachroof. slightly
wider borders at the edges of the coachroof, exactly where the original line
was. I also decided to paint the top of the raised doghouse with nonskid,
rather than the smooth surface that was originally there, and laid out borders
similar to those on the forward coachroof.
|
|
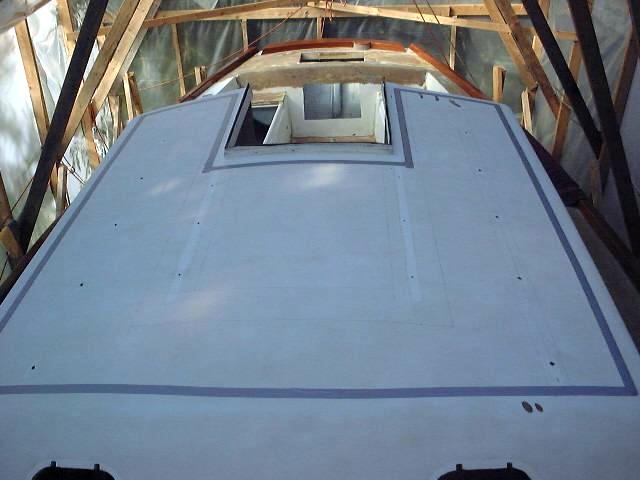
  I
laid out the other areas with borders as seemed appropriate at the time, including the forward
hatch, hawsepipe to the chainlocker, and the area around my new hatch on the
poop deck. I laid out all these lines with a pencil and straightedge, and
then moved on to taping. I
laid out the other areas with borders as seemed appropriate at the time, including the forward
hatch, hawsepipe to the chainlocker, and the area around my new hatch on the
poop deck. I laid out all these lines with a pencil and straightedge, and
then moved on to taping.
|
|
 The
tape I chose was 3M # 225 silver long mask, which is designed for outdoor use up
to 30 days. I had used this expensive but high quality tape in the past
with good results. The 30-day ability of the tape was useful since it meant
that I could put the tape on once and do all my priming and painting without
worrying about tape removal later. The
tape I chose was 3M # 225 silver long mask, which is designed for outdoor use up
to 30 days. I had used this expensive but high quality tape in the past
with good results. The 30-day ability of the tape was useful since it meant
that I could put the tape on once and do all my priming and painting without
worrying about tape removal later.
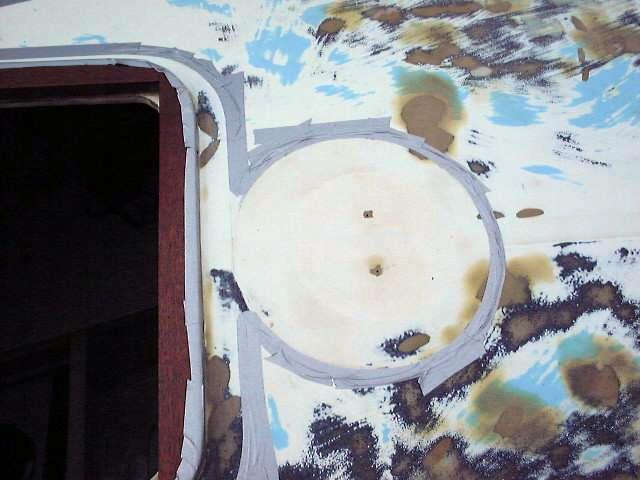
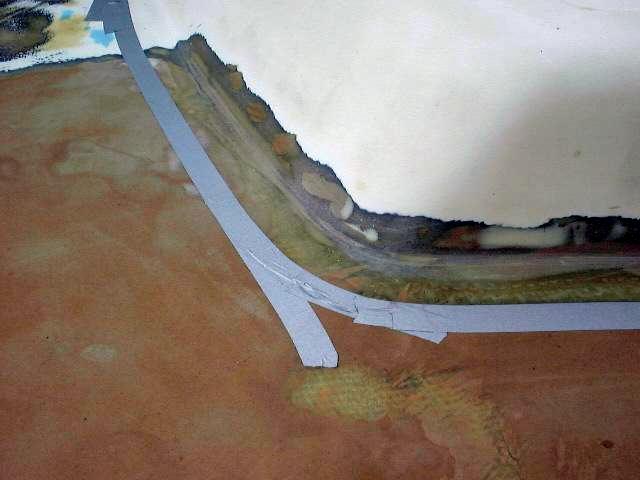
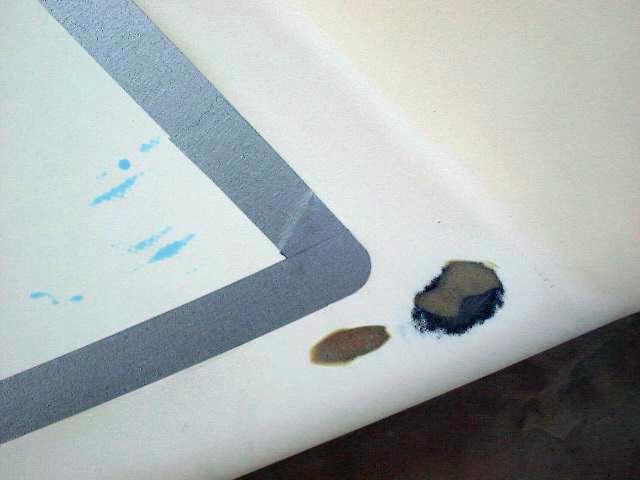
 Following my layout lines, I carefully
applied the tape, checking all
the curved by eye to make sure they are fair. Any slight irregularities
that I notice when I remove the tape after the Awlgrip goes on can be corrected
by rearranging the tape lines slightly when I tape off for the nonskid
later. At the corners, I used a quarter as a radius template to create
a smoother, more professional look to the finished product; the quarter has just
the right radius to my eye. I just placed the quarter at the corners--both
inside and outside corners--and cut around it with my utility knife. When
all the taping was done, I went over everything again and pressed the tape
firmly down. Following my layout lines, I carefully
applied the tape, checking all
the curved by eye to make sure they are fair. Any slight irregularities
that I notice when I remove the tape after the Awlgrip goes on can be corrected
by rearranging the tape lines slightly when I tape off for the nonskid
later. At the corners, I used a quarter as a radius template to create
a smoother, more professional look to the finished product; the quarter has just
the right radius to my eye. I just placed the quarter at the corners--both
inside and outside corners--and cut around it with my utility knife. When
all the taping was done, I went over everything again and pressed the tape
firmly down.
|
Update: 2008
The excellent #225 tape skyrocketed in price since I originally wrote this
article. While it is an outstanding product, its cost has become so
high that I'd only recommend it if the longevity of the tape was critical.
For any work undercover, in a permanent or temporary building, I'd suggest
3M #233 green painter's tape, which is a good all-around masking tape. |
|
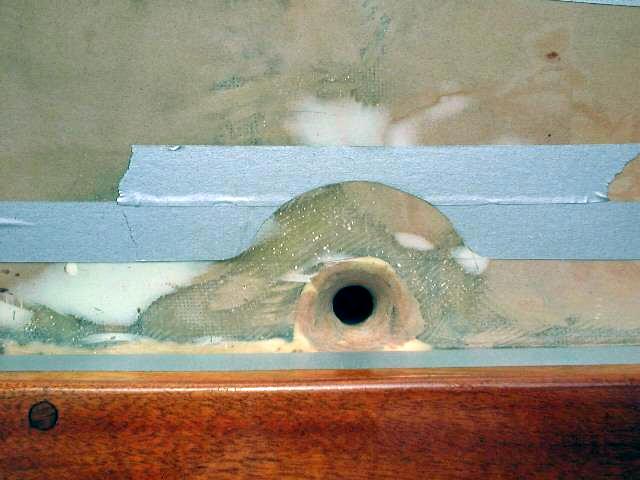
 I
also created borders around the deck scuppers. To lay these out, I first taped straight by the scuppers,
then added another piece right outside the first. Then, I laid one short
piece of tape over the middle of the scupper to give me an area to place the
point of the compass so I could draw an arc on the built out tape; I then cut
out the arc by eye and I
also created borders around the deck scuppers. To lay these out, I first taped straight by the scuppers,
then added another piece right outside the first. Then, I laid one short
piece of tape over the middle of the scupper to give me an area to place the
point of the compass so I could draw an arc on the built out tape; I then cut
out the arc by eye and  rounded
the corners using the quarter. I used a similar technique around the
cockpit scuppers. rounded
the corners using the quarter. I used a similar technique around the
cockpit scuppers.
I
taped the
inside of the mahogany toerail to protect it, and was ready to apply primer.
|
|
Priming
Before beginning
priming, I cleaned all the surfaces with Awl Prep Plus (# T-0115) degreaser/dewaxer
solvent, using a wet cloth followed immediately by a dry one to wipe up the dirt
and excess. This also gave me a last opportunity to check over the tape and
other preparations.
The primer I used was
US Paint Awl-Quik, # D-8003. (Converter # D-8001) I had used this before when painting my
Ensign a couple years ago, and was prepared for all the difficulty associated in
using it. Unfortunately, this is the only Awlgrip primer designed for use
with a brushing thinner; all the other primers state that they are intended for
spray only.
|
Update: 2008
Further experience and anecdotal research indicates
that you can also apply Awlgrip 545 finish primer by roll and tip.
See further comments on Awl-Quik and other high-build primers on the
hull page, where I wrote a more
detailed discussion of these products and lessons learned. |
|
The Awl-Quik is a
50/50 mix of base and converter, to which reducer (T-0031) is added as needed, up to 40%
by volume. The converter is extremely thick, so much so that
it barely pours (and this is August, so it's warm). The base is a little
thinner, but still thick. This makes the product difficult to deal with,
especially when opening a new can. It was very hard to stir (using a drill
attachment) when the cans were new and full.
After stirring as
needed, I measured out 20 oz. of converter, 20 oz. of base and about 16 oz. of
T-0031 reducer. I mixed these according to the manufacturer's
instructions and went to work. The primer and the solvents are very strong
and a good respirator is absolutely required
when working with the stuff, whenever a can is open. The stuff will make
your head ache after a few seconds without the breathing protection. With
the respirator, I don't even notice it.
|
Update: 2008
Additional information suggests that a standard
organic respirator cartridge might not properly filter out the most
dangerous components of the fumes found when using Awlgrip and similar
solvent-based LPU products and their primer. Refer to the
manufacturers' MSDS for the products you intend to use and make your own
decisions on proper respiratory protection. For spraying, only
approved supplied air systems should be considered acceptable. |
|
The primer can be
rolled and tipped or just brushed on, which I found worked easier on the smaller
surfaces of the deck and cabin trunk. Despite the maximum amount of
thinner allowed--and even a little more--the primer does not level well, so
brush marks are guaranteed. They can be sanded out later. I started
in the cockpit and worked my way around, trying to come up with the best way to
keep a wet edge. With the primer, so much sanding will be necessary that
this is not essential, but I was trying to use the priming as a dry run for the
topcoat painting later on. I brushed on as smooth a coat as possible, 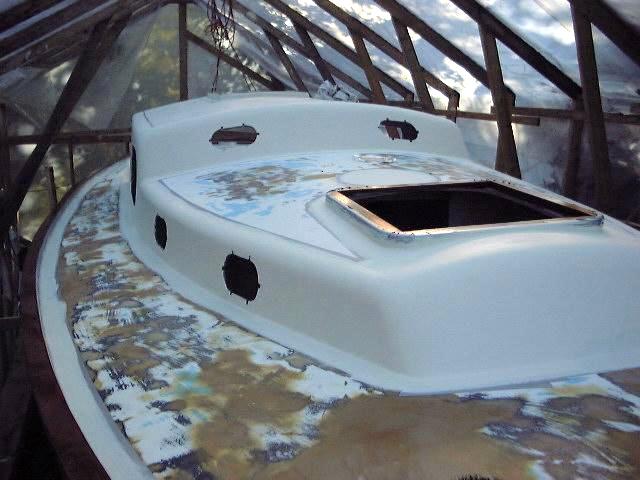 adding
a little reducer to the pot every now and then as the brush began to pull.
When I finished the cockpit and coachroof, I moved to the staging to paint the
cabin trunk and borders along the toerail. When the deck priming was done,
I moved on to the hull, since I was trying
to get all the priming done in one fell swoop. It took about
two hours to prime the deck areas and the hull; cleaning the deck and hull, and
preparing the primer initially, took another 1 1/2 hours earlier. adding
a little reducer to the pot every now and then as the brush began to pull.
When I finished the cockpit and coachroof, I moved to the staging to paint the
cabin trunk and borders along the toerail. When the deck priming was done,
I moved on to the hull, since I was trying
to get all the priming done in one fell swoop. It took about
two hours to prime the deck areas and the hull; cleaning the deck and hull, and
preparing the primer initially, took another 1 1/2 hours earlier.
Because I began my
priming very early in the day--I began cleaning and preparation just after 6 AM,
shortly after it was light enough to actually work--I was finished early enough
to allow sufficient drying time for a second coat later in the day. I
followed the same steps as before, trying again to make the second coat as
smooth as possible. I allowed the primer to dry overnight before
continuing.
|
|
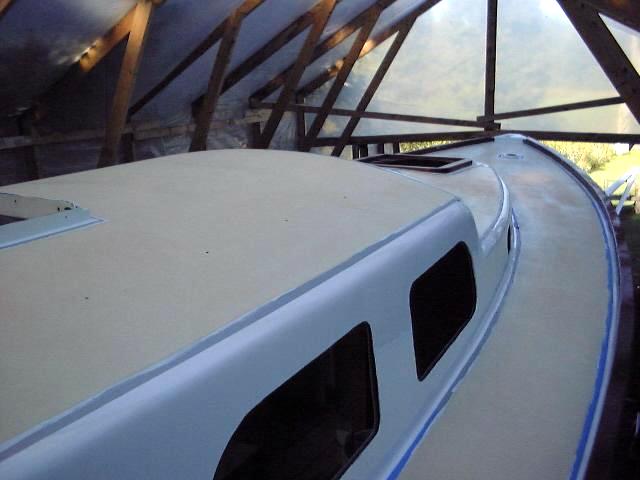
Topcoats
The primer
required a lot of sanding before I was able to continue the painting
process. I did most of the deck sanding entirely by hand, except for a few
of the largest flat surfaces, such as the inside of the cockpit well, since the machine
was too prone to sanding through the primer--something I wanted to avoid.
I used 220 grit. The primer sands fairly easily, leaving a very smooth
surface, but in some areas it was still tough to get rid of the brush
strokes. The primer did a good job filling the small crazing that covered
all of the gelcoated surfaces on the deck, as I hoped it would. The
resulting surface, after sanding, should make a very good base for the
topcoats. There are a few areas where I couldn't help sanding through the
primer, but I'd rather do an extra coat of white Awlgrip than deal with the
primer any more.
The
final step before painting was to clean all surfaces again with Awl-Prep plus, #
T-0115, ridding them of residual dust, dirt and contaminants, and then to wash
down the inside of the plastic shed and the floor with water to settle any dust
that had collected there. With this done, the boat was left alone for the
rest of the day before continuing.
Just
prior to mixing the paint prior to application, I again went over the primed
deck surfaces with Awl-Prep solvent (# T-0008) followed with a dry rag to wipe up the excess, then
went over everything with a tack cloth to ensure that it was dust free. It
really does pay to be so compulsive at this step, since any dust, dirt or other
contaminants can ruin the whole paint job--something I wished to avoid.
With
everything perfectly clean, I began to mix the various parts of the Awlgrip
system. This includes # 8044 Snow White color component, # 3002 Awl-Cat
catalyst, and T-0031 brushing reducer. I followed the directions on the
package and mixed the color and catalyst in a 2:1 ratio, then began adding the reducer to get the mixture to the
proper flowing consistency. I made some test applications on a panel to
see if the brush marks would properly self-level as desired before beginning on
the deck.
Because
of the relatively small surfaces of the deck, I did not use a roller
for spreading the paint first, preferring to simply brush it on with a super
high quality 2 1/2" badger brush (West Marine Flagship). When the paint is
properly reduced, it flows on very nicely and levels almost immediately, leaving
an unbelievably high gloss behind. As I worked, I found it necessary to
add a little more reducer here and there as it seems to evaporate somewhat from
the pot.
The
trick on the deck, working alone, was to maintain a wet edge at all times in all
areas. If a wet edge is not maintained, there will be unsightly lap marks
that will always show. It is pretty much impossible for one person to
paint the whole deck without lapping somewhere, so the idea is to find an
inconspicuous area to have a lap if necessary. This is another
argument for avoiding the multiple smaller patterns of nonskid, since every boundary
between these admittedly attractive patches means another place where a wet edge
must be maintained. Yikes! Having worked with Awlgrip before, I knew
that it will remain wet enough to brush over for nearly 15 minutes, provided it
is in the shade and not too hot, so I worked out a plan for painting with this
in mind.
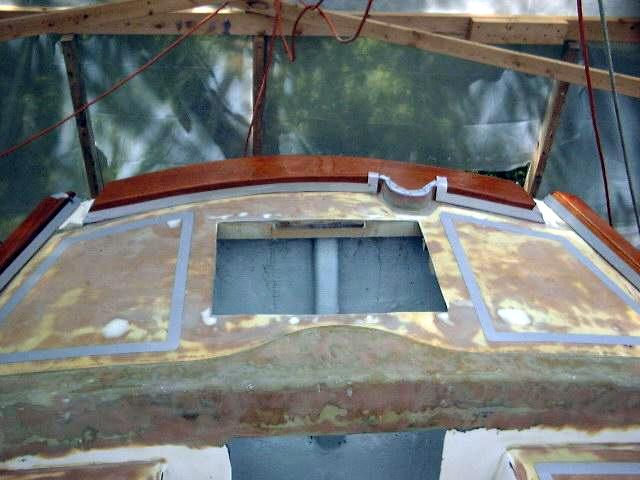
I
began painting on the coachroof at the mast step and work forward around the
hatch, then aft along both sides of the cabin trunk, painting about two linear
feet on each side, then switching to the other side and so forth. When I
reached the bump up to the raised doghouse, I started working towards the
centerline, painting the forward portion of the doghouse till I reached the
other side where I was able to meet up again with the still wet paint
there. Then, I worked aft again on the doghouse sides to the cockpit,
doing first one side then the other. Then, from the cockpit I painted the
aft face of the doghouse and the companionway surround, before continuing with
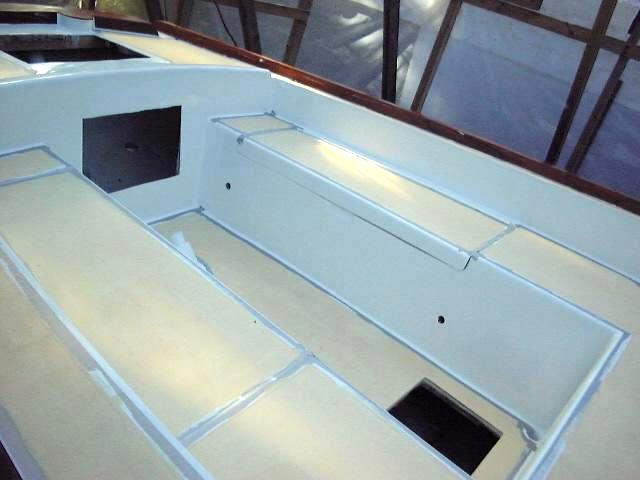
the cockpit well and aft end of the cockpit.
With
all the areas inside the cockpit well painted, I moved outside the boat to the
staging and continued, painting the poop deck areas, aft cockpit coaming, and
the vertical insides of the cockpit seats where the wooden coaming will
eventually go. I planned on my overlaps being at the forward end of the
cockpit, which will be pretty much covered with the wooden coamings, so any
marks should be more or less invisible unless you are really looking.
Then, I painted the outer perimeter of the sidedecks and foredeck. It took
about two hours to complete the deck painting (remember, this is the edges and
cabin trunk only, not the nonskid).
The first coat
covered pretty well and made a huge difference in the appearance of the
boat, finally covering over the tired, dingy original gelcoat and epoxy
patches everywhere. The paint was incredibly high gloss and bright
white, which looks terrific. I did get a few runs in the paint here
and there, and a collection of bugs, but I had at least one more coat to
go and possibly two, depending how the next came
out.
The bugs were a
significant problem, as were loose bristles in the
brush--despite the high quality. I had to pick a number of bristles out of
the fresh paint during the process, then rebrush the area. The bugs were
tougher to deal with, since they (of course) seem to be drawn to the fresh
paint. Even with the full enclosure, they managed to find their way
in. I hoped that if I left things closed up during the whole painting
process, most of them would die off by the time I get to my final, final deck
coat. In the first coat, however, it really wasn't too big a problem,
since I would have to sand anyway.
Later, I determined that the best way to
deal with the bugs was to not worry about them: it was best to pick
out the carcasses once the paint was dry. In most cases, the marks
they made in the paint were insignificant in the scheme of things, and
would either be sanded out prior to the next coat, or were minimal enough
to be unnoticeable when the job was done.
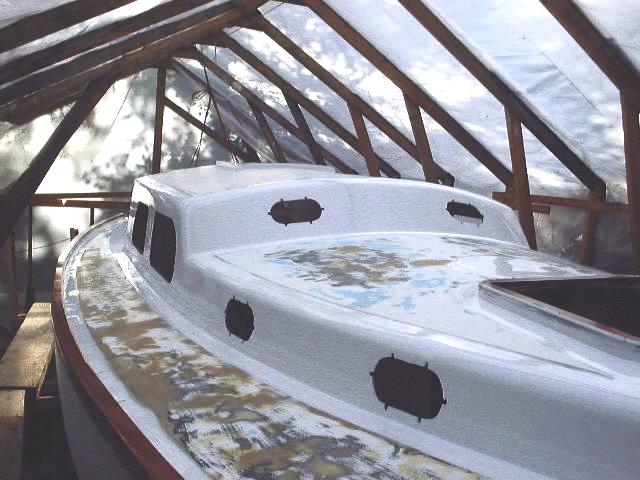
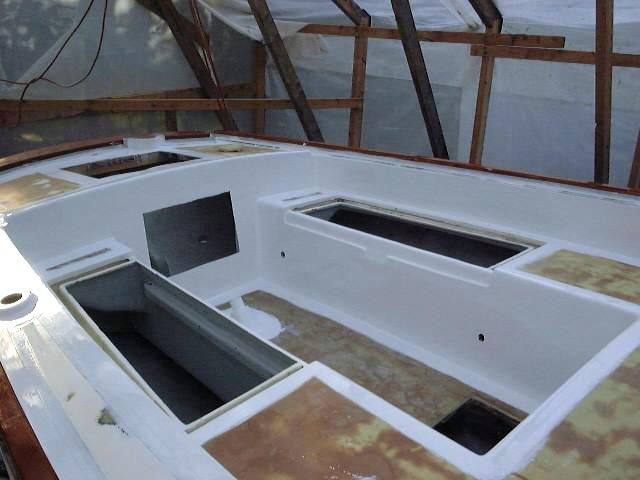
Please click on the thumbnails below to see
the results of the first coat. (Remember, the nonskid will be painted
later with another product...Awlgrip is only being used on the edges and cabin
trunk.)
|
|


 |
|
The
next day, I hand sanded all the painted areas with 320 grit paper. I
concentrated on a general smoothing of the surface, and spent extra time sanding
out any drips, runs or bugs that were in the paint. This took a couple
hours. The paint was thin in areas
and, where the primer had been thin over the raw fiberglass or epoxy putty, the
darker colors beneath were visible. However, the coverage was generally
good, and I didn't sand all the way through the first coat anywhere but on some
of the corners in the cockpit. With the sanding done, I brushed everything
off and washed the entire deck with Awl Prep solvent.
The
following morning, I prepared to apply the second coat. Part of me was
hoping that this would be the last, so I could avoid sanding again, but I wasn't
too optimistic--or maybe I should say I was just being realistic; I knew deep
down that three coats was the way to go anyway. I began
painting the same way as the first coat, but soon ran into a problem--moisture!
I had
kept the shed doors closed since applying the first coat of paint, and the bug
problem was definitely reduced and nearly eliminated--well worthwhile in that
respect, and with the cooler weather it was not unpleasant working inside the
enclosure. However, we had some very cold nights with low dew points, and
this created something of a monster inside the shed and on the boat. Early
in the morning, the boat appeared dry, and was dry when I went over it with a
tack cloth just prior to painting. However, as the sun rose beyond the
trees across the street and our house and began heating parts of the shed, tiny
moisture droplets appeared on the deck--after I had begun painting. This
was not good. I dried things off and continued painting, but failed to
tack off again. This left more lint than you would expect behind, which of
course ended up in the paint. Obviously, a third coat was going to be
necessary. I kept painting, worrying more about good coverage and avoiding
runs than trying to make it perfect. When the paint dried, it didn't look
too bad after all, but was definitely not good enough to use as a final
coat. I had to get rid of the lint, and a couple spots still were showing
dark patches through.
I
decided to take a new approach to the final coat. Obviously, painting in
the morning was not going to work; however, things dried out nicely inside the
shed by early afternoon, so I figured the afternoon would be OK. The trees
around and behind the shed begin to block the direct sun by 1:30 or 2 in the
afternoon, throwing everything in to shade--this is good, since the direct sun
is too hot to work in and would cause the paint to tack up more quickly than
desired for easy brushing.
Note that it was September in Maine when
I originally painted the boat. This meant warm but short days and
cool nights, in general--leading at least in part to the condensation
problem. The environmental conditions one might encounter during a
similar project would of course vary greatly and be dealt with
accordingly.
The
morning after the second coat, I went out and sanded the decks again--hopefully
for the last time. The moisture on the surfaces actually helped me here,
since I was using wet-dry sandpaper. There were only a couple drips from
the day before, which I sanded out, and the rest of the surfaces just required a
light sanding to knock down and remove any lint or other debris. Sanding
took about an hour, after which I brushed everything off and went to do other
things while the boat dried off.
A little later, I
carefully washed everything down with Awl-Prep (which is designed, among other
things, to remove latent moisture from the surface--I had
been using it all along...) and tacked the whole deck off one last time.
When the shed became mostly shady, I went ahead with the paint.
Painting went well, and the paint was laying down very smoothly. A slight
problem I had had on the first two coats with fisheyes was not present this
time--must have been slight moisture rather than surface contamination as I had
thought--and I was very pleased with how things were going.
However, I had
a little more trouble keeping the wet edge using my painting technique
(described above) since it was
a warmer day than the past couple--probably by 10 or 15 degrees, plus I was
painting in the afternoon rather than the cool of the morning. I prefer
the morning--it makes the paint much easier to work with. I ran into minor
trouble when trying to paint the front of the doghouse and keep all the edges
wet--the paint had begun to set up by the time I returned to the other side of
the boat, making integrating the next section a little harder. As I moved
past, however, the two sections seemed to amalgamate fairly well, and the lap is
not particularly noticeable. Painting the cockpit, once I had finished
with the difficult cabin trunk, went very well, and I was very pleased with the
results.
|
|
 I did
end up with one run that might be visible to others--on the port side of the
cabin trunk right between the two large ports. (This was one of the areas
I had had trouble with the wet edge earlier--brushing over the partially tacky
paint had built up too much thickness, causing the run.) I did
end up with one run that might be visible to others--on the port side of the
cabin trunk right between the two large ports. (This was one of the areas
I had had trouble with the wet edge earlier--brushing over the partially tacky
paint had built up too much thickness, causing the run.)
While this was devastating to me at the time, and
originally I had thought I might need to repaint the entire deck
with a 4th coat, or otherwise repair this area, I ended up leaving the run
alone, and frankly soon became entirely unaware of its existence. No
one else ever noticed it except after I pointed it out.
|
|
 The
Awlgrip application on the deck was not perfect--few jobs ever are, despite what
some people would like you to believe. But it was outstanding despite
that, and impossible to tell that the paint had been applied by brush.
Done correctly, this would always be true, but it's critical to properly
mix/reduce and properly apply the paint in order to achieve a brush mark-free
finish. It's not hard to accomplish with a little care; this was only the
second time I'd used Awlgrip (at the time, which was back in 2000). The
Awlgrip application on the deck was not perfect--few jobs ever are, despite what
some people would like you to believe. But it was outstanding despite
that, and impossible to tell that the paint had been applied by brush.
Done correctly, this would always be true, but it's critical to properly
mix/reduce and properly apply the paint in order to achieve a brush mark-free
finish. It's not hard to accomplish with a little care; this was only the
second time I'd used Awlgrip (at the time, which was back in 2000).
Awlgrip and other LPU paints can be a
challenge to work with, and are expensive. But professional results
require professional-quality products. The more commonly available
2-part polyurethane paints marketed to boatowners are not the same thing,
and, while they may produce excellent results when applied properly, will
not likely produce the same results as Awlgrip, and will not last as long
nor as effectively.
|
|
I waited a week or so--during which period I
painted the hull--before taping
over the Awlgrip so I could paint the nonskid. I had to do just a
little prep work first--mainly sanding down any Awlgrip that got spilled or
brushed beyond the tape lines into the field.
|
|
Nonskid
After
about a two week break from working on the decks to paint the hull and boottop,
it was time to return and begin preparations for the final step--painting the
nonskid. This is a low-stress operation, as there is no finesse required
to get the smoothest finish, the highest gloss, etc., since the idea is to end
up with a gritty nonskid surface.
The
first step was to tape off the nonskid areas, which is pretty self
explanatory. With careful taping, I was able to straighten or change any
small areas where I didn't quite like the line of the Awlgrip. Next, I
sanded off any Awlgrip that had gotten on the inside of the nonskid areas, to
remove the ridges and provide a better tooth for the paint. Finally, I
cleaned everything off.
There
will be three to four coats of paint on the nonskid areas: a coat of
primer, and at least two coats of the final color with the nonskid added.
Two coats should cover just fine, but I may do an additional coat next spring in
case I damage the new paint in any way during construction for the remainder of
the project. (I will be careful, though...)
The
paint I used is Interlux Brightside one part polyurethane. I experimented
with this paint for the nonskid on my Ensign a
couple years ago and it has worked out very well, with minimal wear and only a
slight deterioration of the original, freshly painted appearance. It may
not be as tough ultimately as Awlgrip in this application, but it is easy to
repaint if necessary, and it seems silly to waste such expensive, glossy paint
on an area where it is designed to be filled with grit and dull in appearance.
First,
I rolled on a coat of Brightside white primer, using one of the mohair rollers I
used on the hull. I didn't worry about tipping off, I only needed to
strive for even coverage and no obvious ridges from the roller. The roller
stipple will only add to the nonskid texture of the deck. All areas of the
deck were able to be rolled with a 4" roller; no brushing needed.
|
|
 After
letting the primer dry overnight, I prepared for the first color coat. To
a quart of Interlux Bristol Beige, I added a 1/2 pint of Interlux Brightside
flattening agent. This ensures that the decks will not be glossy, which
would be slipperier than desired. I also added a good quantity of Interlux
polymeric nonskid particles. I mixed this all together thoroughly.
The directions say to let the mixture sit for 15 minutes to allow the particles
time to absorb paint, so I did so. Then, I checked the texture by doing a
test on a piece of scrap, to see how gritty the surface is when rolled
out. My experience is that you should add significantly more particles
than the directions call for, but it all depends on what sort of surface you
want. I ended up with about double the recommended--about 12 oz. by volume
for a quart of paint. Less would be OK; I wouldn't use more. After
letting the primer dry overnight, I prepared for the first color coat. To
a quart of Interlux Bristol Beige, I added a 1/2 pint of Interlux Brightside
flattening agent. This ensures that the decks will not be glossy, which
would be slipperier than desired. I also added a good quantity of Interlux
polymeric nonskid particles. I mixed this all together thoroughly.
The directions say to let the mixture sit for 15 minutes to allow the particles
time to absorb paint, so I did so. Then, I checked the texture by doing a
test on a piece of scrap, to see how gritty the surface is when rolled
out. My experience is that you should add significantly more particles
than the directions call for, but it all depends on what sort of surface you
want. I ended up with about double the recommended--about 12 oz. by volume
for a quart of paint. Less would be OK; I wouldn't use more.
|
|
 When
the texture was what I wanted, I rolled the paint on the decks smoothly and
evenly, making sure there were no unsightly lap marks or ridges. I began
on the coachroof and cabin trunk, then painted the poop deck, cockpit sole and
seats, and then painted my way around the sidedecks clockwise, starting from the
port aft corner. (My ladder was on the starboard side.) This would
also be easy from staging, but I had taken mine down for the time being.
The nonskid texture using these particles is excellent--they end up very evenly
distributed through the paint, and because they are incorporated into and absorb
the paint, there's no unsightly gritty stuff on the surface. I highly
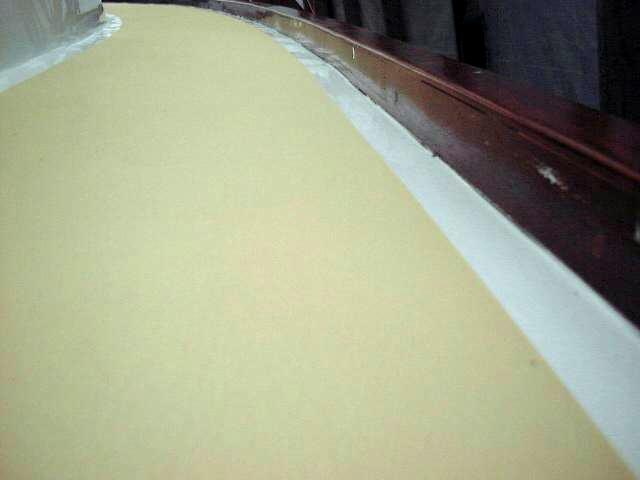
recommend this method. (First coat, left) When
the texture was what I wanted, I rolled the paint on the decks smoothly and
evenly, making sure there were no unsightly lap marks or ridges. I began
on the coachroof and cabin trunk, then painted the poop deck, cockpit sole and
seats, and then painted my way around the sidedecks clockwise, starting from the
port aft corner. (My ladder was on the starboard side.) This would
also be easy from staging, but I had taken mine down for the time being.
The nonskid texture using these particles is excellent--they end up very evenly
distributed through the paint, and because they are incorporated into and absorb
the paint, there's no unsightly gritty stuff on the surface. I highly
recommend this method. (First coat, left)
The
next day, I rolled on a second coat the same way as the first. The
coverage was excellent, and the color became more even, Both coats
contained the grit particles; this does not make the surface too gritty at
all. Later that day, when the paint had dried to the touch, I removed the
masking tape from the staging, which I had set up again. I did not walk or
lean on the new paint--that will wait a couple days at least.
|
|
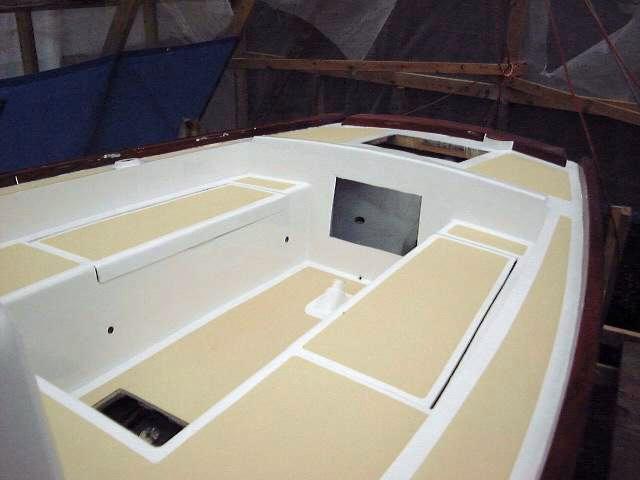
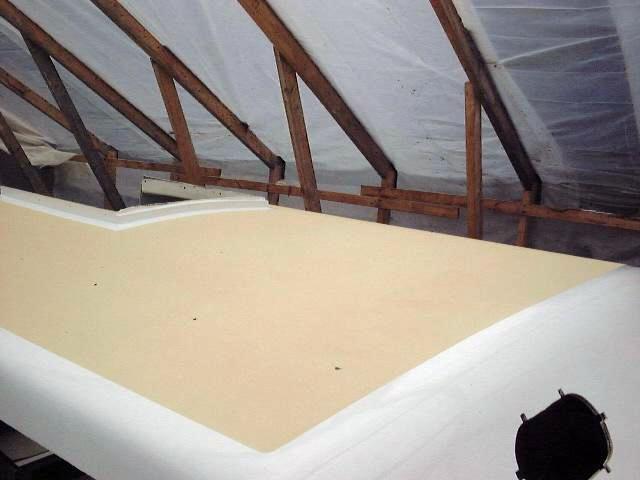
 The
decks looked great and were finally finished. I was very pleased with the
color and the contrast between the nonskid and the white Awlgrip. It is
just the classic look I was hoping for. The
decks looked great and were finally finished. I was very pleased with the
color and the contrast between the nonskid and the white Awlgrip. It is
just the classic look I was hoping for.
|
|
 The
details at the corners look good, and it was worth the effort to carefully round
each corner when taping. The
details at the corners look good, and it was worth the effort to carefully round
each corner when taping.
|
|
 I
like the even coverage and lack of interruptions in the nonskid; I think it
provides a nice, clean look. That said, I have nothing against the
interrupted patches of nonskid found on many boats--done properly, it looks very
nice. I
like the even coverage and lack of interruptions in the nonskid; I think it
provides a nice, clean look. That said, I have nothing against the
interrupted patches of nonskid found on many boats--done properly, it looks very
nice.
|
|
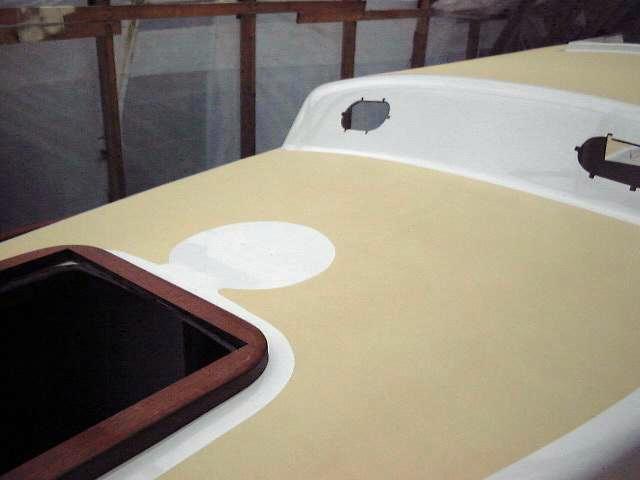
 The
coachroof is now covered with nonskid, which will be useful and also looks
better, I think. The
coachroof is now covered with nonskid, which will be useful and also looks
better, I think.
|
|
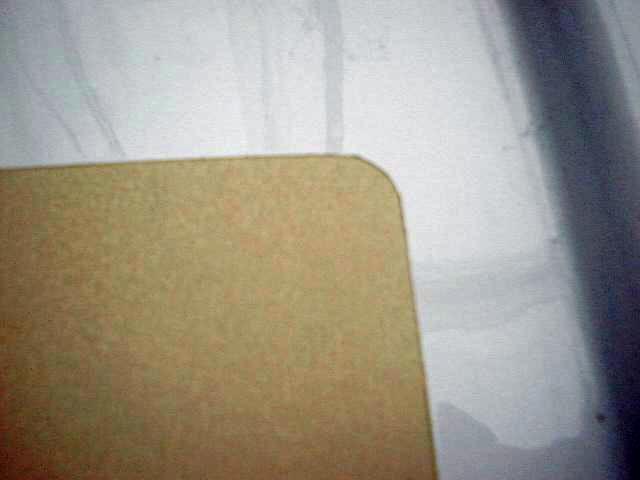
 This
photo attempts to show the finished texture of the deck paint using the methods
above. The camera fails to completely capture the look, but hopefully
these help. This
photo attempts to show the finished texture of the deck paint using the methods
above. The camera fails to completely capture the look, but hopefully
these help.
|
|
 |
UPDATE: December 2003
I repainted the nonskid after three seasons' use, and to
hide several repairs I made during the fall of 2003. I used the same
products and techniques to repaint as I did originally, as seen below.
To read about the repainting, please click
here.
To continue reading about the painting of the
deck following the original restoration project, please scroll down and read
this page. |
|