|
Small Projects:
The Fun Stuff
This page was last updated on 19
April 2002
Magazine Rack
Cutlery Stowage & Knife Block
Compass Back Cover
Pencil Rack
|
|
Magazine Rack
Because of our new holding tank in the space
beneath the vee berth, I had to get rid of the two drawers I had built there
last year. This left the question of how to deal with the old drawer
openings. At first, I thought that I would just install the drawer fronts
there permanently--in fact, I went so far as to actually do it. (See how here.)
Then Heidi said, "You know what would be great there: a magazine
rack". I had to agree, but thought I would probably put it off for a
while--other priorities and such, donchaknow.
Well, that attitude lasted all of a week
before I decided that we just couldn't live without the magazine rack. Of
course, installing it means that I'll have to redo the plywood panel beneath the
vee berth, as the old drawer openings are too wide for the rack to cover.
I won't remove the old until I have the new all made and ready to go.
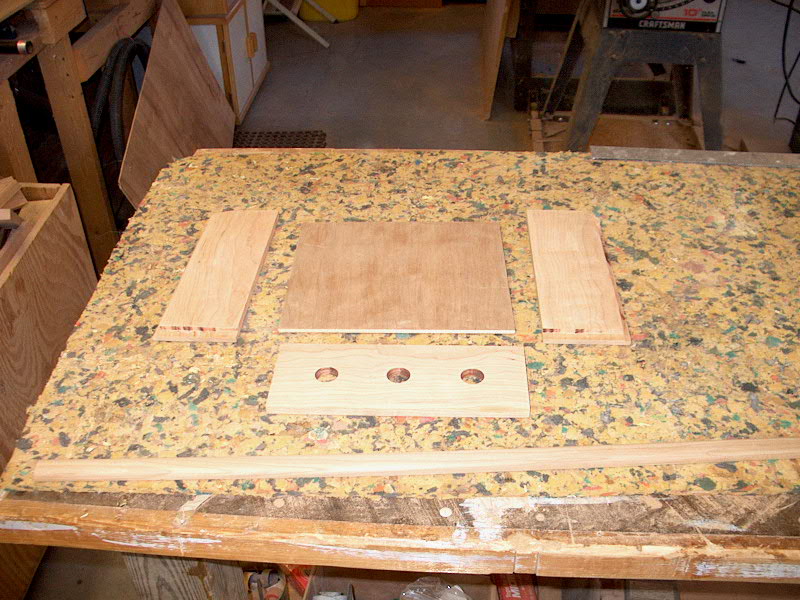
I could, however, go ahead and build the
magazine rack. It really is a simple affair: three pieces of
3/8" thick cherry (resawn from a piece of 7/8") and a piece of
1/4" cherry plywood for the front. The inside dimensions are about
9-1/2" wide by 9" high. This allows a little spare room inside,
and will ensure that even extra wide glossy magazines will fit without a
problem. The 9" height allows the title of the magazine to be seen
over the top of the rack. The rack is about 3-1/2" deep, which will
limit its contents to a dozen magazines or so.
|
 The
plywood face is set into a dado on the front edges of the side
boards. Originally, this was going to be a nice flush installation, but a
milling error screwed up that idea. Rather than throw out the wood, I
changed my idea a bit and decided to use some trim to cover the seam
instead. The plywood comes down till it is even with the bottom; to allow
the rack to be cleaned if necessary, I drilled three 3/4" holes in the
bottom with a Forstner bit. The rack is also wide enough to get a hand
into if necessary. I formed a slight radius on the top edges to prevent
any corners from being exposed in the finished product. The
plywood face is set into a dado on the front edges of the side
boards. Originally, this was going to be a nice flush installation, but a
milling error screwed up that idea. Rather than throw out the wood, I
changed my idea a bit and decided to use some trim to cover the seam
instead. The plywood comes down till it is even with the bottom; to allow
the rack to be cleaned if necessary, I drilled three 3/4" holes in the
bottom with a Forstner bit. The rack is also wide enough to get a hand
into if necessary. I formed a slight radius on the top edges to prevent
any corners from being exposed in the finished product. |
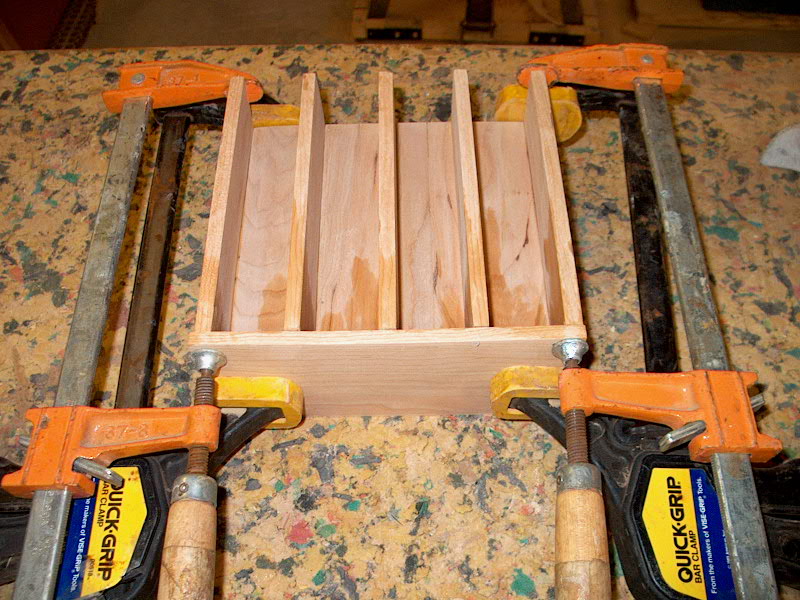
 With
the four pieces cut to size, I glued them up with water resistant yellow
carpenter's glue. Then, when the glue dried, I cut and fit trim pieces
around the sides of the front and glued them in place. I let this cure for
a couple hours, then removed the clamps and sanded everything smooth. With
the four pieces cut to size, I glued them up with water resistant yellow
carpenter's glue. Then, when the glue dried, I cut and fit trim pieces
around the sides of the front and glued them in place. I let this cure for
a couple hours, then removed the clamps and sanded everything smooth. |
|
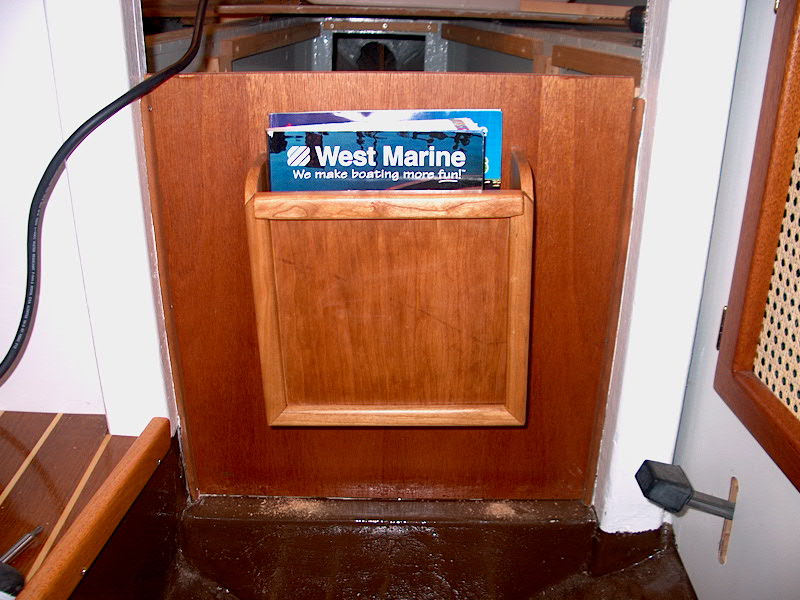
 The
completed magazine rack looks pretty good. I varnished it with three coats
of varnish (the last being satin varnish) to match the interior trim. The
completed magazine rack looks pretty good. I varnished it with three coats
of varnish (the last being satin varnish) to match the interior trim.
|
| After I installed the new
plywood panel to replace the old drawer front panel, I had to install the
magazine rack before the holding tank got
installed. This is because I wanted to install the magazine rack with
screws from the back side, and that area would be inaccessible once the holding
tank was installed. |
|
 I
aligned the rack in the place I wanted it, centered from side to side and a
little closer to the top of the panel than to the bottom, and marked the outline
of the sides on the panel. Then, I drilled holes from the front of the
panel, keeping the holes in the center of the outlined area. From the back
(forward) side, I then created a small countersink with a larger drill
bit. I did this because the only screws I had small enough to screw into
the delicate 3/8" thickness of the magazine rack sides were only 3/4"
long. I drilled about halfway through the 1/2" plywood with the
larger bit. Then, holding the rack carefully in place and using a smaller
bit again, I drilled a pilot hole into the back of the magazine rack sides--3
holes per side. Then I installed the rack with #6 x 3/4" screws. I
aligned the rack in the place I wanted it, centered from side to side and a
little closer to the top of the panel than to the bottom, and marked the outline
of the sides on the panel. Then, I drilled holes from the front of the
panel, keeping the holes in the center of the outlined area. From the back
(forward) side, I then created a small countersink with a larger drill
bit. I did this because the only screws I had small enough to screw into
the delicate 3/8" thickness of the magazine rack sides were only 3/4"
long. I drilled about halfway through the 1/2" plywood with the
larger bit. Then, holding the rack carefully in place and using a smaller
bit again, I drilled a pilot hole into the back of the magazine rack sides--3
holes per side. Then I installed the rack with #6 x 3/4" screws.
Project complete!
|
|
Cutlery Stowage and Knife
Block I have a great book--Ferenc Mate's The
Finely Fitted Yacht, Vol. I & II. This book is chock full of
little ideas for all parts of the boat--storage things, on-deck solutions,
etc. I love the book (Mate has a wry sense of humor that comes out in his
descriptions...), and decided to build a few of the projects he describes,
modified to suit my own needs. The magazine rack above is very loosely
based upon one in his book--although mostly for size rather than execution.
One of his ideas is for a small cutlery rack
that can be mounted out of the way somewhere on a bulkhead. Since there
really aren't any good stowage options for cutlery on the Triton (last season we
kept ours in a plastic tray on the counter), I though this would be a neat
project. Of course, as I got into it I realized that it was no simple job.
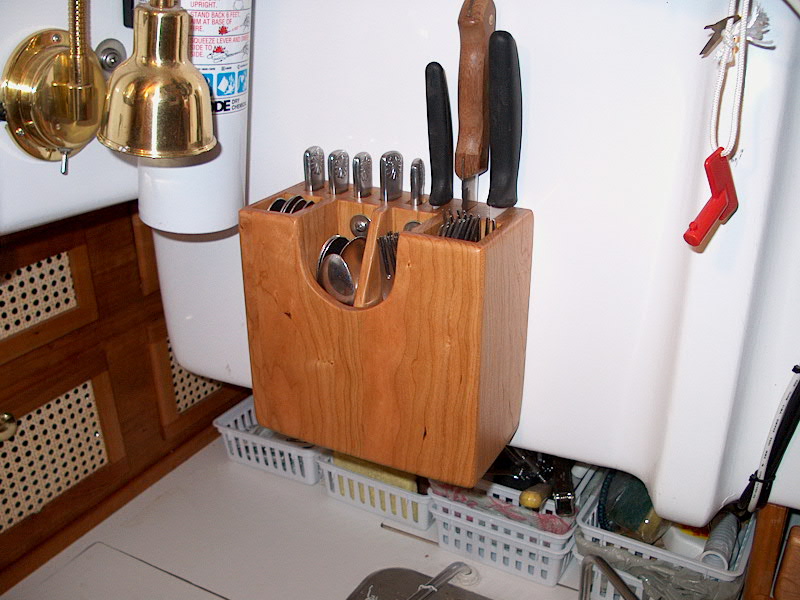
The unit as he describes it features a solid
block at the rear in which the butter knives are stored. Then, there are
four small vertical compartments at the front for storing the forks, salad
forks, teaspoons and soup spoons. The whole thing is only 7" x
7" x 3-1/2".
The tricky part comes in making the solid
block to hold the knives at the rear. I started cutting some 1-1/2"
cherry that I had around and then realized that I somehow needed to get slots
cut into it for the knives. Mr. Mate has a description elsewhere in the
book of a knife storage block, and I used his method for cutting the slots in
this block as a guide for my process for the cutlery rack.
|
|
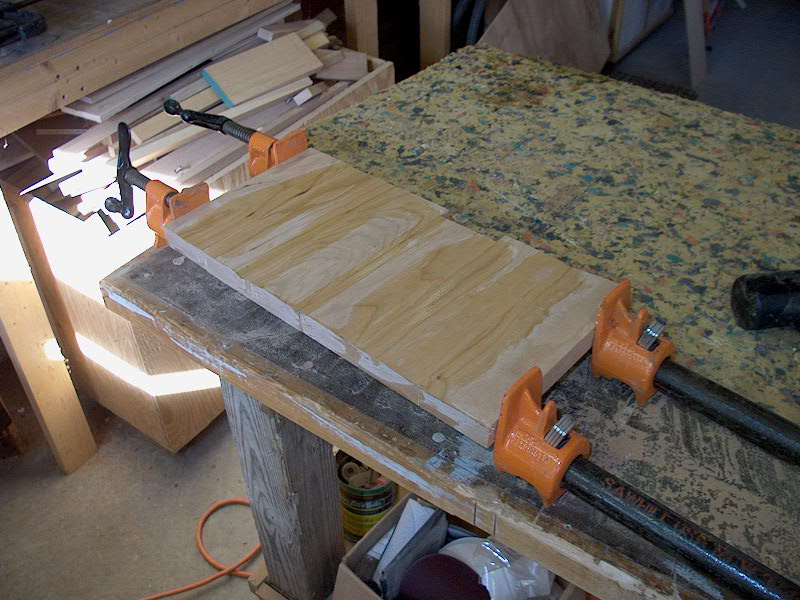
 First,
I had to glue up some panels from 7/8" cherry stock. I made two small
panels, each just over 7" square, from 3" wide boards (3 pieces per
panel), and edge glued them. When the glue dried, I trimmed them down to
exactly 7" on a side and sanded them smooth, leaving me with two blank
panels. First,
I had to glue up some panels from 7/8" cherry stock. I made two small
panels, each just over 7" square, from 3" wide boards (3 pieces per
panel), and edge glued them. When the glue dried, I trimmed them down to
exactly 7" on a side and sanded them smooth, leaving me with two blank
panels.
|
|
Next, I moved on to cutting slots for the
knives. Because we only have five butter knives with our set (a sixth was lost
somewhere), I planned only five slots for the knives. This left enough
room to store three kitchen knives as well: a ceramic chef's knife, a
ceramic paring knife, and a standard bread knife. I spent some time laying
out the spacing and sizes for the grooves that I would cut. For the butter
knives, at Mate's recommendation, I planned to make the slots wide enough to
accommodate part of the handle as well as the blade; for the kitchen knives,
only the blade would be inserted. This meant 1/8" slots for the three
kitchen knives, and just over 3/8" slots for the butter knives. I was
careful in my spacing to leave enough room between knives for the thickness of
the handles and some extra, too. There was plenty of room in the 7"
width.
Then, I began cutting the slots at my table
saw. Starting with the standard blade (which is about 1/8" thick), I
milled three grooves (one for each of the kitchen knives) in each panel.
The groove in each panel is 1/2 the depth of the knife blade in question; when
the two panels are joined together like a book, the grooves match up and be the
proper size for each knife blade.
|
|
 I
replaced the standard blade with a dado cutter stacked to 3/8" thickness
and milled the grooves for the butter knives next. For each cut, I
measured from the edge of the board to the side of the groove and set the saw
fence accordingly. When a test fit with a butter knife revealed that the
slots were a little tight, I widened each groove slightly with an extra pass
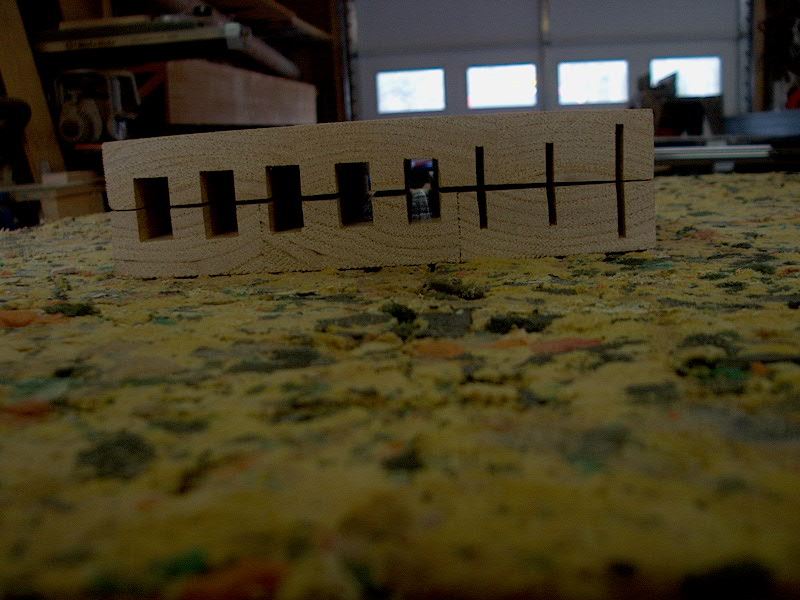
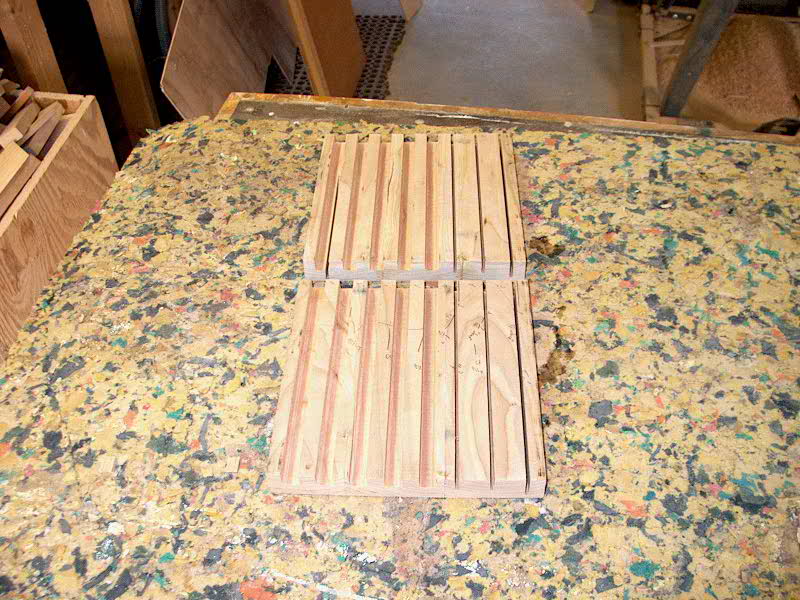
through the saw. In the end, I had two grooved I
replaced the standard blade with a dado cutter stacked to 3/8" thickness
and milled the grooves for the butter knives next. For each cut, I
measured from the edge of the board to the side of the groove and set the saw
fence accordingly. When a test fit with a butter knife revealed that the
slots were a little tight, I widened each groove slightly with an extra pass
through the saw. In the end, I had two grooved  panels
as you see to the right. Bringing them together forms a block with the
grooves captured on the inside. panels
as you see to the right. Bringing them together forms a block with the
grooves captured on the inside.
|
|
The photo below shows the block mocked up, with
all the knives stored inside for illustration.

|
|
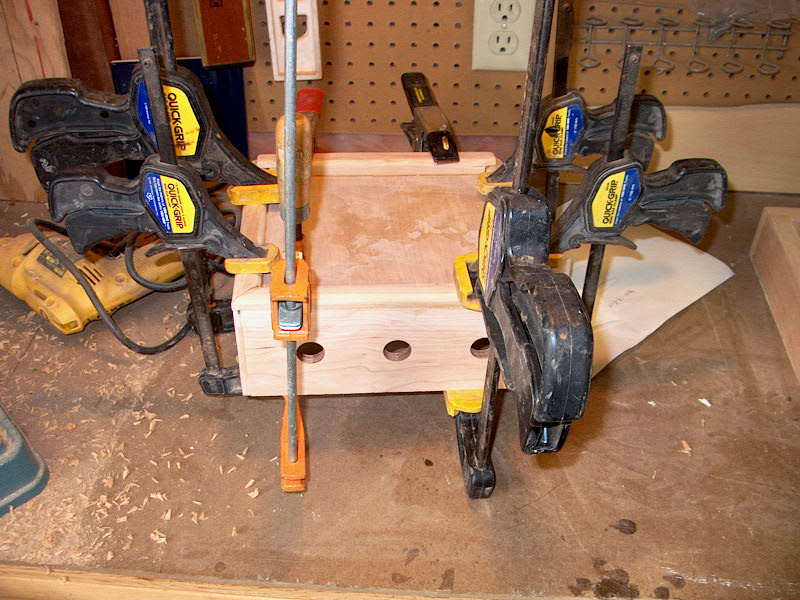
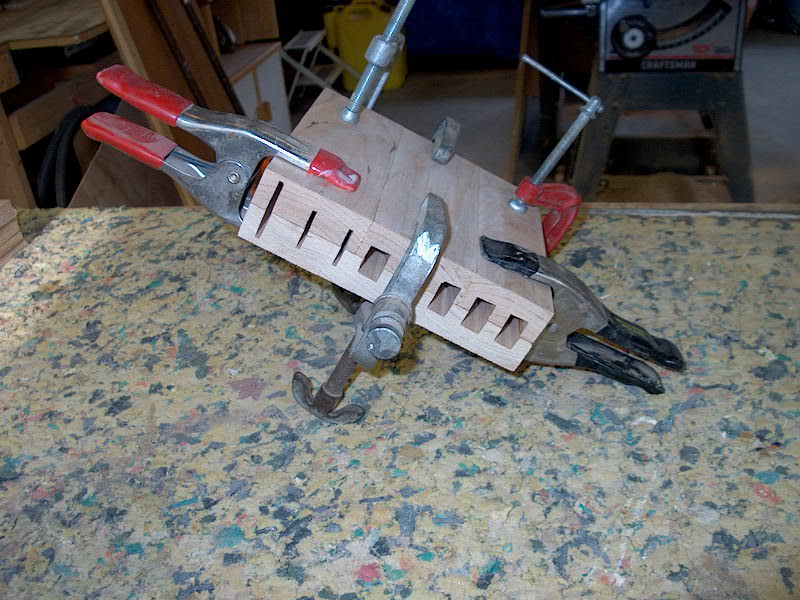
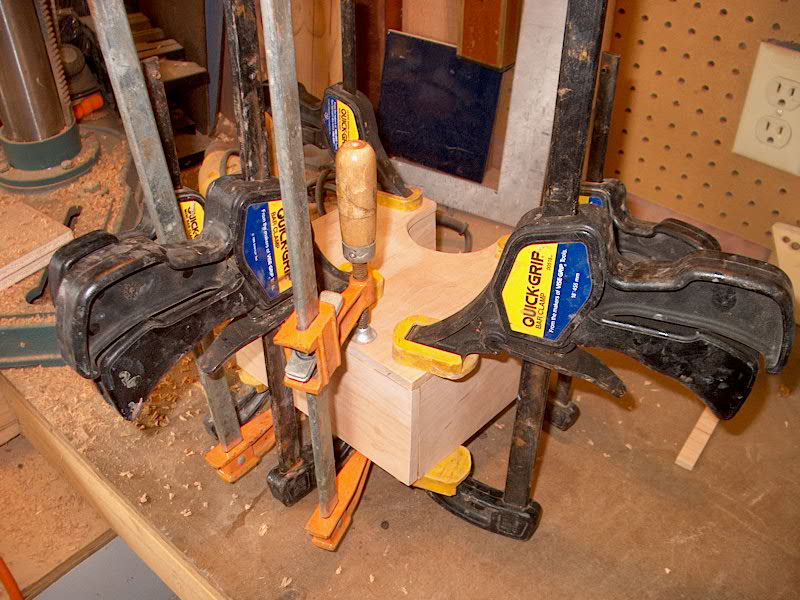
 I
glued up the block with yellow carpenter's glue (type II), being careful to keep
the slots aligned and to not get gobs of glue in the slots. I left the
block to dry overnight before unclamping. I
glued up the block with yellow carpenter's glue (type II), being careful to keep
the slots aligned and to not get gobs of glue in the slots. I left the
block to dry overnight before unclamping.
|
|
 When
the block had been dried overnight, I removed the clamps and moved on to the
next several steps. The first thing to do was to mill three dados for the
small divider pieces that will form the four cutlery storage areas in the front
of the rack. I measured them off evenly and marked the inside of the block
accordingly, and then milled the grooves with the dado cutter in my table
saw. Each groove took two passes to get the correct width, which was
something over 1/4". When
the block had been dried overnight, I removed the clamps and moved on to the
next several steps. The first thing to do was to mill three dados for the
small divider pieces that will form the four cutlery storage areas in the front
of the rack. I measured them off evenly and marked the inside of the block
accordingly, and then milled the grooves with the dado cutter in my table
saw. Each groove took two passes to get the correct width, which was
something over 1/4".
|
|
 Next,
I mocked up the two sides of the box--featuring cherry boards that extend back
to cover the sides of the knife block, and then extend forward about 1-1/2"
or so. This allowed me to determine the needed depth of each
divider. With the proper depth figured out, I ripped my rough divider
pieces to the proper width in the saw, and glued them in place. Next,
I mocked up the two sides of the box--featuring cherry boards that extend back
to cover the sides of the knife block, and then extend forward about 1-1/2"
or so. This allowed me to determine the needed depth of each
divider. With the proper depth figured out, I ripped my rough divider
pieces to the proper width in the saw, and glued them in place.
|
|
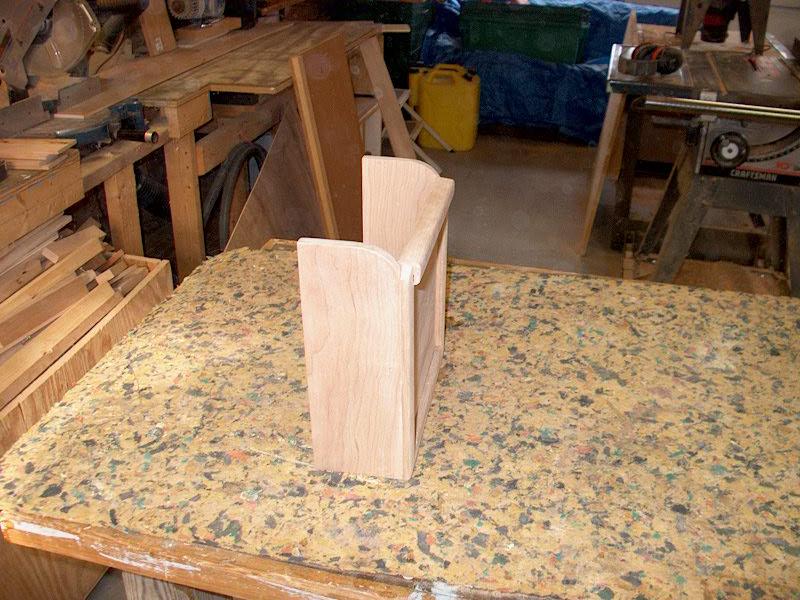
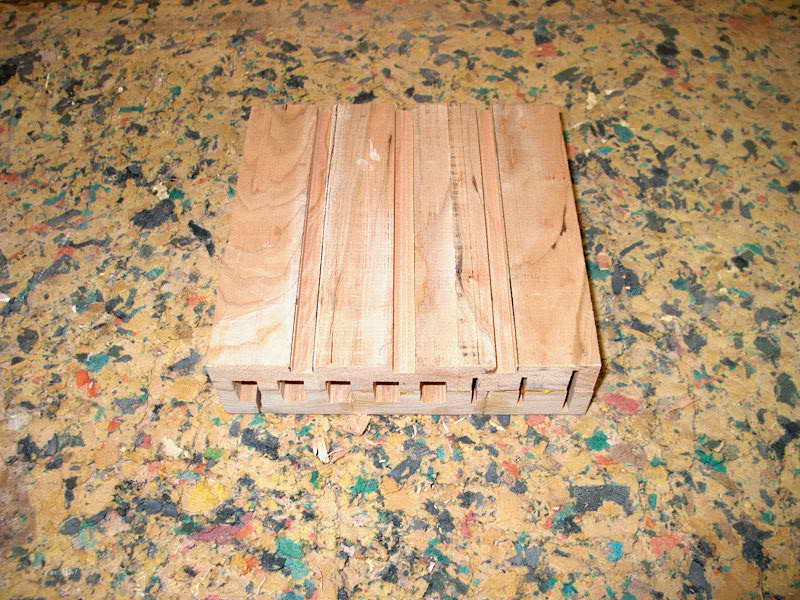
 When
the glue dried, I clamped on the two full-width side pieces. This little
thing is certainly a multi-step, time-consuming project! But it will be
cool. When the sides were dried, I cut to size and glued on the bottom of
the rack. When
the glue dried, I clamped on the two full-width side pieces. This little
thing is certainly a multi-step, time-consuming project! But it will be
cool. When the sides were dried, I cut to size and glued on the bottom of
the rack.
|
|
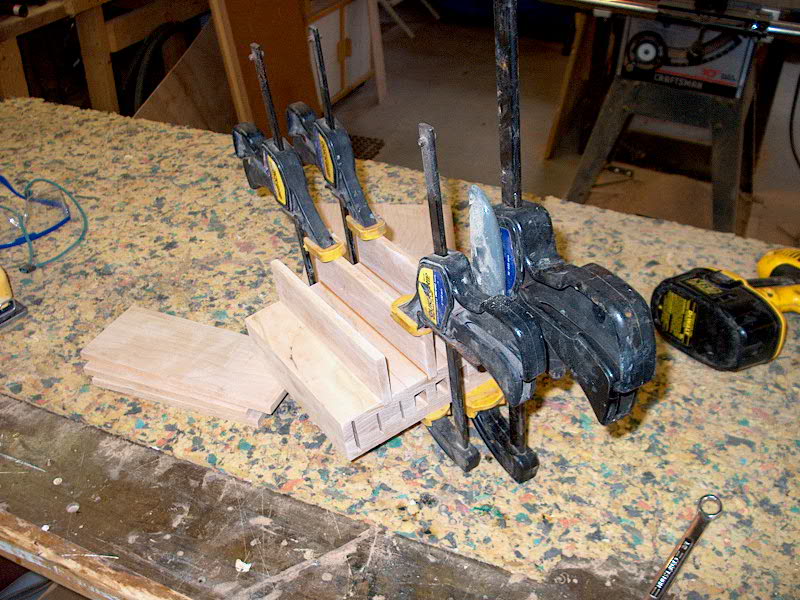
 Now
I moved on to the front of the rack. Because the two central compartments
are designed to house the small forks and spoons, a cutout in the front is
necessary to allow them to be picked up. Laying out my glued-up front
panel carefully, I marked the extent of the cutout, and made the cut with my
jigsaw. Then, I marked the center divider and made an angled cut with a
coping saw to avoid having it stick up awkwardly above the central cutout.
With these cuts made, I cut the front panel to the proper dimensions, sanded
both sides smooth, and glued it to the front, using many clamps to hold
everything in place. I left the clamps on for some time to ensure proper
adhesion. Now
I moved on to the front of the rack. Because the two central compartments
are designed to house the small forks and spoons, a cutout in the front is
necessary to allow them to be picked up. Laying out my glued-up front
panel carefully, I marked the extent of the cutout, and made the cut with my
jigsaw. Then, I marked the center divider and made an angled cut with a
coping saw to avoid having it stick up awkwardly above the central cutout.
With these cuts made, I cut the front panel to the proper dimensions, sanded
both sides smooth, and glued it to the front, using many clamps to hold
everything in place. I left the clamps on for some time to ensure proper
adhesion.
|
|
When the glue was kicked, I sanded everything
smooth and finished the piece with several coats of varnish, the last being
rubbed effect to match the rest of the cabin. I installed it on the aft
bulkhead above the galley--about the only place I could find for it--with two
screws drilled carefully through the solid block in the back of the rack, in
between knife slots. I'd rather have some more screws holding it up, but
where to install them???
|
|
Compass Back Cover
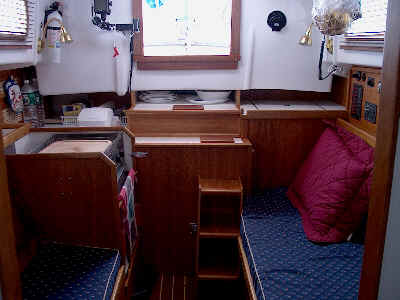 So
you have your nice interior all set, and you're proud of it. Then you go
and cut a gaping hole in the rear bulkhead for a compass, which then forever
looks terrible from inside the boat. Some sort of cover seems like a
necessity. In this picture, it's that ugly black thing protruding from the
even-uglier hole on the right side of the photo. So
you have your nice interior all set, and you're proud of it. Then you go
and cut a gaping hole in the rear bulkhead for a compass, which then forever
looks terrible from inside the boat. Some sort of cover seems like a
necessity. In this picture, it's that ugly black thing protruding from the
even-uglier hole on the right side of the photo.
A simple wooden box, hinged at the side, can
be a good solution. I built a basic open-fronted box of 7/8" cherry stock,
with rabbeted corner joints. To close off the front of the box, there are
a few options. I would like to get a nice decorative tile (8" x
8") to place in there for a little accent; the tile could be changed on a
whim by opening the box and removing whatever method of securing it is in place.
(To be determined). Or, one could insert a small photo, or watercolor, or
whatever.
|
|
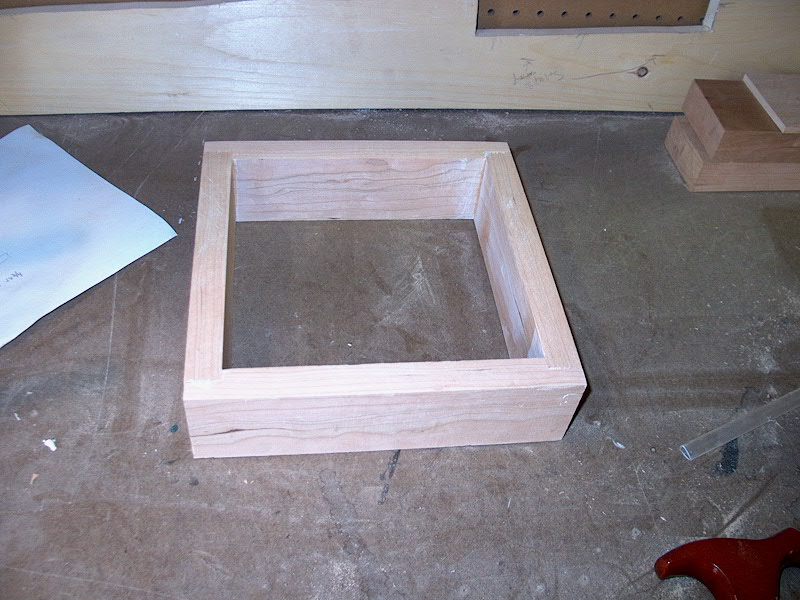 Here is the basic box, glued up and sanded,
but not finished. The inside opening is 8" by 8", and the
overall depth is 2-1/2". Here is the basic box, glued up and sanded,
but not finished. The inside opening is 8" by 8", and the
overall depth is 2-1/2".
|
|
 To
continue the box construction, I next had to come up with a way to secure any
tile or panel inside the box so that it could be inserted or removed at
will. To accomplish this, I milled some solid cherry into a 1/2"
radius corner bead on my large router table and table saw. Then, cutting
pieces to fit with miter joints at each end, I glued the trim inside the box,
leaving it flush on the face side. This creates a bearing surface for the
insert to rest upon from the inside, and also trims off the edge of whatever
that insert is/will be. I used a million clamps to hold the pieces in
place while the glue dried. To
continue the box construction, I next had to come up with a way to secure any
tile or panel inside the box so that it could be inserted or removed at
will. To accomplish this, I milled some solid cherry into a 1/2"
radius corner bead on my large router table and table saw. Then, cutting
pieces to fit with miter joints at each end, I glued the trim inside the box,
leaving it flush on the face side. This creates a bearing surface for the
insert to rest upon from the inside, and also trims off the edge of whatever
that insert is/will be. I used a million clamps to hold the pieces in
place while the glue dried.
|
|
 When
the glue was dry, I sanded everything smooth with 120 and 220 grit paper.
For now, I cut a 1/4" insert panel out of cherry plywood to fit
inside. When we find something else nice to put in there, we will replace
it. To hold the panel in place, I added some simple wooden cleats on
the inside, which are screwed in place. I varnished the box to match
the interior woodwork with two coats of gloss varnish and then a final coat of
satin varnish on top. When
the glue was dry, I sanded everything smooth with 120 and 220 grit paper.
For now, I cut a 1/4" insert panel out of cherry plywood to fit
inside. When we find something else nice to put in there, we will replace
it. To hold the panel in place, I added some simple wooden cleats on
the inside, which are screwed in place. I varnished the box to match
the interior woodwork with two coats of gloss varnish and then a final coat of
satin varnish on top.
I installed the compass box cover with two
brass hinges, and held it in place with a 2" brass latch.
Project complete! If we change the
insert, we'll post a new picture here.
|
|
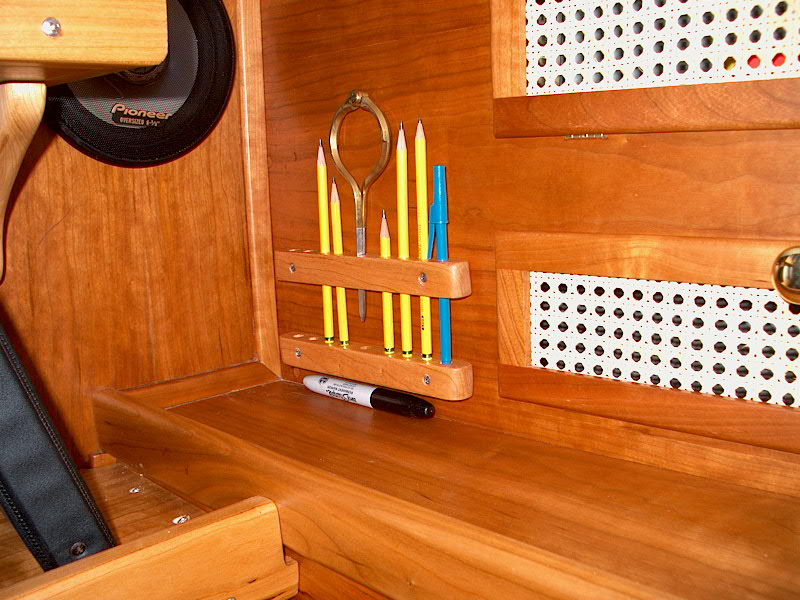
Pencil
Rack
This is a silly project, again copied from The
Finely Fitted Yacht. I followed the directions almost exactly, and my
own experience is detailed here--although this ends up being a sort of
paraphrase of the directions in the book.
To make this two-piece rack, I started
with a 2" wide, 7/8" thick, and 8" long piece of solid
cherry. With the piece on edge, I marked a centerline, then marked for
holes every 3/4" on center, from each end towards the center. At the
center, in the remaining 2" of space, I marked for one final hole directly
in the center.
I inserted a 3/8" drill bit in my drill
press, and set the depth control so that I would drill 1-3/4" into the
wood. Then I drilled all the holes. Next, I marked the center of the
board (across the 2" width), accounting for the kerf of the saw blade, and
ripped the board into 2 equal pieces. Voila! A pencil rack! I
sanded each piece and rounded the ends, and drilled two screw holes in each
piece for attachment. After three coats of varnish to match other interior
components, I hesitated for a while before installing it, as I didn't know the
best place for it--or even if I would find a suitable place. After a time,
however, I found the spot--on the longitudinal bulkhead above the starboard
settee, sort of inside the nook created near the bookshelves. Four screws,
and the installation was complete. Pretty slick!
You may chuckle at the
ridiculousness of this...but I'll have the last laugh when I can conveniently
reach for a nice sharp pencil, while you're digging through God knows where for
a greasy stub...
|
|
|
|