 THE BEFORE PICTURES
Awlgripping
Silent Running
March-April, 1999
For greater detail and description on the process of painting a hull and deck with Awlgrip, please visit our 1963 Pearson Triton restoration site.
THE BEFORE PICTURES
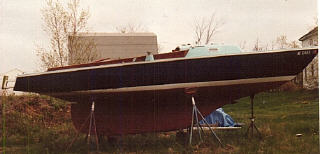
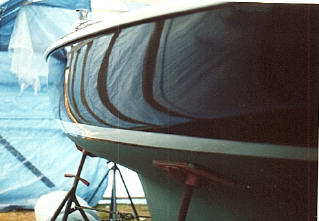
These first two photos were taken shortly after purchasing the boat, in May, 1998. The boat is located at the former owner's home in South Portland, Maine. I love the profile of an Ensign on the hard--arguably the most attractive position, as it enables you to see the sweeping lines of the keel in combination with the slight reverse sheer.
The original blue hull was in fair condition, although rather chalky and oxidized. Polishing helped, but only to a point. The painted white bootstripe was in poor condition. Note the aqua colored
deck, which I dubbed "whatweretheythinking" blue. If it hadn't been for the hideous deck color, I might very well have
cleaned the boat up as much as possible and left it at that. However, it felt like a bathtub toy with that color, and it detracted (I thought) from the appearance of the boat.
This
picture attempts to show the color of the deck, and its general condition.
You can see a line on the cabin trunk, just forward of the port, where it is
more oxidized than the rest--the rear portion, the shiny area, had been covered
with a tarp, while the forward part of the boat was uncovered. The boat
had been stored this way for nearly two years elapsed, after remaining in
drydock for the previous summer season.
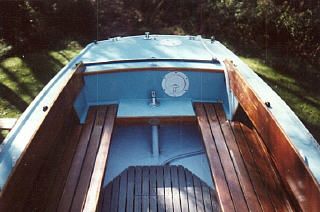
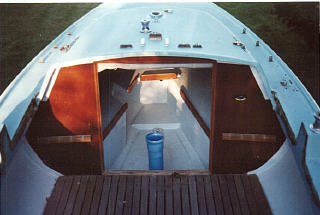
The next two photos below show the condition of the cockpit after I had owned the boat for one season. The brightwork is essentially sound, which saved the wood, but it is in poor condition. I stripped the brightwork and revarnished over the winter with 10 coats of Epifanes gloss. Note that the benches had been removed in the left-hand photo.
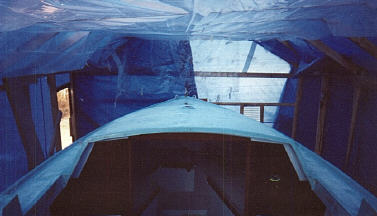
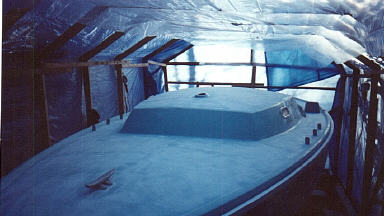
 In
the fall, I built a simple framework over the boat and covered it with three old
blue tarps I had. This would be my work area--far from perfect, but it was
sufficient to get the job done successfully.
In
the fall, I built a simple framework over the boat and covered it with three old
blue tarps I had. This would be my work area--far from perfect, but it was
sufficient to get the job done successfully.
 SANDING AND PREP
This next series of photos shows the boat in several different stages of the painting preparation and application.
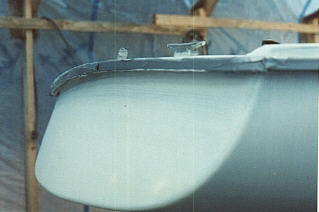
These first two show the deck after sanding, including filling and sanding the molded nonskid. You can also see the inside of the
rudimentary structure I built over the boat. Amazing what one can accomplish in filtered blue light! At this stage, some grinding and filling of deck stress cracks has also
occurred. Fortunately, the deck was only minimally cracked, mainly concentrated on one short area of the toerail.
These two photos show the hull after sanding, removing the painted boottop, and gouging out and filling several stress cracks that were located here and there. Sanding the gelcoat was straightforward; I used only a palm sander with 80, 120 and 220 grits. I didn't use my random orbit sander because it tends to leave minor swirl marks that show up under glossy surfaces. The gelcoat was in good enough condition that only this light sanding was necessary. Had there been crazing, severe gouges or other more significant damage, I would have used the more powerful sander.
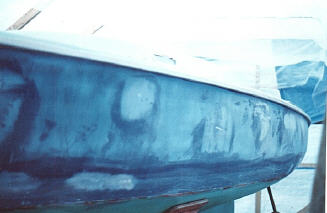
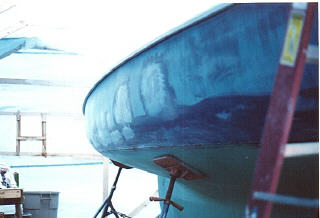
I used a polyester filler to fill the stress cracks after gouging them out. It worked well, but I would use epoxy in the future for its longevity and better secondary bonding.
 After thorough sanding and prep, it was time to apply the epoxy primer. I used
Awl-Quik from US Paint, the recommended primer for this application.
After thorough sanding and prep, it was time to apply the epoxy primer. I used
Awl-Quik from US Paint, the recommended primer for this application.
The primer was very thick and cumbersome to work with, although it sanded fairly easily. I applied two coats, sanding between as recommended. I left the boottop area unprimed for ease of retaping later; I worried that the thick primer might fill the scribe lines, plus I had raised the lower edge of the boottop to provide for a thin stripe of the
blue hull color between the boottop and the bottom paint for improved appearance.
Unfortunately, the
recommended ratio of thinner (reducer) 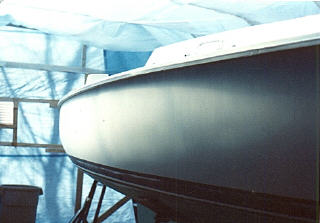 for the
primer turned out to be a bit shy of what was needed. This resulted in brush marks that refused to properly level out, so more sanding was necessary to smooth the surface prior to putting on the topcoats. The extended sanding resulted in a few areas where the primer was sanded through, exposing the gelcoat. This caused a problem later on when I was applying the finish coats, as they did not cover well over the unprimed areas. This meant that I had to do three finish coats instead of two.
for the
primer turned out to be a bit shy of what was needed. This resulted in brush marks that refused to properly level out, so more sanding was necessary to smooth the surface prior to putting on the topcoats. The extended sanding resulted in a few areas where the primer was sanded through, exposing the gelcoat. This caused a problem later on when I was applying the finish coats, as they did not cover well over the unprimed areas. This meant that I had to do three finish coats instead of two.
The topcoat of Flag Blue on the hull was relatively easy to apply, although it tended to run, especially up below the gunwale. The Snow White on the deck laid down well, although I had to deal with--and repair (by applying a third
coat) some runs around the ports on the
cabin trunk.
 I
ended up putting three coats on the hull for proper coverage, mainly because of
the thin primer in those areas, although I also got a big run in the first coat
on the port bow that needed to be sanded out; the second coat did not then
properly cover that area.
I
ended up putting three coats on the hull for proper coverage, mainly because of
the thin primer in those areas, although I also got a big run in the first coat
on the port bow that needed to be sanded out; the second coat did not then
properly cover that area.
It took three days to get all three coats on,
applied when the ambient temperature in the shed was around 60 degrees.
(No cold-related problems to report at all.) The end result was nothing
short of spectacular, and well worth the effort involved--around 100 hours of
work sanding, fairing, taping, priming and painting. I know, it doesn't
seem like that much. After all, it is a small boat with minimal hull and
deck area to paint.
 To
see the final product, please scroll down.
To
see the final product, please scroll down.
THE AFTER PICTURES
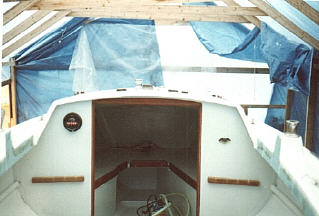 This photo shows the painted bulkhead at the forward end of the cockpit. The deck nonskid areas were painted several days after the final coat of Awlgrip was applied. I taped over the white, and then rolled a coat of Interlux Brightside primer over the nonskid areas (which had been sanded smooth previously). The next day, I applied the first of two coats of Interlux Brightside Seattle Gray, with
Interlux polymeric nonskid particles and a flattening agent mixed in. The second coat went on the same way, with more than the recommended amount of grit added. The nonskid came out very well, and has held up well for the past season.
This photo shows the painted bulkhead at the forward end of the cockpit. The deck nonskid areas were painted several days after the final coat of Awlgrip was applied. I taped over the white, and then rolled a coat of Interlux Brightside primer over the nonskid areas (which had been sanded smooth previously). The next day, I applied the first of two coats of Interlux Brightside Seattle Gray, with
Interlux polymeric nonskid particles and a flattening agent mixed in. The second coat went on the same way, with more than the recommended amount of grit added. The nonskid came out very well, and has held up well for the past season.
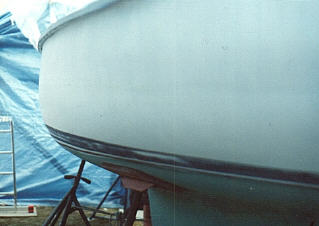
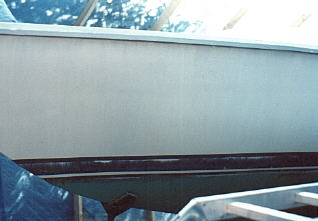
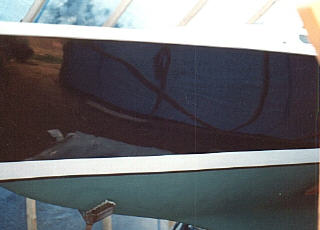
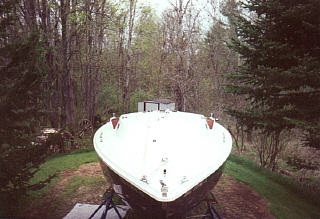
The rest of the photos show various views of the painted hull, after the boottop (two coats of Awlgrip Snow White) and bottom (cheap West Marine Green) were repainted. Note the gloss and reflectivity of the paint--nothing else comes close. It looks good from 1' away, although I can see all the "flaws". I stopped pointing them out after awhile, since no one else seemed to be able to see them.
You've already seen the pictures of the boat in the water and with the shelter removed; these photos here give a better idea of the close-up quality of the shine, and the vast improvement it made to the boat.
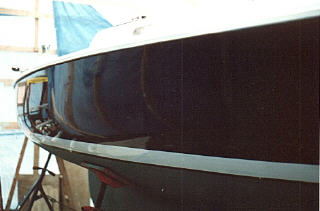
Deep gloss...
Excellent reflectivity...
It's hard to tell, but the nonskid areas are really a light gray (Seattle Gray) that offsets the white and blue very nicely.
![]() Email
me!
Email
me!
This site is part of "The Restoration and
Cruising Adventures of Glissando". Click
here to go to the home page.