|
Engine
Instrument Panel
This page was last updated
on 17 January 2004.
|
|
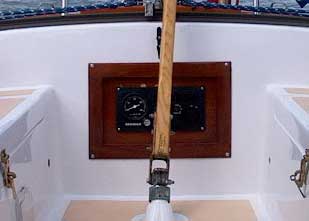 During
the initial restoration project, I decided to locate my engine
instrument panel at the aft end of the cockpit, in the opening that had
once been the access hatch to the lazarette. All was well and good
until I repowered the boat during the first season of use. When I
tried to remove the old instrument panel, I damaged the mahogany
surround I had built, both by cracking the flange around the edge (when
I tried prying the whole surround out), and with some minor plywood
chipping in the center portion (when I cut out the opening to
accommodate the new Yanmar's panel). Neither flaw was significant,
and I lived with the surround for two additional seasons. During
this time, I continually "meant to" replace the surround, but
never got around to it. During
the initial restoration project, I decided to locate my engine
instrument panel at the aft end of the cockpit, in the opening that had
once been the access hatch to the lazarette. All was well and good
until I repowered the boat during the first season of use. When I
tried to remove the old instrument panel, I damaged the mahogany
surround I had built, both by cracking the flange around the edge (when
I tried prying the whole surround out), and with some minor plywood
chipping in the center portion (when I cut out the opening to
accommodate the new Yanmar's panel). Neither flaw was significant,
and I lived with the surround for two additional seasons. During
this time, I continually "meant to" replace the surround, but
never got around to it.
|
|
 During
the fall of 2003, however, the boat was inside my new boat shop, and I
decided the time had come to remove the old surround and build a new
one. An additional factor in my decision to finally replace the
panel was that I wanted to recess the inner portion more deeply, so that
I could install a Plexiglass cover over the instrument panel to protect
it from spray and water. During
the fall of 2003, however, the boat was inside my new boat shop, and I
decided the time had come to remove the old surround and build a new
one. An additional factor in my decision to finally replace the
panel was that I wanted to recess the inner portion more deeply, so that
I could install a Plexiglass cover over the instrument panel to protect
it from spray and water.
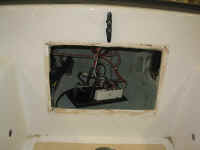
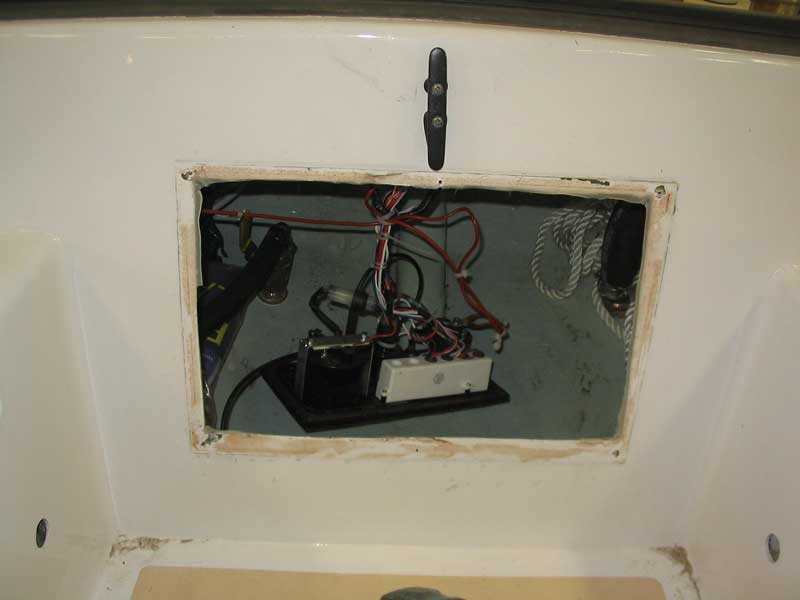
I began by removing the
old surround. First, I unscrewed the instrument panel and eased it
through the hole, leaving it attached to the wiring harness and engine
stop cable. Then, with a slim putty knife, I slit the silicone
(what was I thinking) seal beneath the surround flange and pried the
unit free. |
|
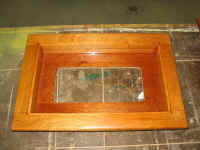
The new surround was to be a near copy of the original, but with
important changes. First, the inner portion needed to be more
deeply recessed than before, so that the engine stop cable and key
switch could be completely enclosed inside. I determined that the
panel needed to be recessed 2" in order to clear these items.
Second, I wanted the flange around the edge to be a bit thicker and
beefier (depthwise), as the old flange had been barely 1/4" proud
of the surface. I thought that something a bit thicker would be
more attractive. I also wanted to build a simple protective panel
on the back side of the panel, which would shield the wiring from the
contents of the lazarette. Finally, my plan was to install a Plexiglass
cover over the instrument panel, to protect it from rain and nuisance
spray, as well as to prevent lines from fouling the stop switch and
ignition key, which had sometimes occurred in the past.
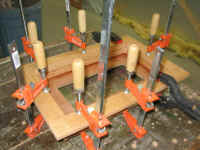
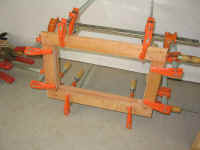 I
planed some rough mahogany down to 1" in thickness, and milled the
material needed for the surround. I glued up the frame with resorcinol
glue, and once the main frame was complete, I rabbetted the edges with a
dado cutter in my table saw to allow the surround to recess slightly
into the opening in the boat. Then, I glued on four additional
pieces of 1" stock around the inside of the center hole, which had
the effect of creating the 2" deep recess that I needed in order to
protect the instrument panel. Gluing on these four pieces required
a seemingly ridiculous number of clamps! I
planed some rough mahogany down to 1" in thickness, and milled the
material needed for the surround. I glued up the frame with resorcinol
glue, and once the main frame was complete, I rabbetted the edges with a
dado cutter in my table saw to allow the surround to recess slightly
into the opening in the boat. Then, I glued on four additional
pieces of 1" stock around the inside of the center hole, which had
the effect of creating the 2" deep recess that I needed in order to
protect the instrument panel. Gluing on these four pieces required
a seemingly ridiculous number of clamps!
|
|
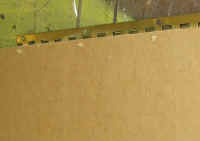
 For
the flat panel, I cut a piece of 3/8" mahogany plywood to size, and
then cut out an opening in the center to allow the instrument panel to
slide through and be secured. When the glue cured on the main
assembly, I sanded the whole thing to remove excess glue and saw marks,
and then glued the plywood onto the back of the assembly with more
resorcinol, taking care that the cut opening remained in the
center. I left the assembly to cure until the glue dried. For
the flat panel, I cut a piece of 3/8" mahogany plywood to size, and
then cut out an opening in the center to allow the instrument panel to
slide through and be secured. When the glue cured on the main
assembly, I sanded the whole thing to remove excess glue and saw marks,
and then glued the plywood onto the back of the assembly with more
resorcinol, taking care that the cut opening remained in the
center. I left the assembly to cure until the glue dried.
|
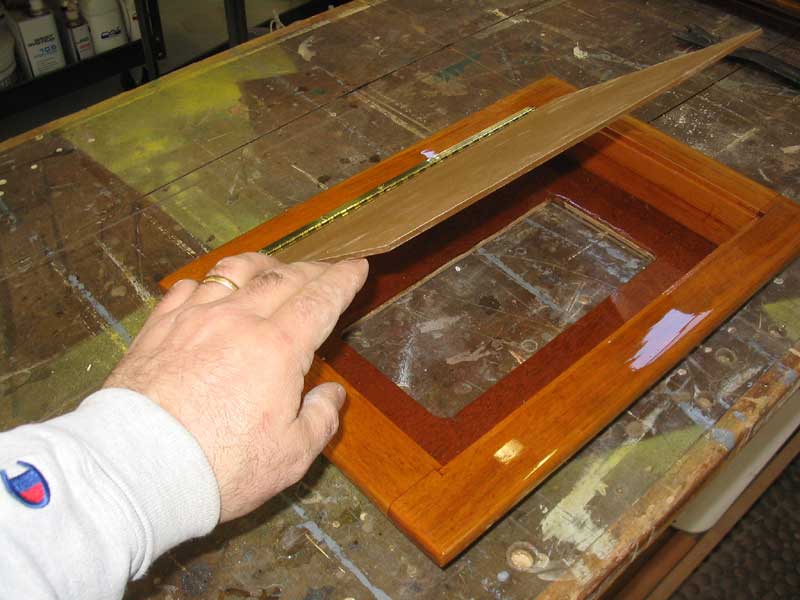
 When
the glue had set overnight, I removed the clamps and performed one
last milling operation. Because I wanted to have the ability to
install a Plexiglass cover over the panel, I routed a shallow 1/8"
deep rabbet along the inner edge of the face frame, so that a thin panel
would be able to rest roughly flush. With that done, I sanded the
whole thing again and applied the first of many coats of varnish
required. When
the glue had set overnight, I removed the clamps and performed one
last milling operation. Because I wanted to have the ability to
install a Plexiglass cover over the panel, I routed a shallow 1/8"
deep rabbet along the inner edge of the face frame, so that a thin panel
would be able to rest roughly flush. With that done, I sanded the
whole thing again and applied the first of many coats of varnish
required.
|
|
Over the days and weeks that followed, I applied 7 or 8 coats of varnish to the instrument surround, sanding between
coats. When at last I felt there was enough varnish buildup, and a fine looking last coat, I moved on to complete and
install the surround.
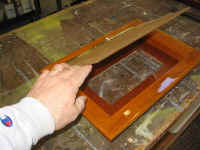
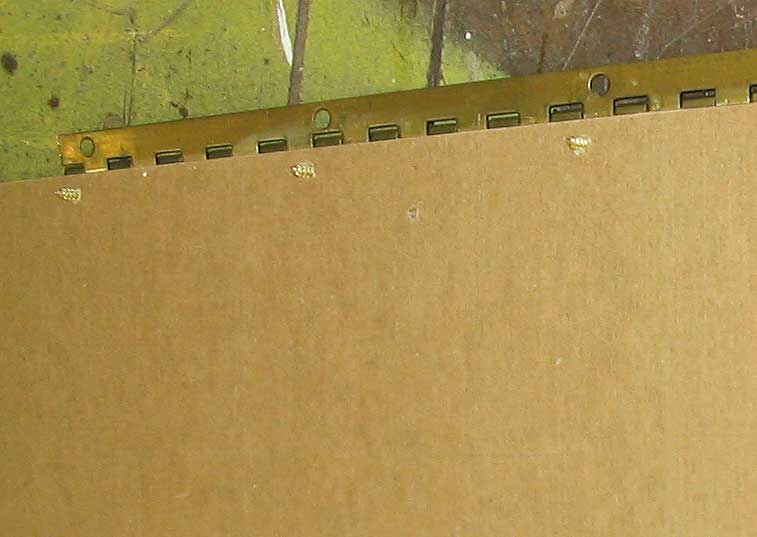
 I
picked up a small sheet of 1/8" clear Plexiglass for the door/cover to the surround. With my table saw, I cut it
to fit inside the rabbetted opening that I had built into the wooden surround; it fit nicely flush. I ordered a slim
brass piano hinge from a cabinet supplier, and when it arrived installed it with some tiny brass screws through the Plexiglass
and into the wooden surround. Because the screws penetrated through the thin Plexiglass, I used a grinding wheel
to cut away most of the excess. No, the hinge isn't the strongest thing going, but I think it will work just fine for
the limited usage it will receive.. I had considered using epoxy to secure the hinge to the Plexiglass, but figured it
wouldn't adhere well. I
picked up a small sheet of 1/8" clear Plexiglass for the door/cover to the surround. With my table saw, I cut it
to fit inside the rabbetted opening that I had built into the wooden surround; it fit nicely flush. I ordered a slim
brass piano hinge from a cabinet supplier, and when it arrived installed it with some tiny brass screws through the Plexiglass
and into the wooden surround. Because the screws penetrated through the thin Plexiglass, I used a grinding wheel
to cut away most of the excess. No, the hinge isn't the strongest thing going, but I think it will work just fine for
the limited usage it will receive.. I had considered using epoxy to secure the hinge to the Plexiglass, but figured it
wouldn't adhere well.
|
|
|
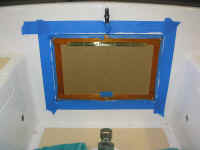 Once
the door was hinged, I installed it in the opening at the aft end of the cockpit with six screws and set in a bed of 3M 101
(polysulfide). To make cleanup easier, I masked off the surround and the opening first, to catch the sealant
squeezeout. Once
the door was hinged, I installed it in the opening at the aft end of the cockpit with six screws and set in a bed of 3M 101
(polysulfide). To make cleanup easier, I masked off the surround and the opening first, to catch the sealant
squeezeout.
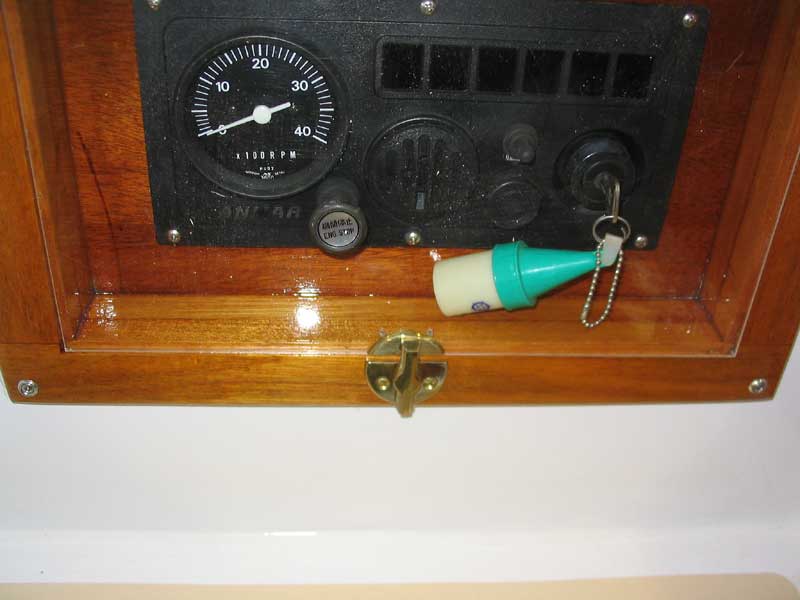
When the surround was securely fastened in place, I eased the Yanmar instrument panel back
through the middle opening and attached it with six stainless steel screws. The Plexiglass cover worked perfectly,
covering the engine stop switch and key switch with no interference from either. While the instrument panel is still
not completely protected from the elements, the new, deeper surround and the spray cover should go a long way to protecting
the panel, as well as avoiding the irritation of having lines and shins get tangled in the stop and key switches.
|
 A
few weeks later, I installed a turn latch on the front side of the panel, which holds the Plexiglass in place.
Dumbly, I installed it upside down at first, which of course didn't work at all; I had thought that I would install it so
the protruding turn latch part was on top, which would allow it to double as a handle. Well, of course this was wrong,
since the turn latch side needed to be on the bottom so that it would hold the cover in...duh. No real harm was done,
though, so I simply turned it around and reinstalled it. But I still need to install a small knob to make
opening the Plexi panel more convenient. A
few weeks later, I installed a turn latch on the front side of the panel, which holds the Plexiglass in place.
Dumbly, I installed it upside down at first, which of course didn't work at all; I had thought that I would install it so
the protruding turn latch part was on top, which would allow it to double as a handle. Well, of course this was wrong,
since the turn latch side needed to be on the bottom so that it would hold the cover in...duh. No real harm was done,
though, so I simply turned it around and reinstalled it. But I still need to install a small knob to make
opening the Plexi panel more convenient.
|
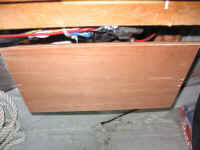 I
also built a simple plywood cover for the back side of the panel. Previously, the back side of the instruments and
wiring had been open to the lazarette, and were subject to damage therein. It hadn't been a problem, but I wanted to
avoid the possibility of the problem becoming a reality, so I made a cover out of scrap 3/8" plywood, which I secured
to the back of the panel with some simple mahogany legs that held it out far enough behind the instrument backs. The
basic cover should be more than sufficient to prevent damage by some piece of gear in the locker contacting the instrument
panel directly. I
also built a simple plywood cover for the back side of the panel. Previously, the back side of the instruments and
wiring had been open to the lazarette, and were subject to damage therein. It hadn't been a problem, but I wanted to
avoid the possibility of the problem becoming a reality, so I made a cover out of scrap 3/8" plywood, which I secured
to the back of the panel with some simple mahogany legs that held it out far enough behind the instrument backs. The
basic cover should be more than sufficient to prevent damage by some piece of gear in the locker contacting the instrument
panel directly.
Project complete...except for a knob, which is insignificant.
|
|


