|
Stepping
the Mast: The First Time
This page was last updated on 29 November 2001
|
|
After the boat was launched, we towed her over
next door to the yacht club, where I spent some time rigging up the spreaders
and jumpers. With this done, we moved on to the boatyard next door and
tied up in the Travellift slip, where their boom truck was located. We
pretty much stepped back and let the riggers deal with things from that
point--hooking up the crane cable and
bridle, then lifting the mast to a vertical position, lowering it into the step,
and attaching the stays. I was a little nervous about the whole process,
since all the rigging was new and I wasn't sure it would all fit properly.
However, everything came off without a hitch, although the backstay barely made
it--with the headstay turnbuckle all the way open, and the backstay the same, we
got the clevis pin through, and tightened it enough to pin the
turnbuckles. Phew! Especially gratifying was that my headstay, which
I had measured, cut and installed the roller furler, fit properly with no
hitches. |
|

|
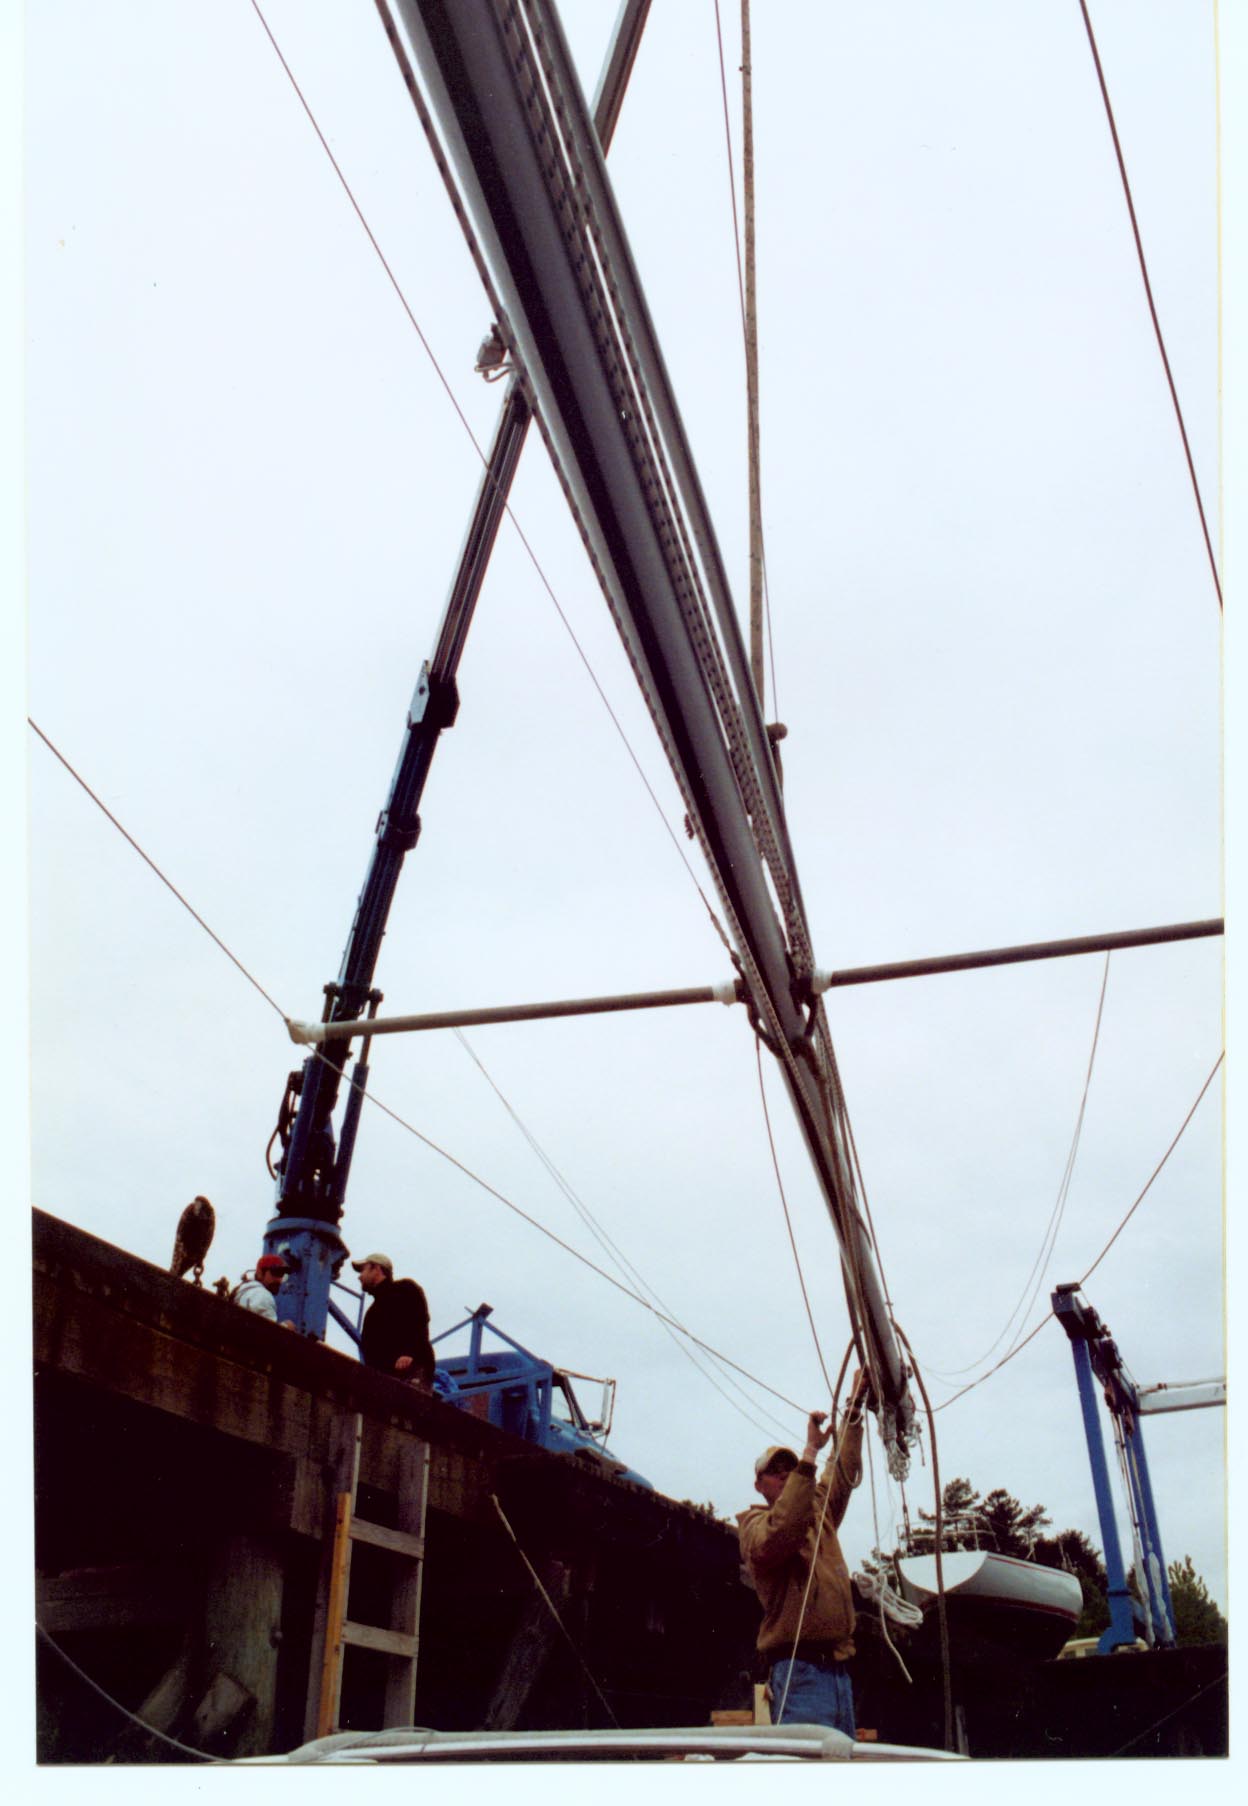
When we got over to the yard, the
first thing they did was raise the mast up off the boat using their boom
truck. |
|

|
The mast nearly vertical. I had
the spreaders and everything all rigged beforehand, being careful to
pull the spreader ends up as high as possible before securing the monel
mousing and spreader boots. As the shrouds are tensioned later,
this tends to pull the spreader tips slightly downward, so it's good to
start out with them as high as possible. |
|

|
Lowering the mast down onto the
step. I'm holding the headstay to keep it from dragging around on
the deck and scratching the paint. The uppers and lowers are about
to be attached. |
|

|
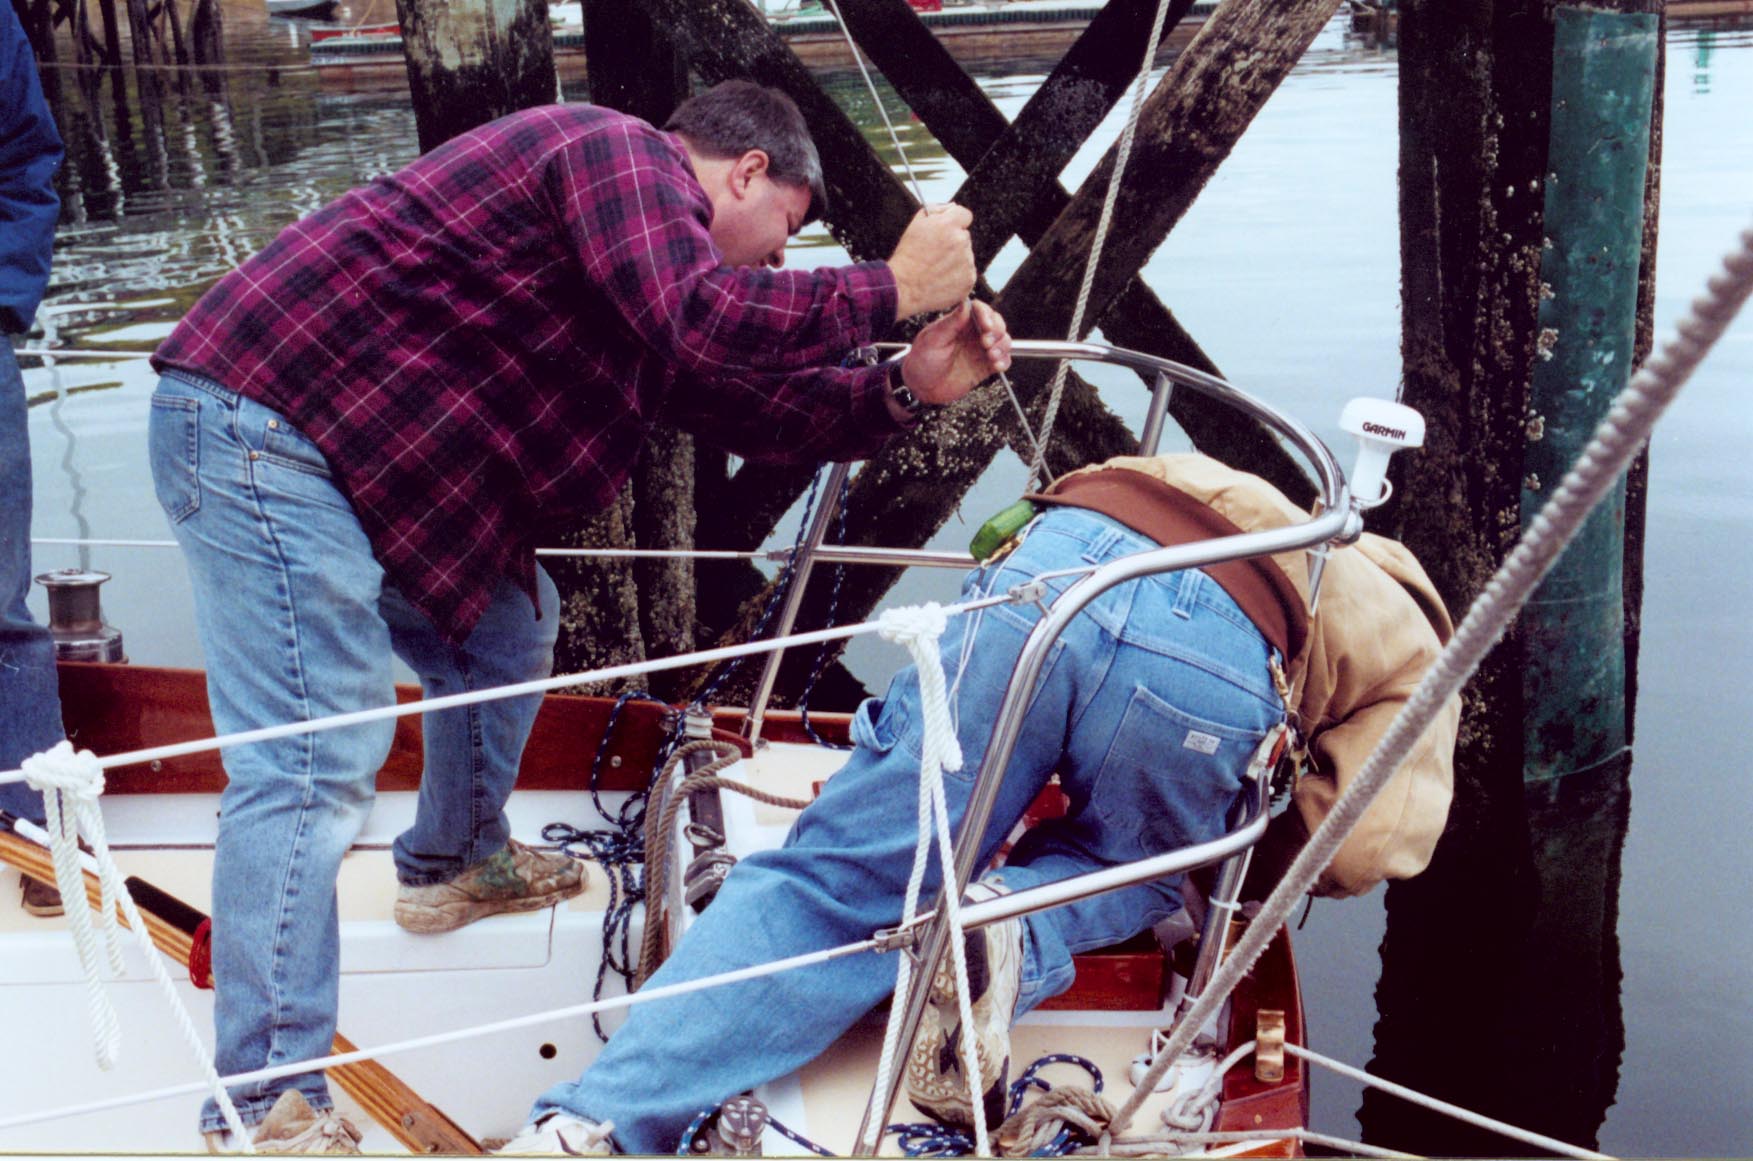
Here we're struggling to get the
backstay attached to the chainplate. The headstay is already
attached and its turnbuckle opened all the way--the new rigging will
stretch, so this should be easier in the future. We did get the
backstay attached, obviously. |
|

|
The mast is successfully
stepped! |
|
|
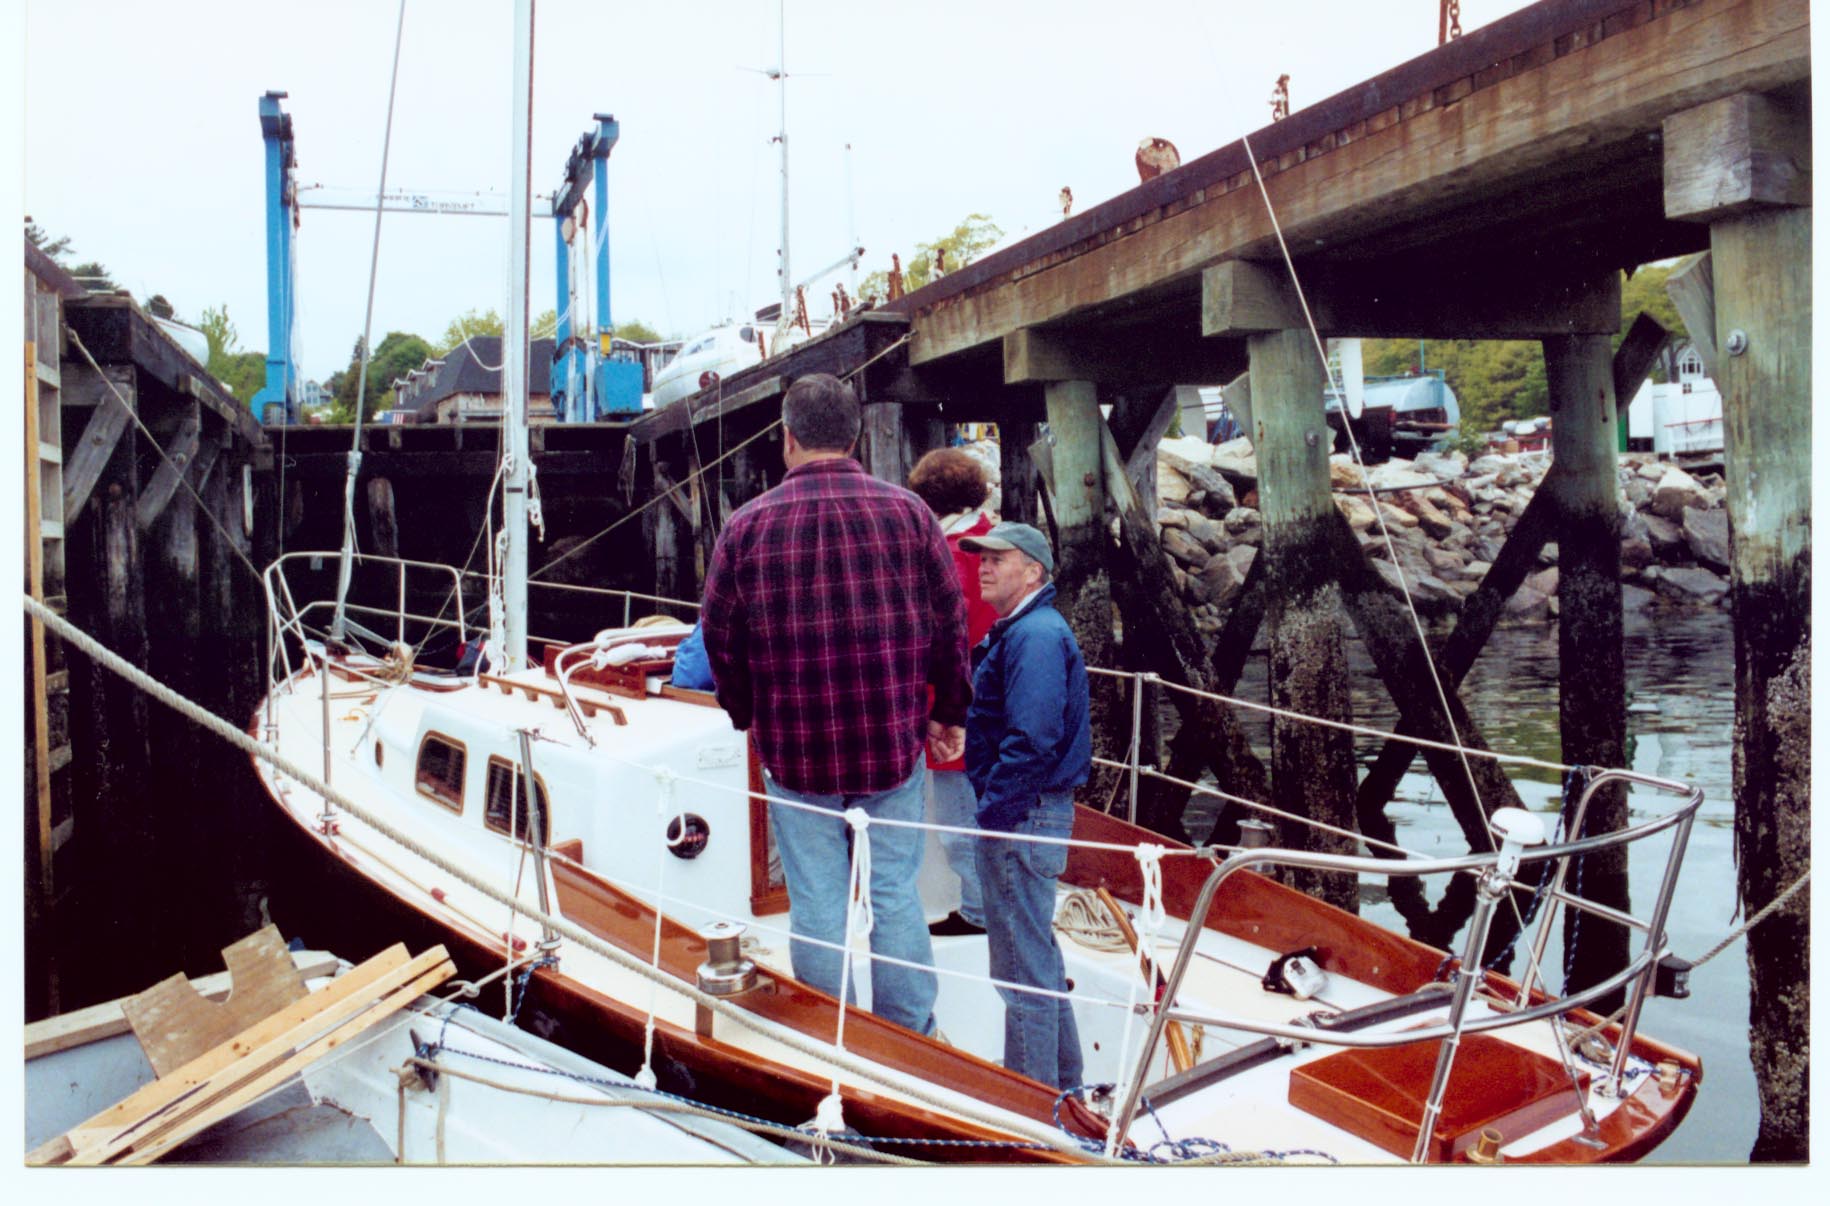
 With
the mast up, we moved back over to the yacht club for the rest of the
afternoon. The boat looked great with the stick up--much better than
without. With
the mast up, we moved back over to the yacht club for the rest of the
afternoon. The boat looked great with the stick up--much better than
without.
|
|
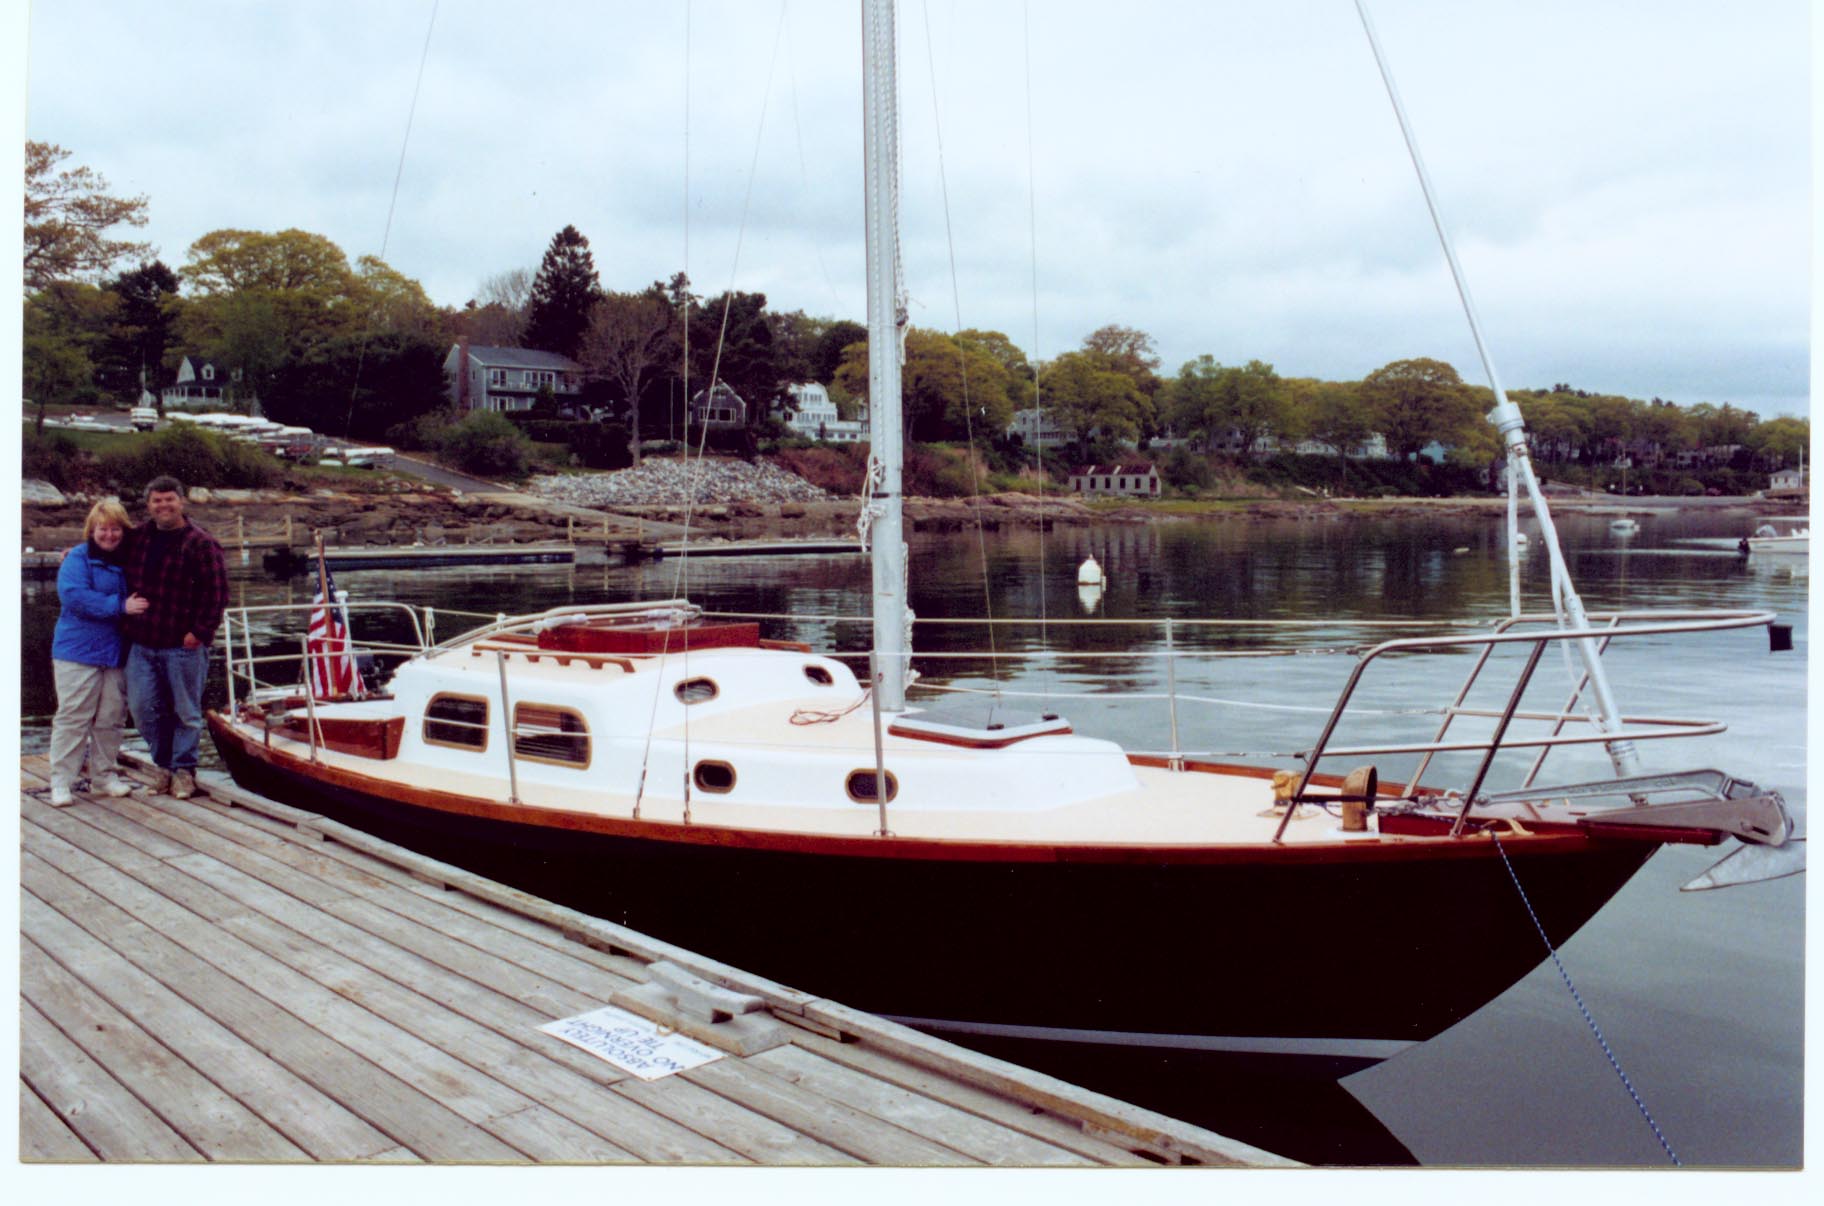
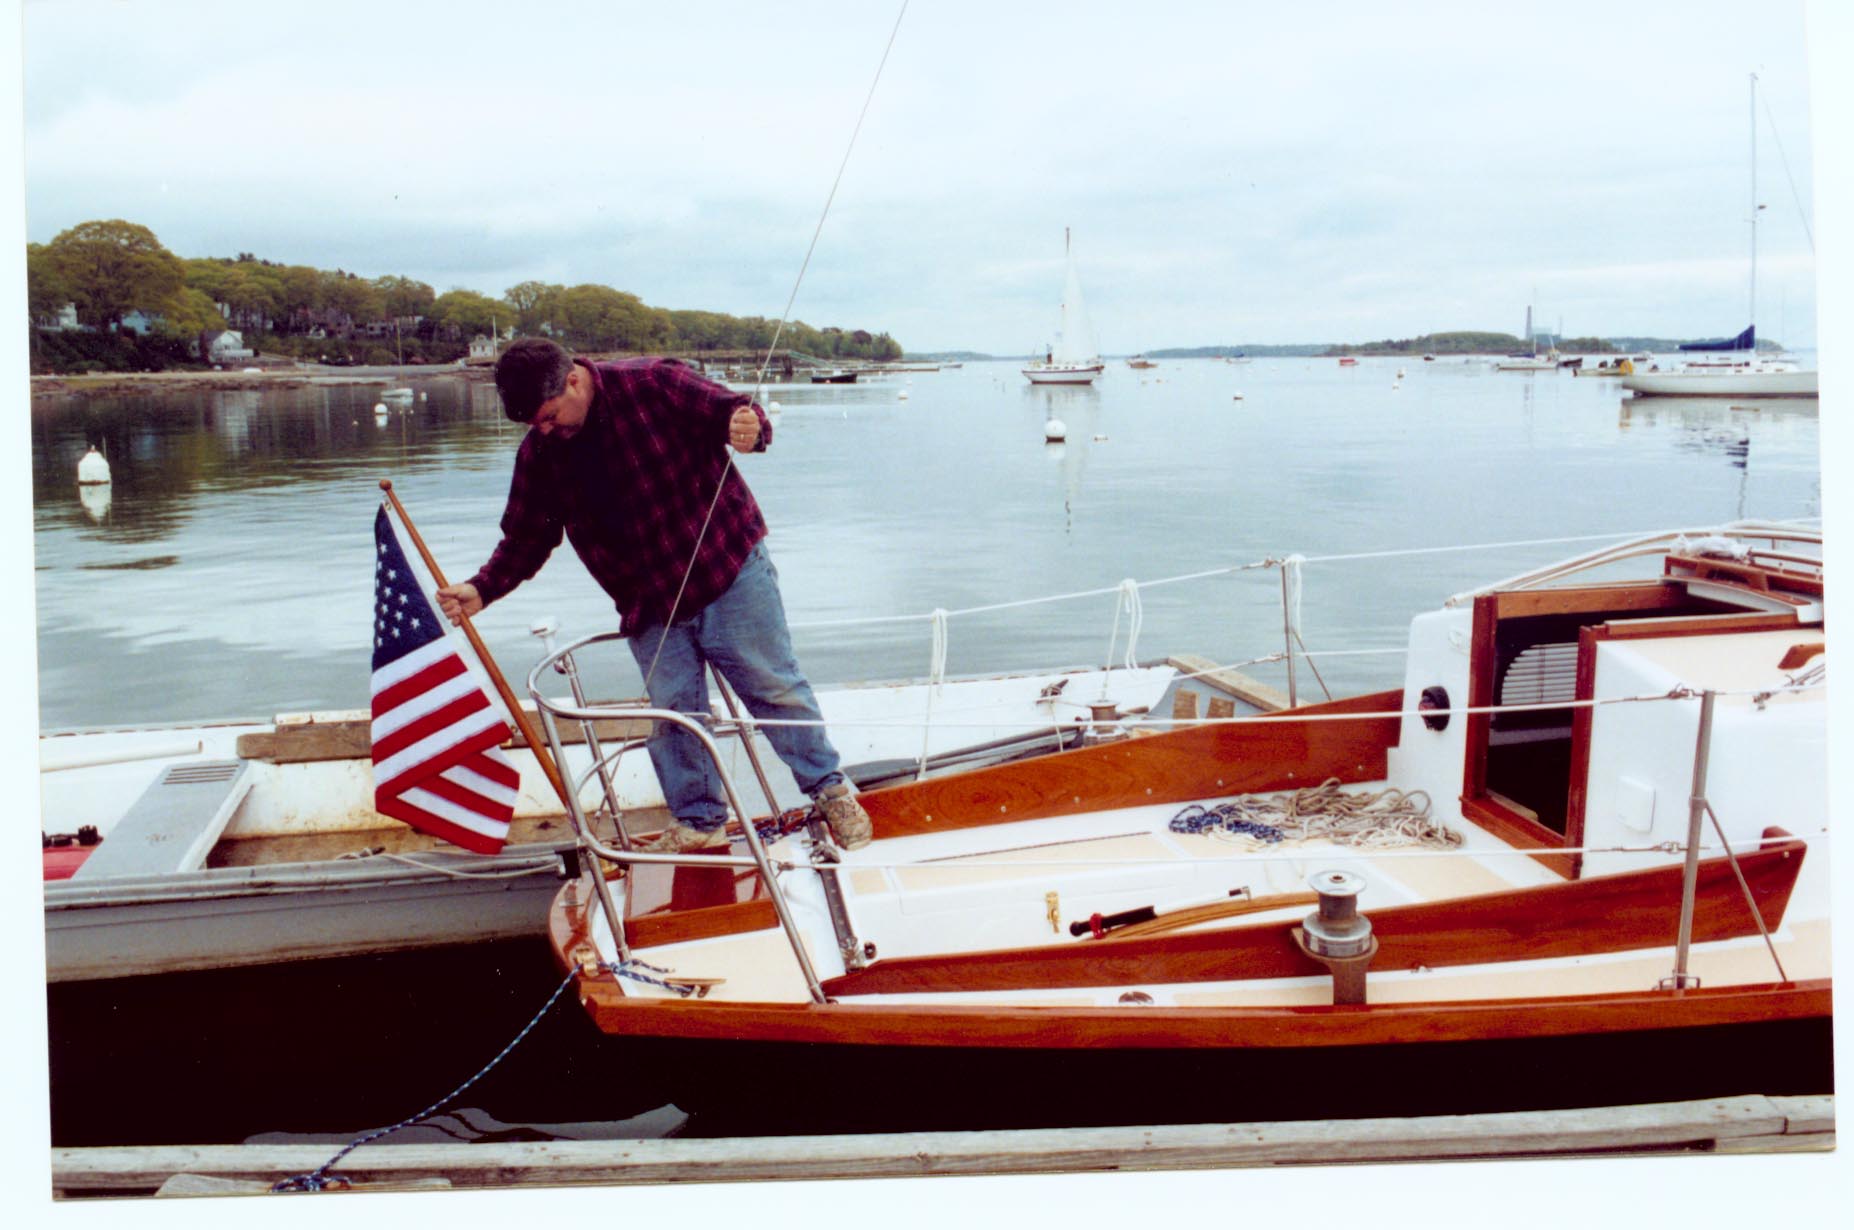 With the mast up, I made it all official by
installing the new ensign in the flagpole socket on the taffrail. With the mast up, I made it all official by
installing the new ensign in the flagpole socket on the taffrail.
|
|
Mast
Wiring Connections
I had heard about a great idea for dealing with the mast wires
and the through-deck situation. It involved a through hull fitting
installed in the deck, to which was attached a hose that ran up into the mast
above deck level; the wires run through the hose, through the through hull
fitting, and into the boat. It sounded great, and I decided to copy the
idea.
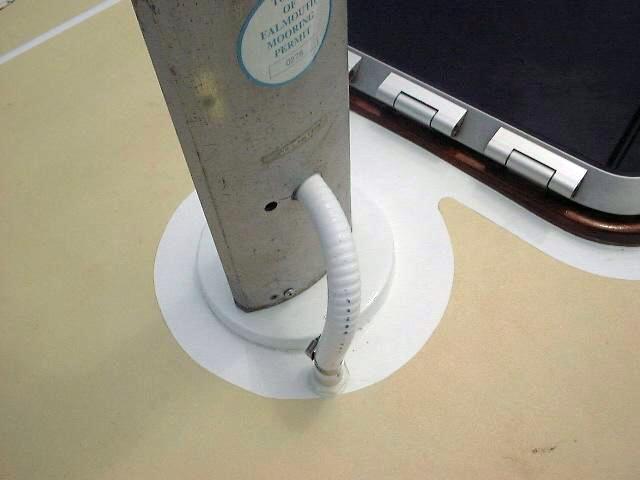 I
installed a plastic (acetic) 3/4" through hull fitting in the deck just aft
of the mast beam, and sealed it well with polysulfide. With the mast still on
the ground, I drilled a 1" hole about 10" above the base, through
which the wires run. With the mast stepped, I cut a length of nice white
sanitation hose to the proper length, ran the wires through, and secured the
hose to the through hull with a hose clamp, inserted the other end into
the mast hole, and sealed around it with silicone caulk. A very neat
installation, and it should be perfectly watertight. It is also easy
enough to dismantle every year when the mast comes out. I
installed a plastic (acetic) 3/4" through hull fitting in the deck just aft
of the mast beam, and sealed it well with polysulfide. With the mast still on
the ground, I drilled a 1" hole about 10" above the base, through
which the wires run. With the mast stepped, I cut a length of nice white
sanitation hose to the proper length, ran the wires through, and secured the
hose to the through hull with a hose clamp, inserted the other end into
the mast hole, and sealed around it with silicone caulk. A very neat
installation, and it should be perfectly watertight. It is also easy
enough to dismantle every year when the mast comes out.
|
|
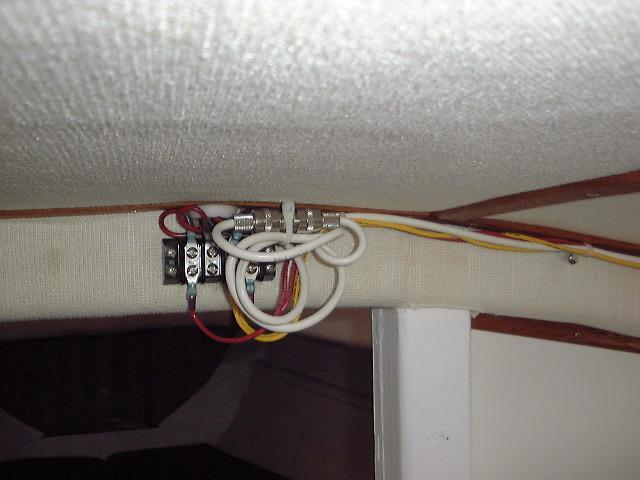 Inside the boat, I cut the wires to length and attached them
to a terminal block that I screwed to the mast beam. Then, I attached the
wires I had run inside the boat earlier during the wiring to the other sides of
the appropriate terminals, completing the circuits. I connected the VHF
antenna using two PL-259 connectors and a splice fitting in between, allowing
for easy connection and disconnection in the future. Inside the boat, I cut the wires to length and attached them
to a terminal block that I screwed to the mast beam. Then, I attached the
wires I had run inside the boat earlier during the wiring to the other sides of
the appropriate terminals, completing the circuits. I connected the VHF
antenna using two PL-259 connectors and a splice fitting in between, allowing
for easy connection and disconnection in the future.
Soon, I'll construct some wooden trim to cover the wires and
terminal block. Details coming soon.
10/1/01: OK, details aren't coming soon--the
season has come and gone, and I never got around to this project. It's on
the list for the winter! I'll post details as soon as the project is
underway. (See Small Projects)
|
|