|
Mast: Awlgrip
This page was last updated on 21 October 2004. |
 During
the initial stages of my restoration project in 2000-2001, I anticipated
painting the original mast. However, with time running out--and
after discovering that scrubbing the aluminum with detergent and a
Scotch-Brite pad made a drastic improvement in its appearance--I elected
at that time to forgo the mast painting, at least for the time
being. Each season, I would once again reconsider the prospect, only
to have it go by the wayside for one reason or another--most importantly,
perhaps, because the mast just didn't look that bad. During
the initial stages of my restoration project in 2000-2001, I anticipated
painting the original mast. However, with time running out--and
after discovering that scrubbing the aluminum with detergent and a
Scotch-Brite pad made a drastic improvement in its appearance--I elected
at that time to forgo the mast painting, at least for the time
being. Each season, I would once again reconsider the prospect, only
to have it go by the wayside for one reason or another--most importantly,
perhaps, because the mast just didn't look that bad.
In 2004, for a variety of reasons, I
decided to replace the boom. I elected
to buy the boom unpainted and untreated, so I was faced with a
decision: if I painted the boom white, my first choice, I would
essentially commit myself to painting the mast to match. Eventually,
I went ahead with the white paint, and therefore made plans to take care
of the mast in the fall, as soon as the boat had been hauled.
|
After much consideration, I decided to proceed
using the same basic Awlgrip-supplied methodology as I had used when
painting the boom earlier in the season: the one-day process that
included a variety of etching chemicals, zinc chromate primer, and final
topcoats, all applied in a single day. As an additional challenge, I
had to do the work outside, as there simply wasn't any convenient way to
get the mast inside the shop in any manner that would allow this sort of
work. Obviously, I should have heeded Heidi's advice and built a
bigger shop--but I have the feeling that if I had, somehow I still
would have had too much stuff inside!
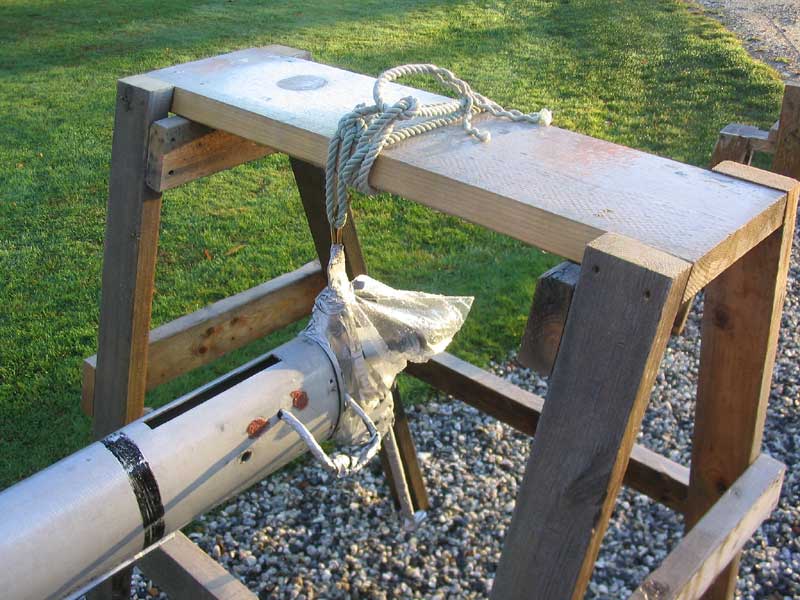
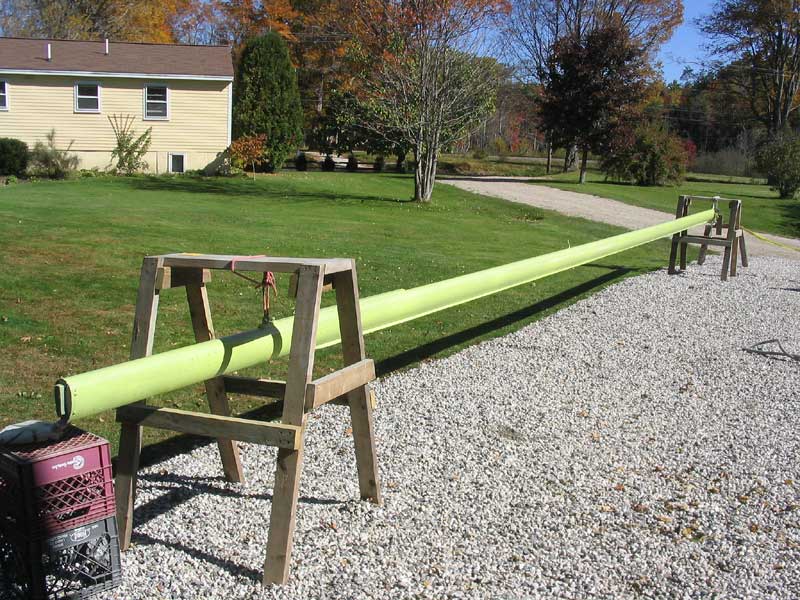
 I began by stripping as much hardware off
the mast as I could. I left the mast base and masthead castings in
place, partially because the screws that held them in were reluctant to
move. Also, I needed a means of suspending the mast, and it made
sense to use the jumper tangs at the masthead. I began by stripping as much hardware off
the mast as I could. I left the mast base and masthead castings in
place, partially because the screws that held them in were reluctant to
move. Also, I needed a means of suspending the mast, and it made
sense to use the jumper tangs at the masthead.
|
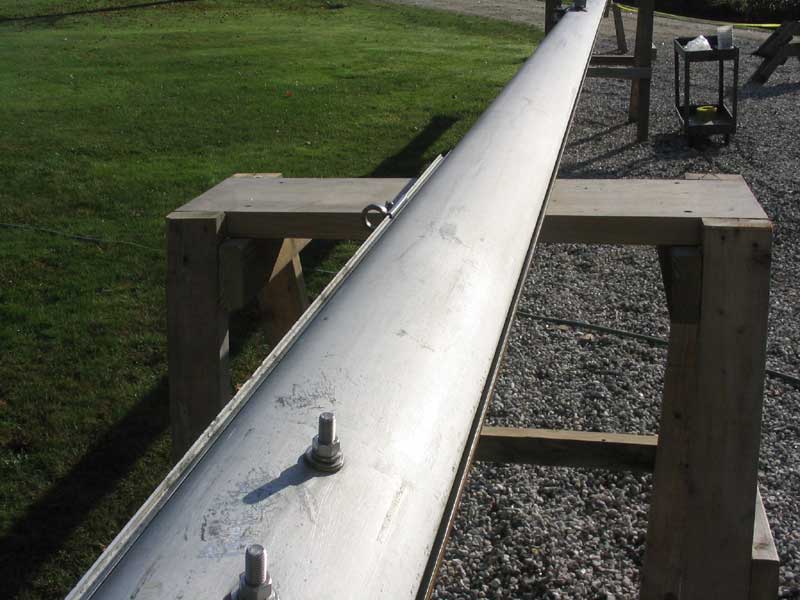
 Just by looking at it, I could tell that
the spinnaker pole track (original) was not going to come off without a
fight, so I left it in place; again, this proved to be helpful, as I used
the eye in the car to suspend the lower end of the mast during
painting. I also found that removing the mainsail track (bronze),
while theoretically possible, was going to be near impossible. After
testing a number of the screws holding it in place, I determined that it
was not worth the effort to remove it. Just by looking at it, I could tell that
the spinnaker pole track (original) was not going to come off without a
fight, so I left it in place; again, this proved to be helpful, as I used
the eye in the car to suspend the lower end of the mast during
painting. I also found that removing the mainsail track (bronze),
while theoretically possible, was going to be near impossible. After
testing a number of the screws holding it in place, I determined that it
was not worth the effort to remove it.
|
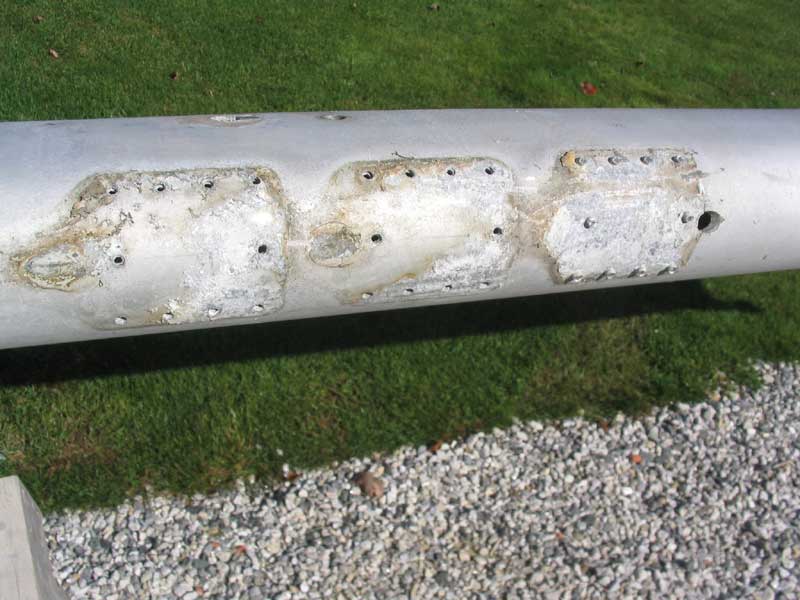
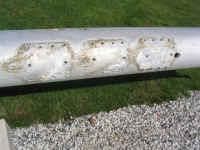 My
mast had three stainless steel tangs secured at the headstay hounds:
one (lowermost) for the genoa halyard block, another (mid) for the
headstay, and a final one (top) for the spinnaker halyard block.
Because each tang overlapped the one beneath, I had to begin at the
top. However, the top tang, for whatever reason, was secured with
rivets, while the lower two featured machine screws. I ground the
heads off the rivets with my angle grinder, and then successfully remove
the top tang, which opened up access to easily remove the lower two.
There was obvious corrosion beneath the three tangs, but it looked far
worse at first glance than it did once I had cleaned off the powdery
residue. My
mast had three stainless steel tangs secured at the headstay hounds:
one (lowermost) for the genoa halyard block, another (mid) for the
headstay, and a final one (top) for the spinnaker halyard block.
Because each tang overlapped the one beneath, I had to begin at the
top. However, the top tang, for whatever reason, was secured with
rivets, while the lower two featured machine screws. I ground the
heads off the rivets with my angle grinder, and then successfully remove
the top tang, which opened up access to easily remove the lower two.
There was obvious corrosion beneath the three tangs, but it looked far
worse at first glance than it did once I had cleaned off the powdery
residue.
|
My next step was to identify and then fill
with epoxy all unneeded holes in the mast. I substantially
overfilled each hole with thickened epoxy and let it cure. Then I
endured a period of several days where the weather would not
cooperate. Finally, the forecast indicated a near perfect day for
Wednesday, October 13, so I prepared in advance for what I knew would be a
busy day by laying out tools, painting supplies, and spray
equipment. I also masked off the areas that I did not want
painted: masthead and base, spinnaker track, and mainsail
track. Because I had, for years, sprayed silicone lubricating spray
on the mainsail track, I found I had to solvent wash it in order to
get the tape to stick, but it seemed to do the trick. I used 3M #225
silver tape.
|
 Early
in the day on Wednesday, before the sun had risen above the trees to the
east, I began preparations by washing the mast with commercial degreaser
and a Scotch-Brite pad. I scrubbed the entire surface and rinsed
well, then removed the bulk of the water with towels and left the mast to
dry on its own once the sun came up. Early
in the day on Wednesday, before the sun had risen above the trees to the
east, I began preparations by washing the mast with commercial degreaser
and a Scotch-Brite pad. I scrubbed the entire surface and rinsed
well, then removed the bulk of the water with towels and left the mast to
dry on its own once the sun came up.
When the mast was dry, I spot-sanded all the epoxy patches, using 120 grit
on my 5" DA. Then, I sanded the entire mast surface just to
sort of break the surface, using first 120, then 220 grits. In this
area, I broke with the Awlgrip instructions. Since I didn't feel the
mast required any surfacing or major filling, I decided that there was no
reason to proceed with coarse sandpaper grits and multiple primer coats,
all of which would require at least a couple additional days to
complete. With weather closing in on me, and some indelible time
constraints, I couldn't afford that sort of time.
I discovered that the tape on the mainsail
track--over 100' worth--had trapped significant amounts of water from the
dew and washing, and had become a soggy, limp mess. I had to pull it
all off, annoyingly.
|
Sanding complete, I vacuumed off the mast to
remove the bulk of the dust, and then moved on to the next steps:
chemical etching, using Alumiprep 33, and application of the chemical
corrosion treatment Alodine 1201. With a Scotch-Brite pad, I applied
the Alumiprep, scrubbing the surface over a several foot-long area and
then rinsing; the mast was in direct sunlight, and it was important to not
allow the chemical to dry on the surface.
As soon as the etching was complete, I
continued by applying the Alodine; I used a cheap brush to apply it as
directed, and then rinsed it off. With that, I left the mast to dry
thoroughly before continuing, using the airflow from my HVLP turbine to
help blow water out of the screwholes and, in particular, away from the
mast track. Fortunately, drying conditions on this day were superb,
with light breezes, bright, cloudless sun, and warm temperatures.
|
 Later,
when the mast had once again dried, I reapplied masking tape to the
mainsail track, and checked the remaining tape for damage from water or
sanding. Then, I spray-applied a coat of Awlgrip 30-Y-94 yellow anticorrosive
primer and let it cure for about two hours. By now, it was close to
noontime, and I wanted my topcoats complete before 1400. Later,
when the mast had once again dried, I reapplied masking tape to the
mainsail track, and checked the remaining tape for damage from water or
sanding. Then, I spray-applied a coat of Awlgrip 30-Y-94 yellow anticorrosive
primer and let it cure for about two hours. By now, it was close to
noontime, and I wanted my topcoats complete before 1400.
|
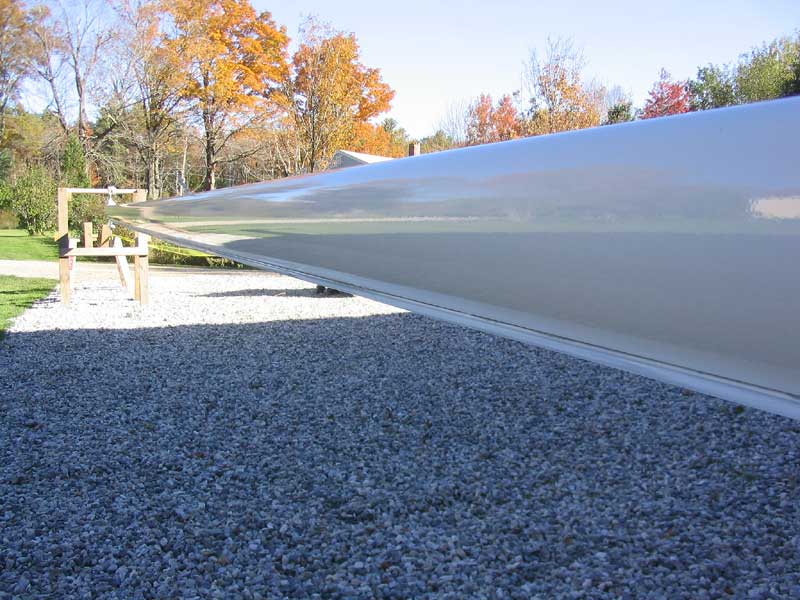
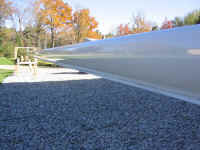 When
the primer had cured sufficiently, I continued by spraying the first of
three coats of Awlgrip Snow White. Then I applied the final two
coats, waiting about 30 minutes between coats as prescribed. I was
finished with spraying at around 1330, and was pleased that the job was
complete. It seemed like plenty of time for the paint to cure before
nightfall, and I was very happy with the quality of the paint job--smooth,
glossy, and only one or two small runs, all at the lower end where the
mast was suspended through the middle of the horse, making access with the
spray gun a little difficult; this resulted in the gun overloading one or
two areas slightly, which caused the runs. No big deal. When
the primer had cured sufficiently, I continued by spraying the first of
three coats of Awlgrip Snow White. Then I applied the final two
coats, waiting about 30 minutes between coats as prescribed. I was
finished with spraying at around 1330, and was pleased that the job was
complete. It seemed like plenty of time for the paint to cure before
nightfall, and I was very happy with the quality of the paint job--smooth,
glossy, and only one or two small runs, all at the lower end where the
mast was suspended through the middle of the horse, making access with the
spray gun a little difficult; this resulted in the gun overloading one or
two areas slightly, which caused the runs. No big deal.
|
Imagine my disappointment when, passing by the
mast the next morning on the way to the shop, I noticed that it looked
funny. A closer inspection revealed that the paint had gone
completely flat, obviously from dewfall. It was apparent that,
despite all former appearances, the paint had not sufficiently cured
before dusk fell the previous day, and the dew had ruined the paint
job. Although I knew about this potential pitfall, I had really felt
confident that I had finished early enough in the day to prevent the
problem, but obviously not. Part of the problem may have been caused
by my choice of reducer: since my HVLP turbine warms the air, I had
found during earlier Awlgrip jobs that the paint tended to orange peel,
which is caused by the reducer flashing off more quickly than the time it
takes for the paint to level for that perfectly smooth surface. As a
result, I had begun using the slowest Awlgrip reducer, T0005 (hot
weather), and this had worked like a charm when I painted the boom.
Perhaps now, though, it had slowed the curing sufficiently that 5 hours
was not enough. I was still learning the spraying process, and the intricacies
thereunto.
In any event, I was disappointed: but
life goes on. After a couple days, I sanded the mast with 220 grit
paper to prepare the surface for recoating as soon as the weather allowed.
|
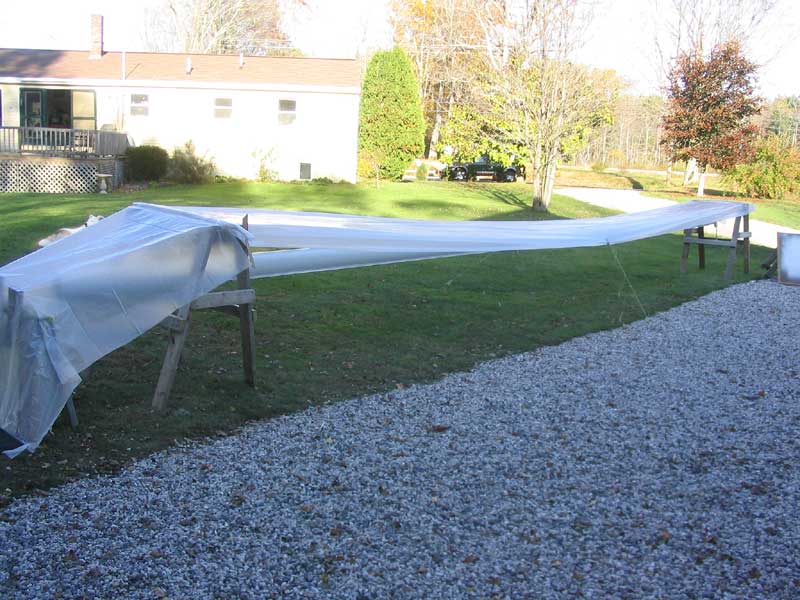
It was exactly a week later that the weather
forecast looked like it might allow me to recoat the mast. Since I
had been watching the forecast anxiously, I was prepared. To avoid a
repeat of the problems above, I spent an hour or so on the day before my
anticipated recoating weather window to prepare a plastic cover for the
mast, which I could deploy over the painted spar late in the day to
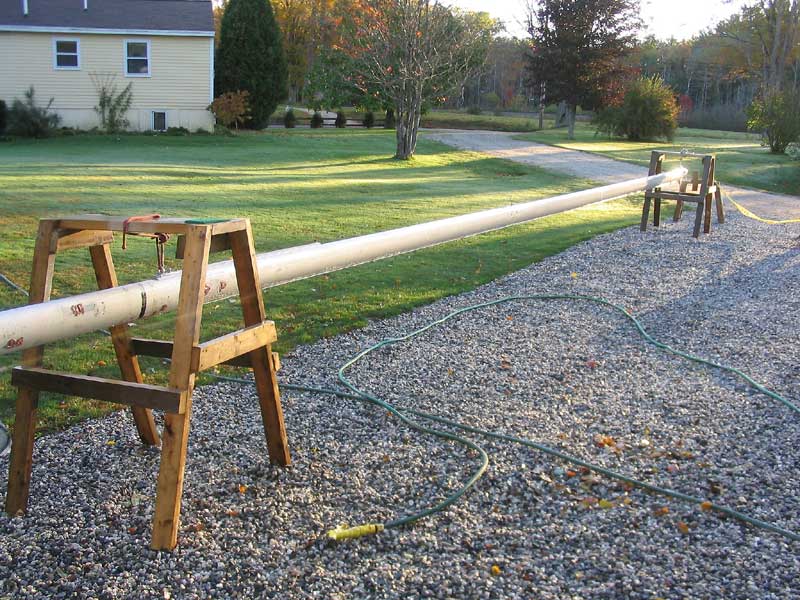
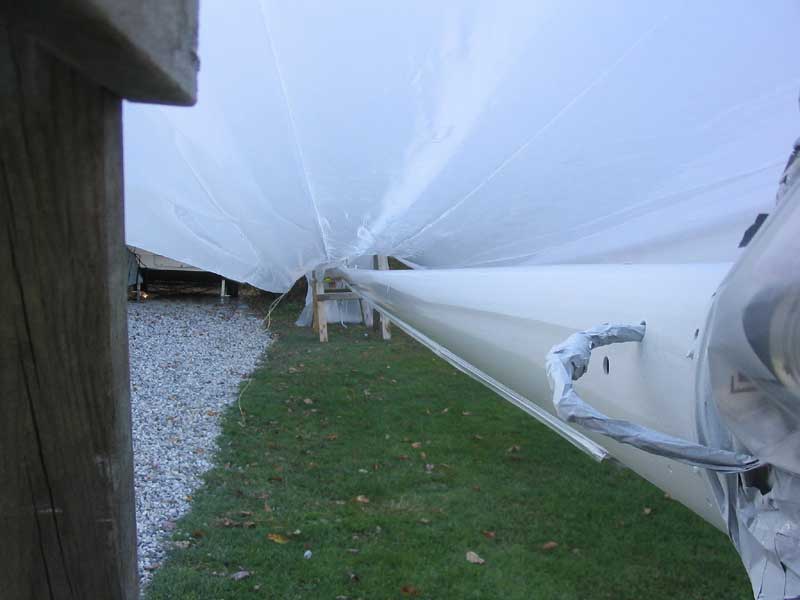
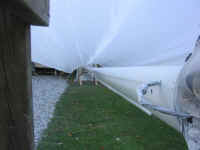
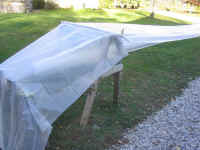
prevent any dew from falling onto it. I used a length of 4' x 50'
plastic sheeting, which I ran between the two horses supporting the
mast. To allow the sheet to be tensioned enough to stay clear of the
mast, I wrapped each end around a strip of wood several times, and then
stapled it in place onto the strips; by screwing these strips into the
tops of the horses, I could tension the sheeting sufficiently without
tearing the plastic. Once I was satisfied that the idea would work,
I rolled up the arrangement to one end, where I left it at the ready for
when it was needed. I also masked off the various portions of the
mast that were not to be painted, as before; I had removed all the tape
from the previous paint job.
|
 Wednesday,
one week after the initial painting, dawned clear and cold, but windy; I
was concerned that I would not be able to paint after all. By 1000,
though, I decided that the wind was not much of an issue after all, and
knew that it was sort of now or never if I wanted the mast to get painted
this fall. I really did not want the project to linger any further,
as I knew it would be a challenge again in the spring to get it
done. Therefore, I pressed onward. With one final cleaning
with Awl Prep solvent, I prepared the day's batch of snow white Awlgrip
and, by 1030, had sprayed the first coat. Since I had such a good
base, I figured two coats would be more than sufficient. The first
coat came out well, with one minor run that I was able to smooth with a
brush before it cured. Wednesday,
one week after the initial painting, dawned clear and cold, but windy; I
was concerned that I would not be able to paint after all. By 1000,
though, I decided that the wind was not much of an issue after all, and
knew that it was sort of now or never if I wanted the mast to get painted
this fall. I really did not want the project to linger any further,
as I knew it would be a challenge again in the spring to get it
done. Therefore, I pressed onward. With one final cleaning
with Awl Prep solvent, I prepared the day's batch of snow white Awlgrip
and, by 1030, had sprayed the first coat. Since I had such a good
base, I figured two coats would be more than sufficient. The first
coat came out well, with one minor run that I was able to smooth with a
brush before it cured.
45 minutes later, I sprayed the second, and
final, coat, and left the mast to cure the rest of the day in the
sunlight. For this batch of paint, I used the standard reducer,
Awlgrip T0003, which would allow the surface to cure faster.
|
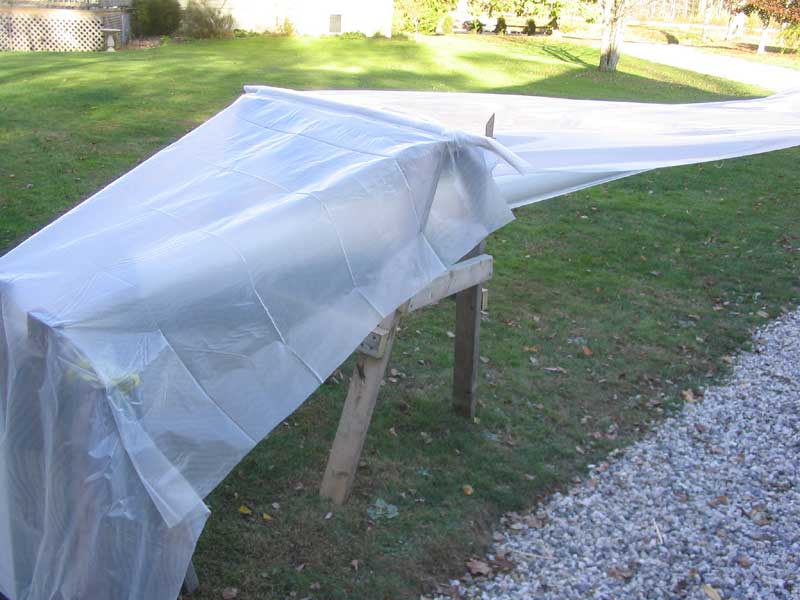
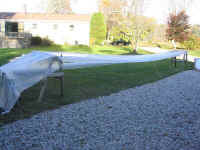
 Late
in the day, the surface was tack-free, and I took the opportunity to roll
out my plastic cover. Being careful to avoid touching the mast
surface, I unrolled the plastic and secured it tightly in place, as
described above. This stretched the plastic enough to keep it off
the mast, but I added extra staples (reinforced with cardboard strips) to
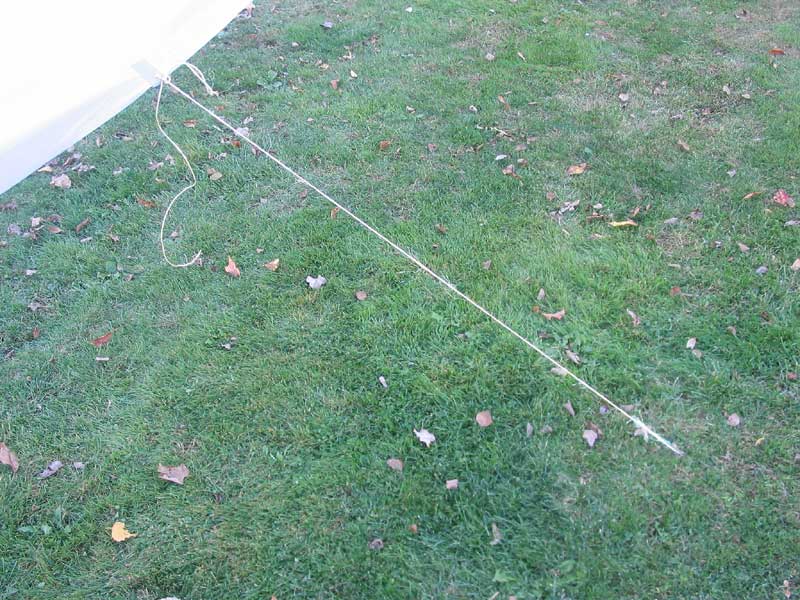
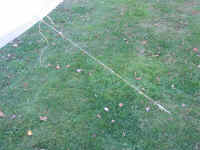
add extra tension to the plastic edges. The wind had lightened, but
some gusts that swept through showed the need to secure the center portion
of the plastic somehow; I used some small string to secure the edges of
the plastic (reinforced with duct tape) to a p air of tent stakes, one on
each side, that I drove into the ground. I didn't tighten these
strings much--just enough to hold the plastic down when the gusts
came. I didn't want to pull the plastic down onto the spar. Late
in the day, the surface was tack-free, and I took the opportunity to roll
out my plastic cover. Being careful to avoid touching the mast
surface, I unrolled the plastic and secured it tightly in place, as
described above. This stretched the plastic enough to keep it off
the mast, but I added extra staples (reinforced with cardboard strips) to
add extra tension to the plastic edges. The wind had lightened, but
some gusts that swept through showed the need to secure the center portion
of the plastic somehow; I used some small string to secure the edges of
the plastic (reinforced with duct tape) to a p air of tent stakes, one on
each side, that I drove into the ground. I didn't tighten these
strings much--just enough to hold the plastic down when the gusts
came. I didn't want to pull the plastic down onto the spar.
|
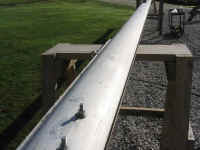
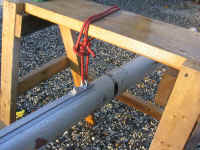
 Finally,
I added an additional piece of loose plastic at the base of the mast,
which protruded beyond the horse. I simply stapled it in place
between the main horse and a smaller one, and further secured it by
throwing a stack of roofing shingles on top of the plastic to prevent the
smaller horse from tipping over. Finally,
I added an additional piece of loose plastic at the base of the mast,
which protruded beyond the horse. I simply stapled it in place
between the main horse and a smaller one, and further secured it by
throwing a stack of roofing shingles on top of the plastic to prevent the
smaller horse from tipping over.
There was nothing more I could do. It
seemed like I had taken the proper precautions, but only the next morning
would tell.
|
|
 Amazingly,
even my efforts above failed. Somehow, frost managed to form on
portions of the mast overnight, even under the cover. Some areas
were completely unaffected, and remained glossy; other areas were
ruined. How did this happen? I noted that the underside
of the plastic, even, was coated with frost. I thought frost was
frozen dew; how did dew get there? To say that this was an
irritating setback would be an understatement. Amazingly,
even my efforts above failed. Somehow, frost managed to form on
portions of the mast overnight, even under the cover. Some areas
were completely unaffected, and remained glossy; other areas were
ruined. How did this happen? I noted that the underside
of the plastic, even, was coated with frost. I thought frost was
frozen dew; how did dew get there? To say that this was an
irritating setback would be an understatement.
In any event, this job was
over for the fall. There was obviously no point in a third
attempt. I knew it was risky to try the job outdoors so late in the
season, but it seemed I had done what I could to make it
worthwhile.
Perhaps the time will have to
come this winter for me to shoehorn the mast into the shop somehow, and
get this paint done right. Maybe I should have just painted the
thing with Dutch Boy house paint instead. For all my efforts, it
about looked like I had.
|
Time and Materials Spent
Wasted on This Project
1st Attempt:
Strip Rigging: 1.5 hours
Strip Hardware: 2 hours
Mask: 1.5 hours
Wash w/Degreaser: 20 min.
Wash w/Awl-Prep: 5 min.
Fill and Sand Excess Holes, and Sand Mast: 1.5 hours
Alumiprep/Alodine 1201 Application: 30 min.
Primer 2 Coats: 20 spray minutes
Topcoat 3 Coats: 20 spray minutes
Alumiprep 33: 8 oz.
Alodine 1201: ~16 oz.
Primer (30-Y-94): Mix 14 oz. base, 14 oz, converter, 14 oz. reducer
(1:1:1) Comments: Way too much. I had about 32 mixed ounces
left over.
Topcoat (Snow White): Mix 12 oz. base, 12 oz. converter, 6 oz.
reducer (1:1; 25%) Comments: Perfect amount for three sprayed
coats.
2nd Attempt:
Sand, clean, and Re-Mask: 1 hour
Topcoat 2 Coats: 20 spray minutes
Topcoat (Snow White): Mix 12 oz. base, 12 oz. converter, 6 oz.
reducer (1:1; 25%) Comments: Small amount left over. I
thought I was mixing less than the first time around, but it turned out it
was the same.
Option that would have looked just as
good now:
1 gallon Dutch Boy latex ($9.99) and 30 minutes of my time, glopping on
the paint with the broom I use to sweep my shop.
Sigh.
|
Life goes on, however. Like all
setbacks, I fell back, regrouped, and atttacked again later. To
continue the project, please click here. |
|