|
Cockpit Access
Hatches
This page was last updated on 10 January 2004.
|
|
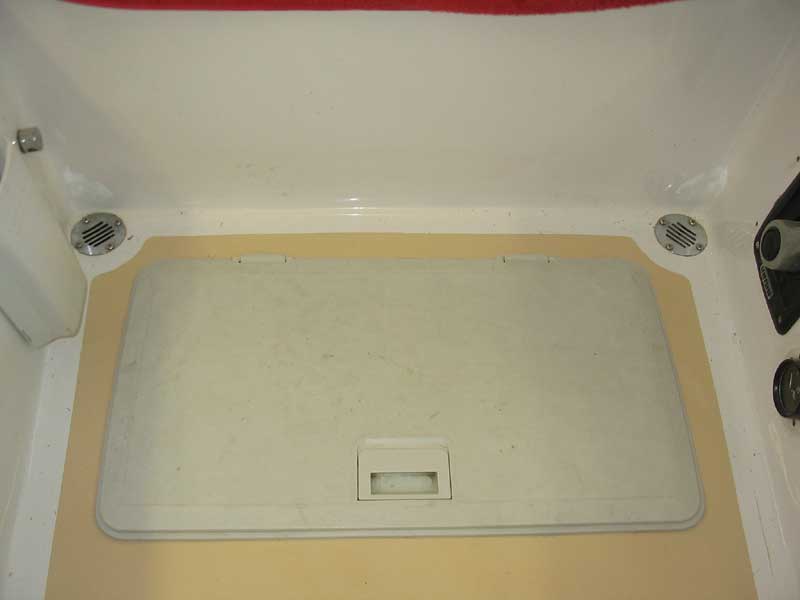
Cockpit Sole Access Hatch
 When
I redid the cockpit a few years ago during the complete boat restoration, one of the most important improvements I made was
to install a large access hatch in the sole above the stuffing box and aft end of the engine. At the time, I hemmed
and hawed about what sort of hatch to install--I was sorely tempted by some nice-looking aluminum flush hatches, but in the
end I chose a plastic hatch made by Tempress. When
I redid the cockpit a few years ago during the complete boat restoration, one of the most important improvements I made was
to install a large access hatch in the sole above the stuffing box and aft end of the engine. At the time, I hemmed
and hawed about what sort of hatch to install--I was sorely tempted by some nice-looking aluminum flush hatches, but in the
end I chose a plastic hatch made by Tempress.
Revisit
the original hatch installation by clicking here.
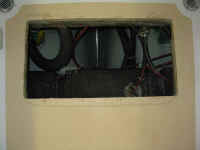
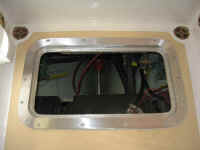
The Tempress hatch performed adequately for three seasons, and the large size
was a boon to the bilge access beneath the cockpit. But the hatch leaked when there was water in the cockpit, which
was at a minimum an irritation--and could lead to unwanted flooding of the bilge.
I had removed the plastic hatch to make it easier to repaint the nonskid earlier
in the month, so the time seemed ripe for a change, if indeed I was ever going to do it. I already knew about one
aluminum hatch, made by Bomar, that was nearly the same exact size as my current one, but it was expensive, so I perused the
catalogs to check out other options in watertight deck hatches. I considered a line of flush aluminum hatches from
Anchor Marine, available at Hamilton Marine, but discovered that there was not a size that matched closely enough--meaning
that I would need to make serious modifications.
Finally, after confirming measurements once again, one day I just ordered the
darn hatch that I wanted. I couldn't--and still can't--point to the exact moment and reason behind my impulsive
decision, but I guess I decided to just stop messing around and get what I knew was inevitable anyway. I had wanted
this hatch three years ago...now just seemed like the perfect time, I guess. |
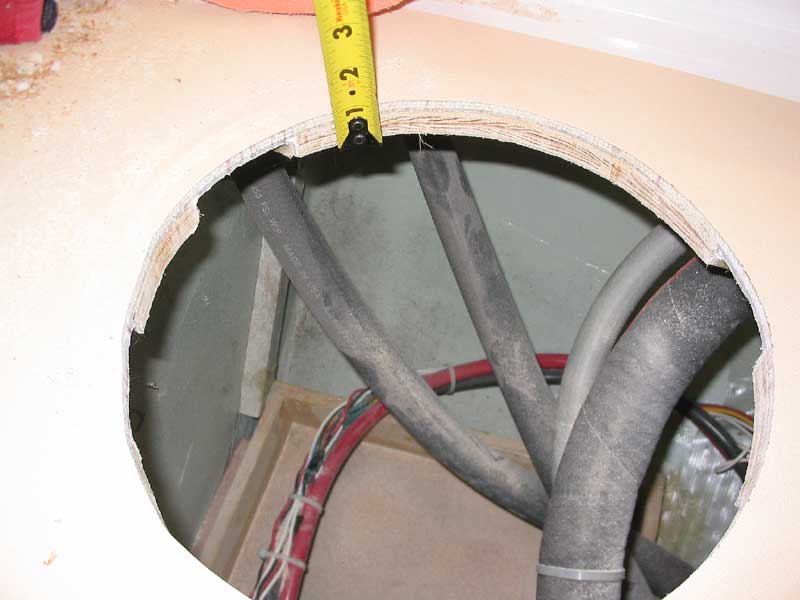
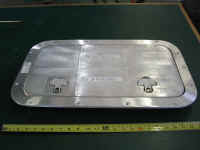 The
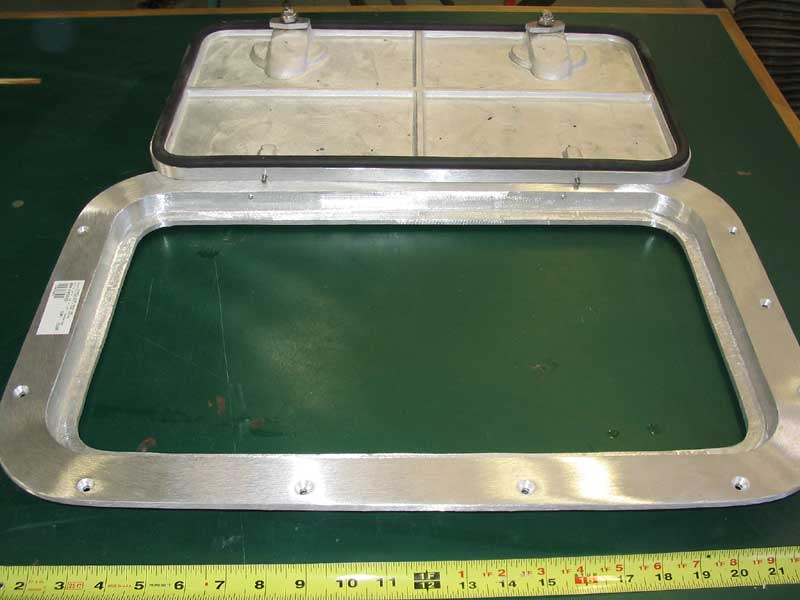
hatch I ordered is a Bomar cast aluminum inspection hatch, part # BOM-C4T1020, available at Hamilton
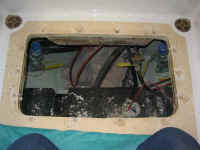
Marine (order #147407; $357.99). The hatch required a 21" x 12" opening, which tied in nicely with the
21" x 11" cutout that was already in the sole from the old hatch. All I'd have to do would be to widen the
cutout by about an inch--no trouble at all. The
hatch I ordered is a Bomar cast aluminum inspection hatch, part # BOM-C4T1020, available at Hamilton
Marine (order #147407; $357.99). The hatch required a 21" x 12" opening, which tied in nicely with the
21" x 11" cutout that was already in the sole from the old hatch. All I'd have to do would be to widen the
cutout by about an inch--no trouble at all. |
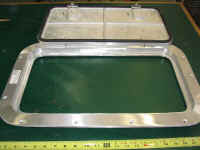 The
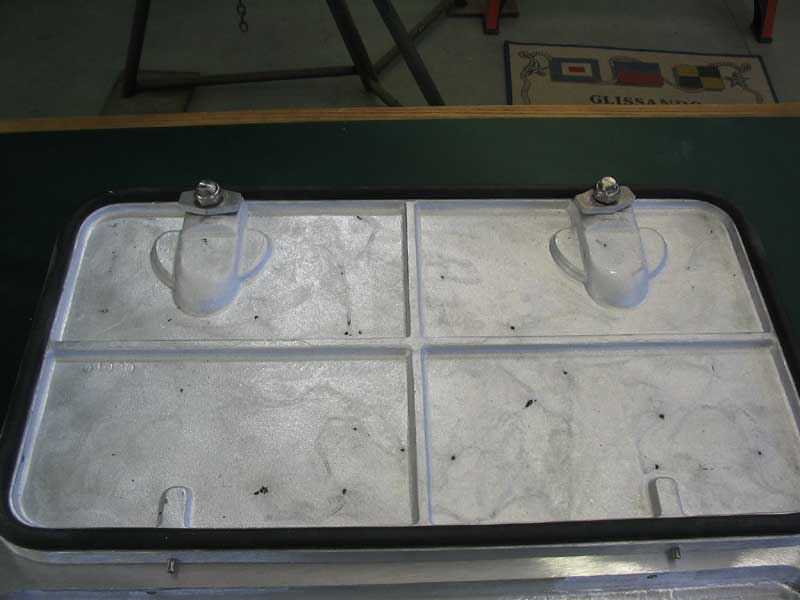
hatch arrived quickly, even though I had received an email from Hamilton saying it was backordered. What a nice piece
of hardware...machined aluminum, with two large locking dogs on one side of the hatch, and two stainless steel pins on the
other side to lock it in place. I felt better already. The
hatch arrived quickly, even though I had received an email from Hamilton saying it was backordered. What a nice piece
of hardware...machined aluminum, with two large locking dogs on one side of the hatch, and two stainless steel pins on the
other side to lock it in place. I felt better already.
 |
 I
marked the shape of the new hatch on the cockpit sole, and made preparations to enlarge the opening as needed.
Unfortunately, I managed to severely drop my jigsaw 10 feet to the concrete floor, ruining the table and chuck in the
process. So I had to put the hatch installation on hold for a few days till I could get a new saw. Rats. I
marked the shape of the new hatch on the cockpit sole, and made preparations to enlarge the opening as needed.
Unfortunately, I managed to severely drop my jigsaw 10 feet to the concrete floor, ruining the table and chuck in the
process. So I had to put the hatch installation on hold for a few days till I could get a new saw. Rats.
|
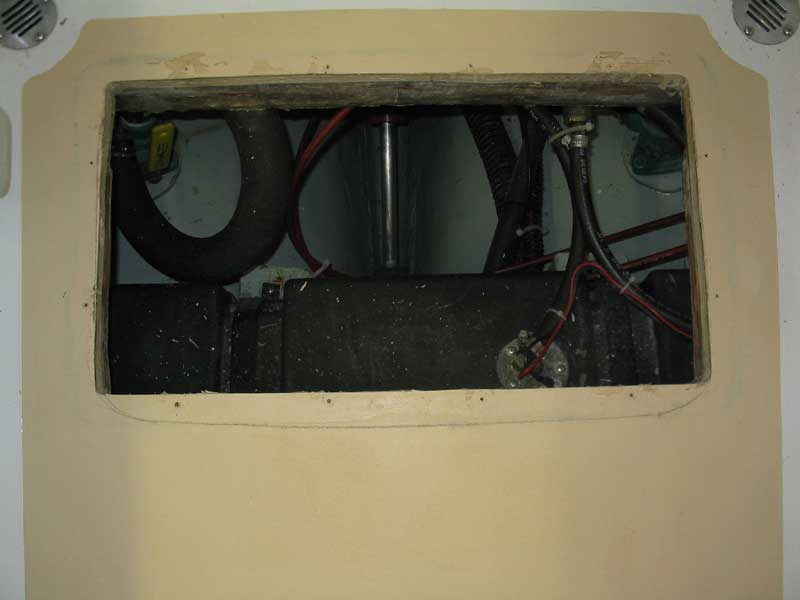
 Armed
with a brand new saw several days later, I enlarged the opening as necessary. I made some fine adjustments with
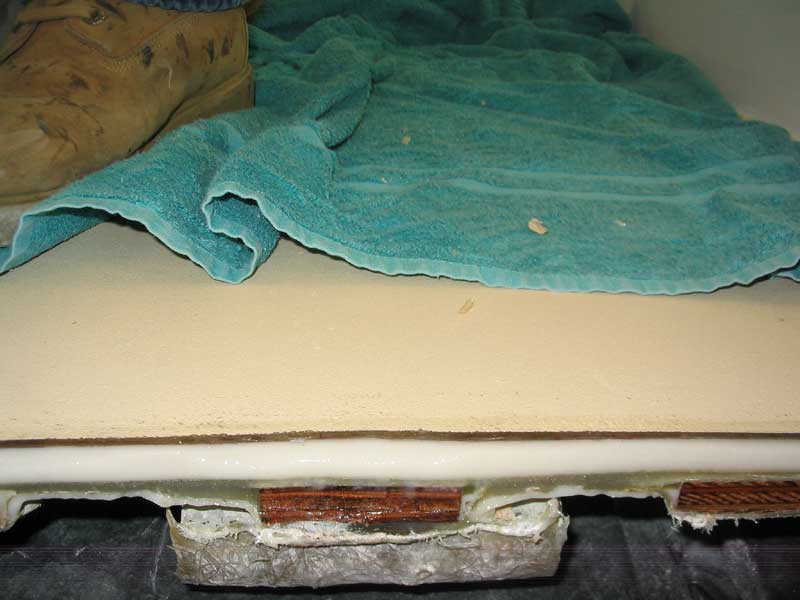
a grinder till the hatch flange fit into place. Then, to prepare the opening, I removed 1/2" or so of the balsa
core material from the exposed back edge and filled the resulting gap with thickened epoxy, to seal the opening and prevent
any possibility of moisture intrusion through the cutout. The other three edges were in nearly the same positions as they
had been with the old hatch, and had been previously filled with epoxy when I installed the original hatch. Armed
with a brand new saw several days later, I enlarged the opening as necessary. I made some fine adjustments with
a grinder till the hatch flange fit into place. Then, to prepare the opening, I removed 1/2" or so of the balsa
core material from the exposed back edge and filled the resulting gap with thickened epoxy, to seal the opening and prevent
any possibility of moisture intrusion through the cutout. The other three edges were in nearly the same positions as they
had been with the old hatch, and had been previously filled with epoxy when I installed the original hatch. |
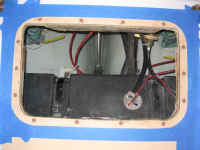
 After
the epoxy cured overnight, I continued by placing the hatch in the opening, ensuring that it was centered and otherwise
properly positioned, and then drilled small pilot holes at each screw location with a Vix bit (a self-centering,
spring-loaded bit designed for this purpose). With the flange screw locations thusly marked, I removed the hatch again
and, using a 1/2" Forstner bit, enlarged the holes at each location, drilling through the top skin and core, but not
through the bottom skin. In this manner, I removed all core material from around the eventual screw locations,
eliminating the chance that minor leakage could saturate the core. I replaced the flange one more time and taped the
deck off around it for protection. After
the epoxy cured overnight, I continued by placing the hatch in the opening, ensuring that it was centered and otherwise
properly positioned, and then drilled small pilot holes at each screw location with a Vix bit (a self-centering,
spring-loaded bit designed for this purpose). With the flange screw locations thusly marked, I removed the hatch again
and, using a 1/2" Forstner bit, enlarged the holes at each location, drilling through the top skin and core, but not
through the bottom skin. In this manner, I removed all core material from around the eventual screw locations,
eliminating the chance that minor leakage could saturate the core. I replaced the flange one more time and taped the
deck off around it for protection. |
 Then,
I mixed a batch of loosely thickened epoxy and poured some into each of the 1/2" holes I had drilled, filling them with
solid, strengthened epoxy. The screws will penetrate through this epoxy, which is not only strong, but also isolates
the screws from the core, preventing any moisture intrusion issues. Since any forces on this hatch will be from
above--whether water, persons, or gear--I saw no reason why screws would be insufficient to hold it in place. I left
the epoxy to cure overnight, as usual, before continuing with the installation. Then,
I mixed a batch of loosely thickened epoxy and poured some into each of the 1/2" holes I had drilled, filling them with
solid, strengthened epoxy. The screws will penetrate through this epoxy, which is not only strong, but also isolates
the screws from the core, preventing any moisture intrusion issues. Since any forces on this hatch will be from
above--whether water, persons, or gear--I saw no reason why screws would be insufficient to hold it in place. I left
the epoxy to cure overnight, as usual, before continuing with the installation. |
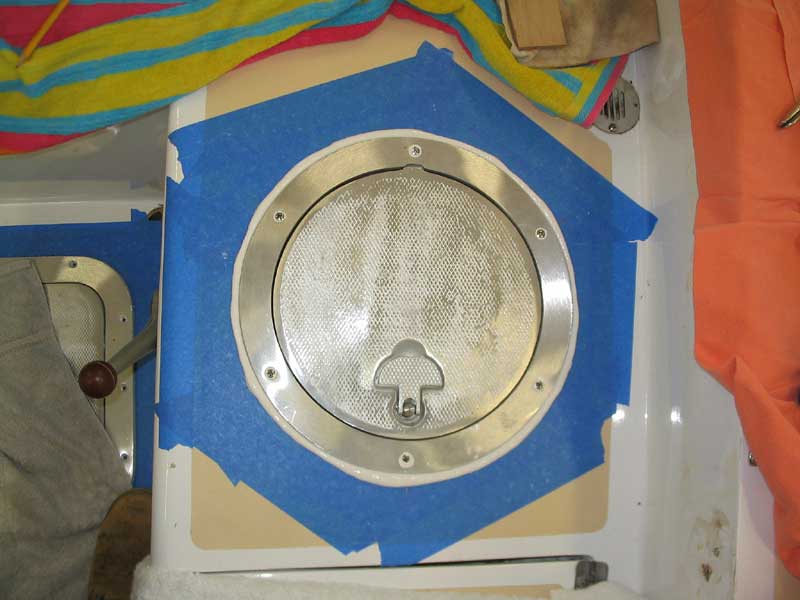
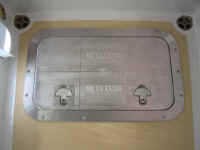 Once
the epoxy had cured, I set the hatch in place temporarily and redrilled the pilot holes for the installation screws, once
again using the Vix bit. Then, I installed the hatch in a heavy bed of 3M 101 polysulfide. The underside of the
hatch flange features two grooves to ensure sound bedding in all areas. I secured the hatch with #10 x 1-1/4"
screws. I cleaned up the excess caulk, removed the tape, and the job was complete. Once
the epoxy had cured, I set the hatch in place temporarily and redrilled the pilot holes for the installation screws, once
again using the Vix bit. Then, I installed the hatch in a heavy bed of 3M 101 polysulfide. The underside of the
hatch flange features two grooves to ensure sound bedding in all areas. I secured the hatch with #10 x 1-1/4"
screws. I cleaned up the excess caulk, removed the tape, and the job was complete. |
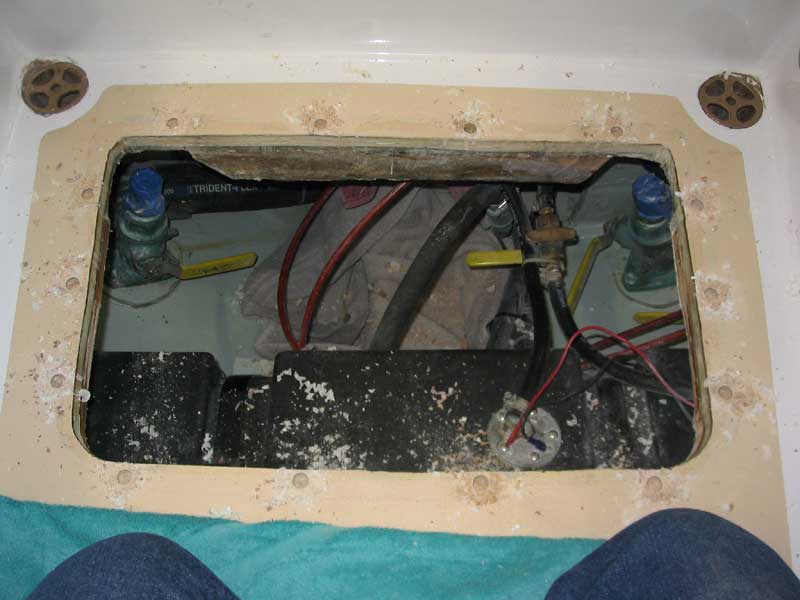
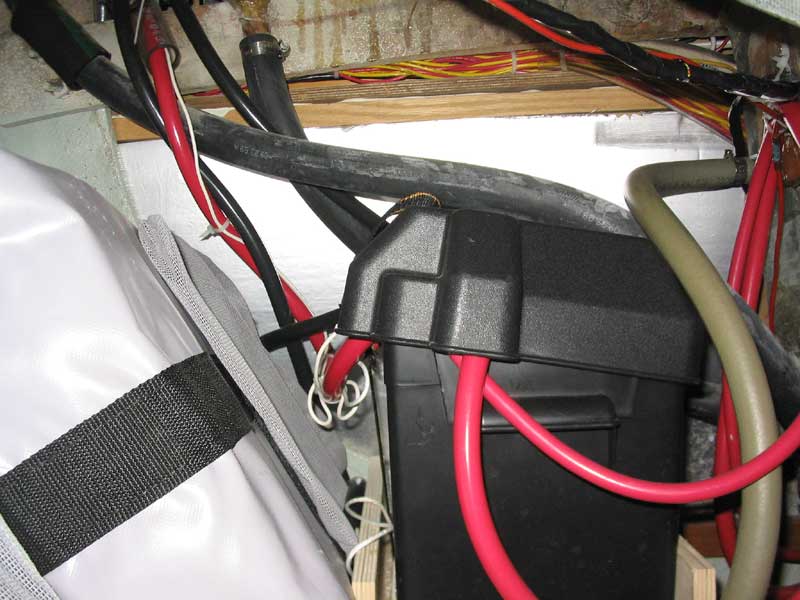
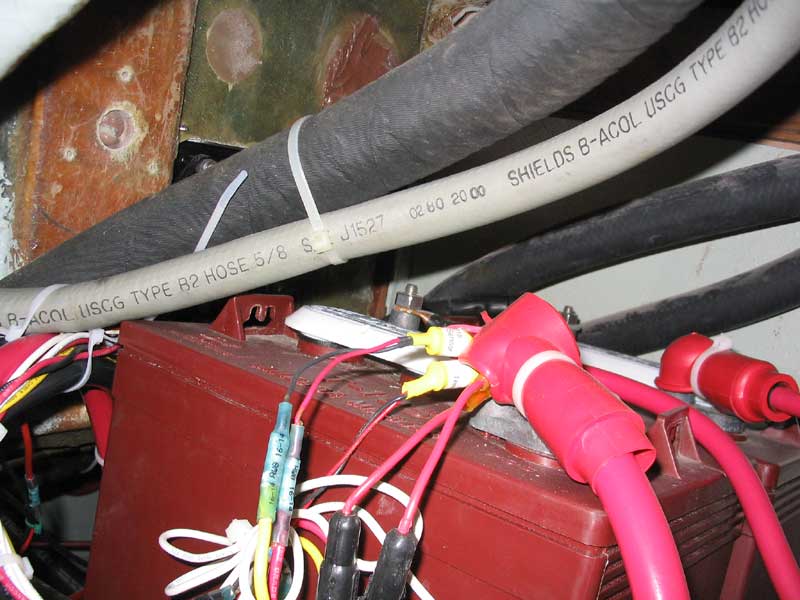
Cockpit Seat Hatch: Battery Access
When rebuilding and reconfiguring the boat, I elected to install my batteries in the cockpit lockers, at the forward
end of each side--a single engine starting battery to port, and two ship's batteries to starboard. The location was
great in many ways: out of the way, yet close to the engine and electrical panel, and in space that would otherwise be
wasted or at least underutilized.
Click here to revisit the original
battery installation.
The same qualities that made the space desirable, however, made it a bear to get the
batteries in and out of the boat--especially the big T-105s on the starboard side. And the location meant that it was
impossible to check the connections and electrolyte level without moving the batteries aft into the open--which was
difficult enough, given that the batteries were stored in deep trays to prevent movement, and the cockpit locker lid molded
scupper arrangement severely limited space to muscle the big batteries around. Add to this the fact that the T-105
golf car batteries have no straps, and one has a recipe for frustration in the making. |
With our short sailing season, I found that it was unnecessary to check the levels during the
season, only doing so in the fall when I removed the batteries for winter storage. But I felt this was less than
ideal, long-term. Finally, when removing the batteries from their trays to open access up for replacing the scuppers,
the last straw broke. Fighting the batteries out one last time, I vowed to never replicate the unpleasantness again. |
|

Port and starboard battery locations, respectively (looking forward)
|
The port side was less of a problem, with its smaller, lighter, single battery, which fits nicely in a pre-bought plastic
battery box. This one is not a big deal to slide aft for inspection or removal, so I decided (for now, at least)
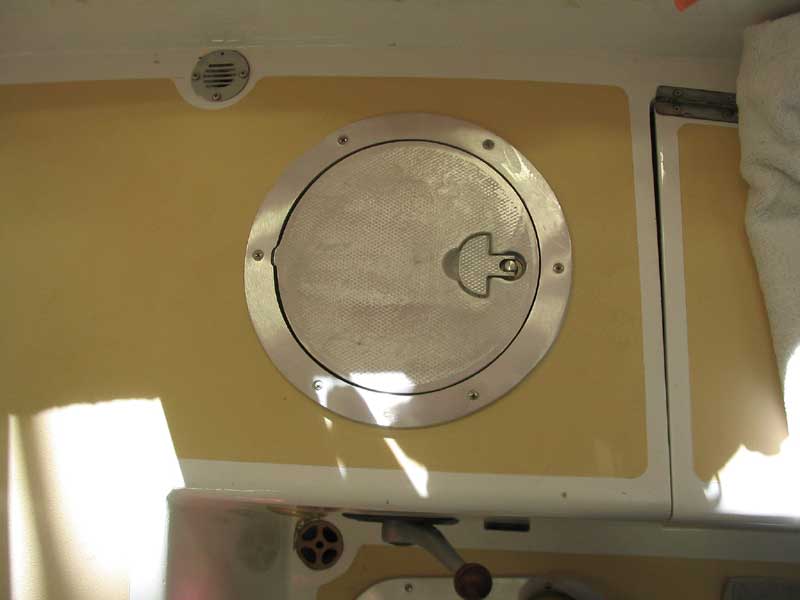
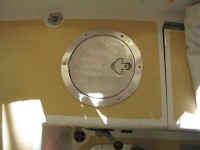
against changing the access on that side. For the starboard side, though, I decided upon a 10" round aluminum
hatch by Bomar, one of similar looks and construction to the larger cockpit hatch. Having upgraded the cockpit sole
hatch to a solid, seaworthy one, I had no interest in installing some flimsy plastic wannabe hatch over the battery
compartment, so I was left with no choice but to spring for the pricey aluminum version. Anyway, I had been eyeing
them for years. Although a day or so earlier I had decided that, despite the chore of removing and installing the
batteries, I probably could get away without installing the hatch, one afternoon I just decided to run out, buy the hatch,
and install it. Such are the inner workings of my mind. |
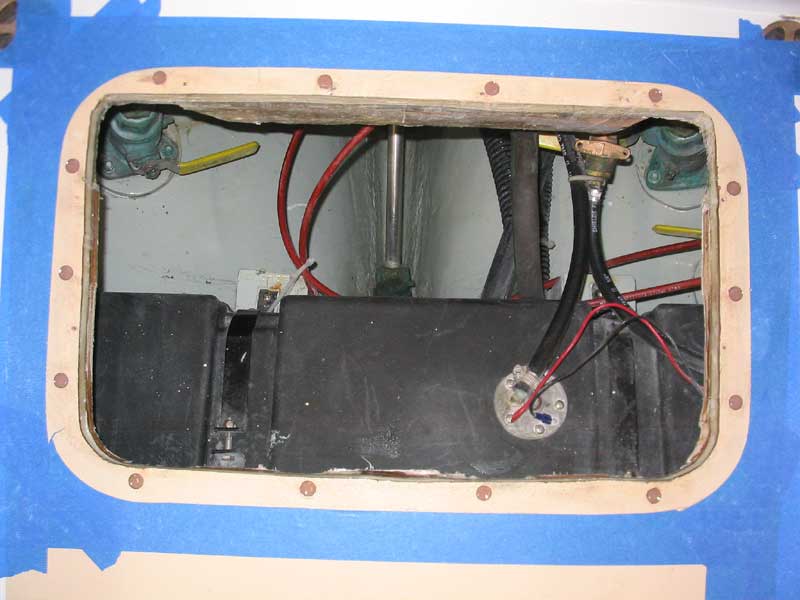
 With
the new hatch on hand, I chose the location for its cutout on the starboard cockpit seat, just forward of the locker
hatch. After double checking the location to ensure that there were no obstructions, I cut the circle out with my
jigsaw. Immediately, I realized with great pleasure what a difference the hatch would make to my life, and to
accessing the area beneath, and I was thrilled. The cost was soon forgotten, as it usually is when a worthy purchase
is made. Fortuitously, my spacing for the hatch ended up symmetrically aligned with the three factory-glassed plywood
supports beneath the cockpit seat, which meant that the screws securing the hatch would have plenty of solid material in
which to bite. Sometimes one gets lucky. With
the new hatch on hand, I chose the location for its cutout on the starboard cockpit seat, just forward of the locker
hatch. After double checking the location to ensure that there were no obstructions, I cut the circle out with my
jigsaw. Immediately, I realized with great pleasure what a difference the hatch would make to my life, and to
accessing the area beneath, and I was thrilled. The cost was soon forgotten, as it usually is when a worthy purchase
is made. Fortuitously, my spacing for the hatch ended up symmetrically aligned with the three factory-glassed plywood
supports beneath the cockpit seat, which meant that the screws securing the hatch would have plenty of solid material in
which to bite. Sometimes one gets lucky. |
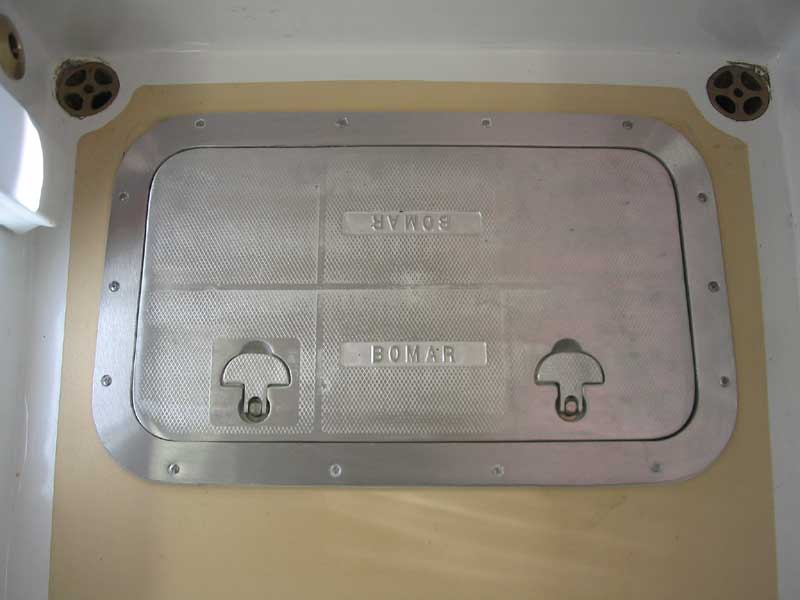
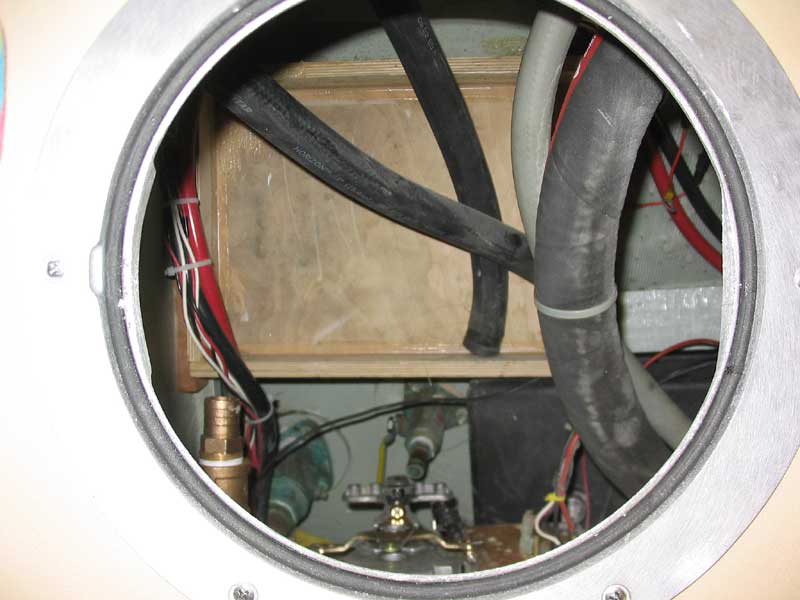
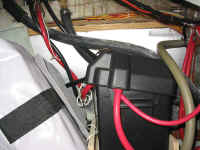
 I
installed the hatch in a thick bed of polysulfide caulk, after outlining the perimeter with masking tape in the usual way,
and secured it with 1" stainless steel screws. The new hatch was not large enough to allow the batteries to be
lowered straight into the locker--one option I had considered--but allows excellent access directly above the battery
location, so that horsing the batteries into place will be possible from both sides. And with the new hatch open,
direct top access to the terminals and vent caps was possible, solving the maintenance and inspection issue once and for
all. As a bonus, the new hatch allowed outstanding access to the inside of the engine control, and to the deck drain
hoses. During the season, we always keep the cockpit cushions in place on deck, so the new hatch will be covered and
out of sight--though the machined aluminum has a sort of institutional beauty of its own. I
installed the hatch in a thick bed of polysulfide caulk, after outlining the perimeter with masking tape in the usual way,
and secured it with 1" stainless steel screws. The new hatch was not large enough to allow the batteries to be
lowered straight into the locker--one option I had considered--but allows excellent access directly above the battery
location, so that horsing the batteries into place will be possible from both sides. And with the new hatch open,
direct top access to the terminals and vent caps was possible, solving the maintenance and inspection issue once and for
all. As a bonus, the new hatch allowed outstanding access to the inside of the engine control, and to the deck drain
hoses. During the season, we always keep the cockpit cushions in place on deck, so the new hatch will be covered and
out of sight--though the machined aluminum has a sort of institutional beauty of its own. |
|
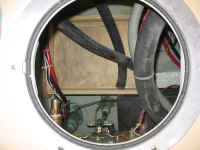
The new hatch in place, left, and looking inside (batteries not installed)
|
|