|
Simple Coaming Seats (The Prototype) |
|
This page was updated
on July 22, 2007
Over the
years, I frequently found that I was wishing for a more
comfortable way to sit on top of the coamings at various
times. The varnished wood coamings look great,
but their narrow tops are not suitable for comfortable
seating, to put it mildly.
I found this desire to sit
on the coamings to be strongest during some of those long,
windless days of powering during cruises, when I'd often put
one of those square throwable cushions on top of the coaming
to allow me to sit there and steer with the tiller
extension, offering a good view and a break from standing;
however, this was far from ideal and ultimately
uncomfortable.
At various times (usually
in the cockpit over drinks), I found myself discussing this
problem with
Nathan Sanborn, and we batted about several
ideas. For whatever reason, nothing ever managed to
come to fruition, partly because we struggled with how to
best support the seat on the coaming, without placing undue
stress on the coaming itself and while maintaining a
wide-enough seat to make the effort worthwhile. |
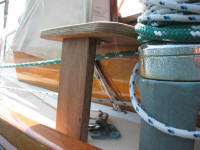
 The
solution was obvious enough, but it took years--and Nathan's
happenstance observation on another boat during 2006--to
arrive there: A vertical leg on the outboard side of
the seat, along with cleats to hold the seat on the coaming.
Sometimes, the answer is so obvious that it's hard to reach,
and this was one of those cases. The "duh" factor was
high, but the right solution isn't necessarily always
immediately forthcoming. The seats in our spy photos
were of basic design, and incorporated a folding leg,
lanyard to secure the seat lest it fall overboard, and a
cushion built into the top. The
solution was obvious enough, but it took years--and Nathan's
happenstance observation on another boat during 2006--to
arrive there: A vertical leg on the outboard side of
the seat, along with cleats to hold the seat on the coaming.
Sometimes, the answer is so obvious that it's hard to reach,
and this was one of those cases. The "duh" factor was
high, but the right solution isn't necessarily always
immediately forthcoming. The seats in our spy photos
were of basic design, and incorporated a folding leg,
lanyard to secure the seat lest it fall overboard, and a
cushion built into the top. |
 Still,
I managed to postpone actually doing anything about these
silly seats for another year, till, with a cruise pending
and with some friendly prompting from Nathan, I decided to
just build something. Rather than worry about getting
things perfect, I elected to build prototype-quality seats
out of some scrap Meranti plywood that I had on hand.
the upcoming cruise would tell the tale as to the success of
the seats, after which I could build something more finished
while accommodating any design changes that might be deemed
necessary. Still,
I managed to postpone actually doing anything about these
silly seats for another year, till, with a cruise pending
and with some friendly prompting from Nathan, I decided to
just build something. Rather than worry about getting
things perfect, I elected to build prototype-quality seats
out of some scrap Meranti plywood that I had on hand.
the upcoming cruise would tell the tale as to the success of
the seats, after which I could build something more finished
while accommodating any design changes that might be deemed
necessary.
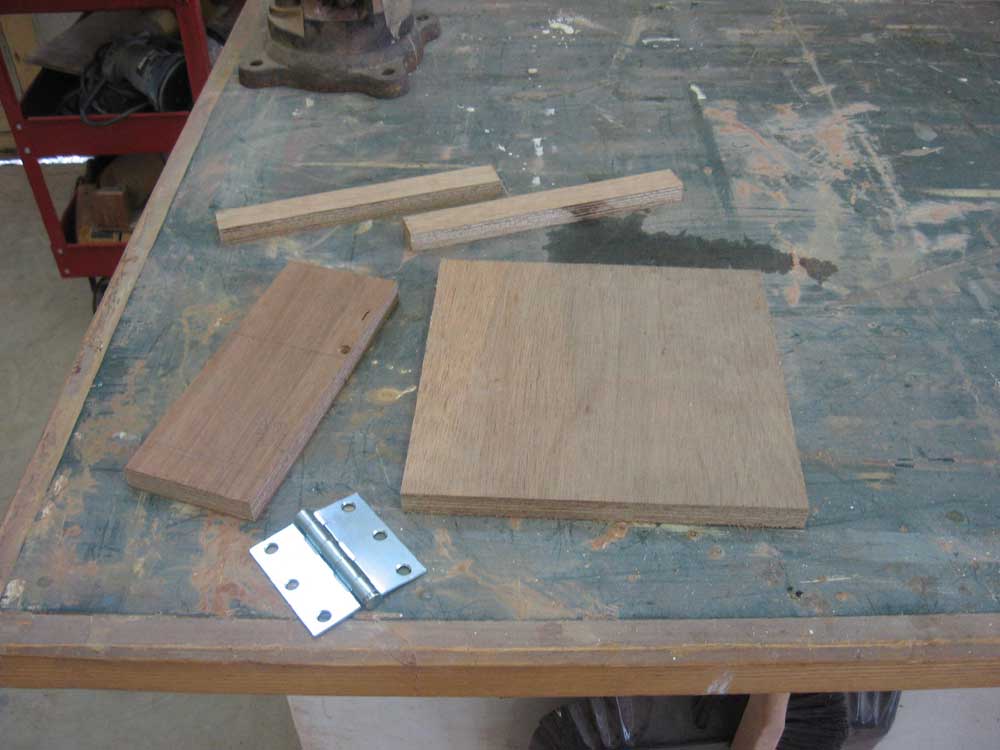
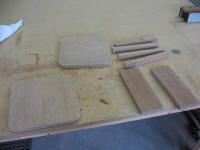
I started with the basics: enough pieces cut out of
the plywood to build two seats. This included two
tops, which ended up rather randomly (and also bound by the
size of the scrap at hand) at 9-5/8" square; plus a leg
piece for each seat, which I left overlong for trimming to
exact size on board; plus four smaller cleats--two for each
seat--that would fit over the coaming to secure the inboard
end of the seat. |
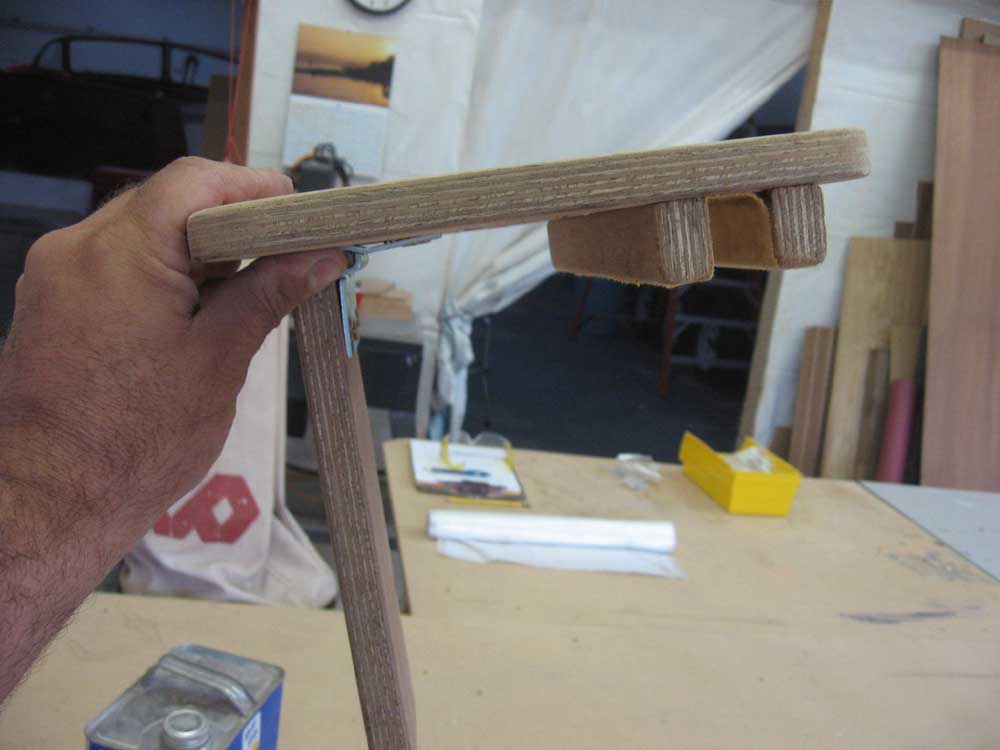
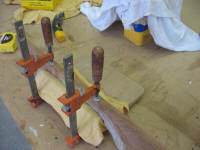
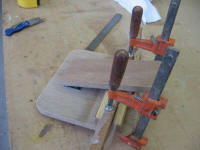
 With
the basic pieces cut, I cut radii on the four corners of the
seat pieces, and then sanded all the pieces with 120 grit to
ease the edges and so forth. Then, I attached the
cleats to the underside with bronze screws, allowing some
overhang on the inboard side of the seat and using a scrap
of 3/4" thick mahogany wrapped in a thickness of jersey
cloth to space the two cleats properly; the cloth simulated
what I planned to install inside the cleats to act as a
protective barrier against the varnished coamings. With
the basic pieces cut, I cut radii on the four corners of the
seat pieces, and then sanded all the pieces with 120 grit to
ease the edges and so forth. Then, I attached the
cleats to the underside with bronze screws, allowing some
overhang on the inboard side of the seat and using a scrap
of 3/4" thick mahogany wrapped in a thickness of jersey
cloth to space the two cleats properly; the cloth simulated
what I planned to install inside the cleats to act as a
protective barrier against the varnished coamings.
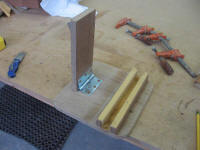
Then, I glued some of the
cloth to the inside with spray adhesive. I found it
necessary to use the mahogany scrap (wrapped in plastic) to
hold the cloth down flat inside the cleats while the glue
cured. Afterwards, I trimmed off the excess material.
|
|
|
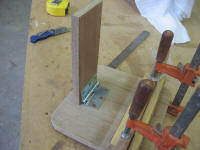
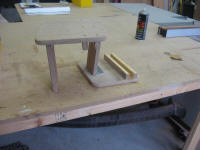
To wrap up construction, I attached the legs to the
undersides of the seats with some basic hinges that I had on
hand. Yes, these hinges are of the zinc-plated
hardware store variety, but I had them on hand and these are
simply prototypes, after all. I did secure the hinges
with bronze screws, though. |
|
|
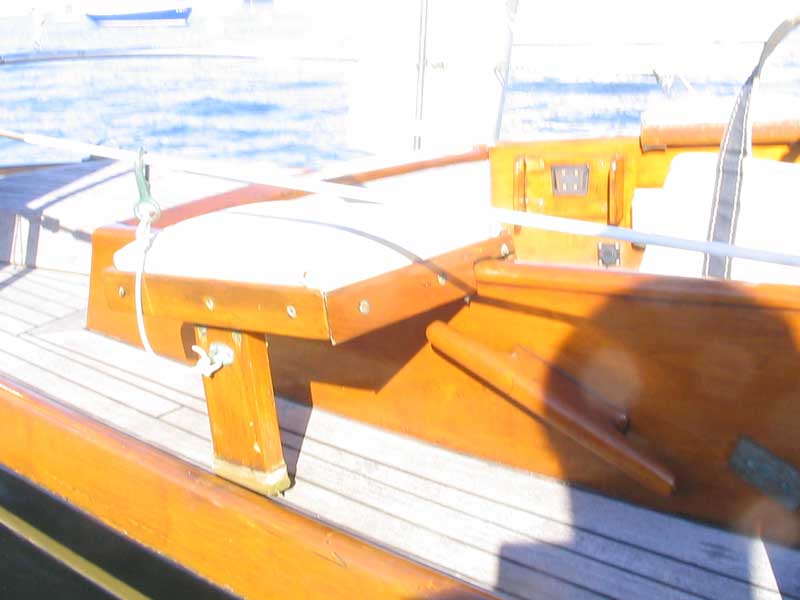
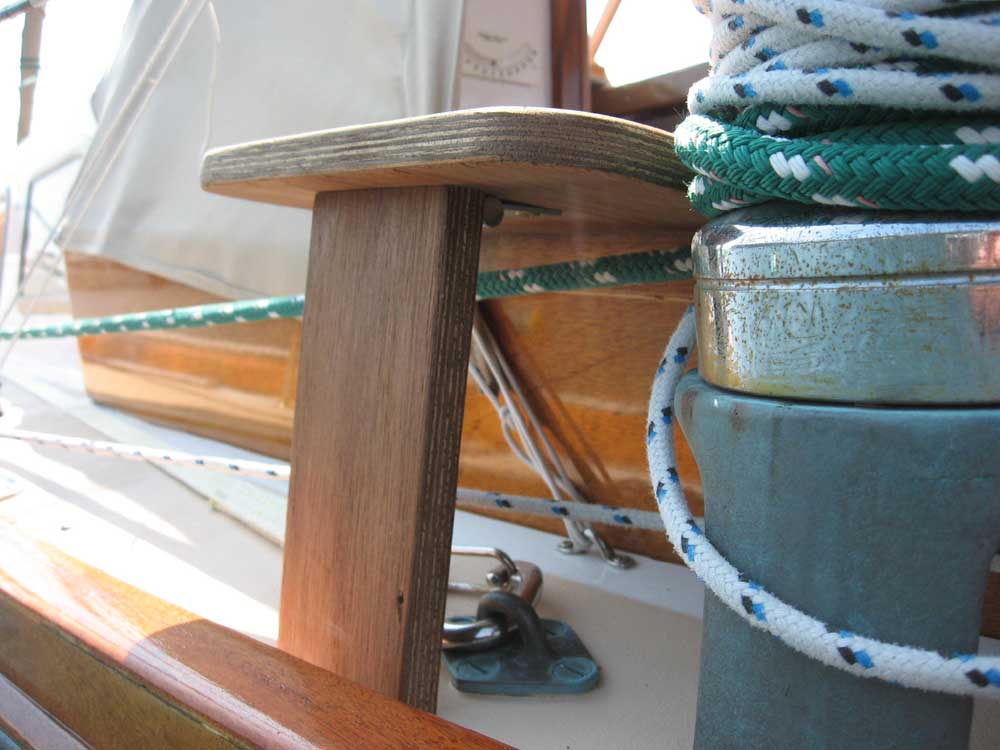
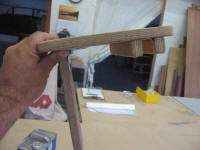
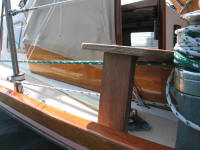
Later, I test-fit the seats on the boat, and cut the leg to
an appropriate length. These prototype seats worked
well, but sorely needed a cushion. With the basic
design figured out, though, it ought to be easy to make a
more finished and effective version. |
|
|
|