|
Building a Mahogany Boathook
This page was last updated
on 20 November 2003.
|
|
 A
proper boathook is a pleasing addition to the exterior of any
boat. A boring, lousy aluminum or plastic boathook, as commonly
seen, is not a pleasing aesthetic addition, though these units do the
job for which they are designed. I had one of the standard
telescoping aluminum hooks, which worked fine, but was ugly. As
tends to happen, the telescoping feature began to fail, locking the hook
into a set position. To keep the hook out of the way, yet ready
for use, I stored it along the starboard lower shroud, where it did
little to enhance the overall look of the boat. A
proper boathook is a pleasing addition to the exterior of any
boat. A boring, lousy aluminum or plastic boathook, as commonly
seen, is not a pleasing aesthetic addition, though these units do the
job for which they are designed. I had one of the standard
telescoping aluminum hooks, which worked fine, but was ugly. As
tends to happen, the telescoping feature began to fail, locking the hook
into a set position. To keep the hook out of the way, yet ready
for use, I stored it along the starboard lower shroud, where it did
little to enhance the overall look of the boat.
Wooden boathooks with
bronze tips are much more attractive, of course, A pre-made
version is advertised in the backs of sailing magazines for the
ridiculous price of $150 or so, which of course is far too high for
consideration. |
|
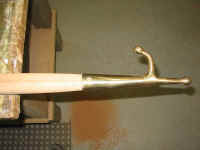
A couple years back, I purchased a bronze
boathook tip on a whim while wandering through the store. It was
only around $25 or something. Almost comically, creating a pole to
go with the hook became one of those "I kept meaning to"
projects. Many people use wooden curtain rods or dowels to secure
the hook, which is OK--but the solid wood of the rods tends to bend and
warp, and just doesn't hold up that well. I looked into purchasing
dowel material from a company that I used to once buy teak dowels, but
their prices were high, and to prevent damage to the material they would
only ship a minimum order of two lengths, though I only wanted
one. And it was too expensive for that.
After some thought and
discussion with fellow sailors, I decided to laminate up a wooden blank
out of mahogany and build the pole myself. Because I don't have a
lathe--and even if I did it wouldn't be long enough to turn a
boathook--I, after consultation with others, decided that a square blank
with widely rounded corners would be not only sufficient, but even
preferable.
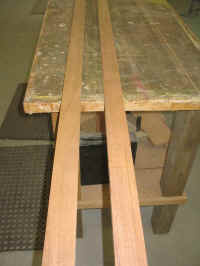 With
mahogany on hand, I finally turned to the boathook project after about
two years of looking at my bronze hook end and tolerating my junky
boathook on the boat. I planed a rough mahogany board till it was
smooth on each side, not worrying about the final thickness (it ended up
at about 7/8" in thickness). As it happened, the board I
pulled from the rack featured tight, dense grain and a very pleasing
deep mahogany color--unlike some of the other stock I have that is
lighter in both color and texture. The board featured a deep split
along one edge, but there was plenty of material even after ripping off
the damaged section. I cut the remaining piece into two lengths
approximately 2" in width, which is more than large enough for the
boathook (the ultimate diameter will end up as somewhere around
1-1/2"). With
mahogany on hand, I finally turned to the boathook project after about
two years of looking at my bronze hook end and tolerating my junky
boathook on the boat. I planed a rough mahogany board till it was
smooth on each side, not worrying about the final thickness (it ended up
at about 7/8" in thickness). As it happened, the board I
pulled from the rack featured tight, dense grain and a very pleasing
deep mahogany color--unlike some of the other stock I have that is
lighter in both color and texture. The board featured a deep split
along one edge, but there was plenty of material even after ripping off
the damaged section. I cut the remaining piece into two lengths
approximately 2" in width, which is more than large enough for the
boathook (the ultimate diameter will end up as somewhere around
1-1/2").
|
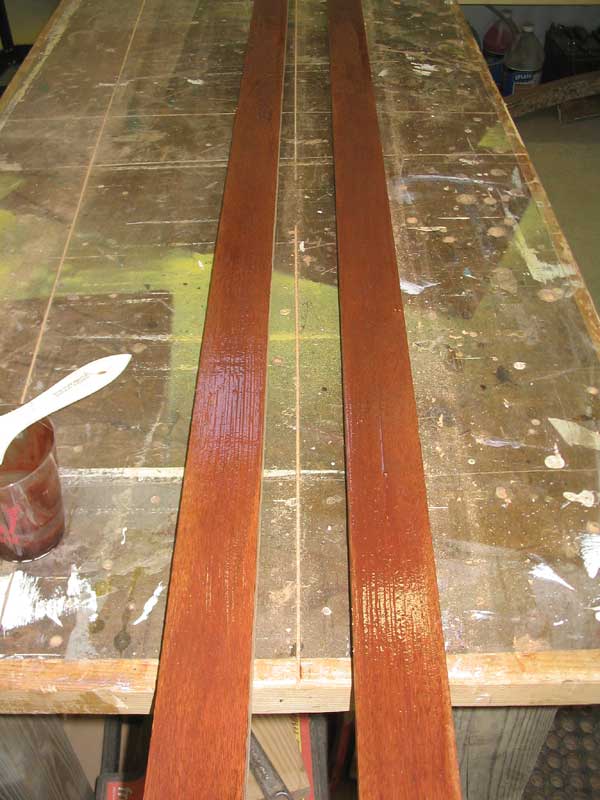
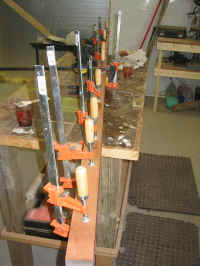
I glued the two pieces together on their
flats to create a blank that was about 2" in width by well over
1-1/2" in thickness. I glued the boards with resorcinol glue,
which, with its red color, is a good choice for use with mahogany.
It's also very strong and waterproof. I like using it instead of
epoxy for many smaller projects. I applied a coat of the glue to
each board, then clamped them together, trying to keep the edges flush
on one side so as to make final sizing easier.
 |
|
|
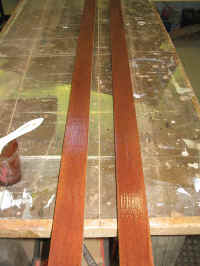
After allowing the glued-up blank to cure overnight, I unclamped it and
continued with the fabrication. With one straight edge, it was
easy to saw the blank to the proper width (1-1/2"), and then to square
it off in the other direction. I ended up with a blank that was
1-1/2" square and over eight feet long to 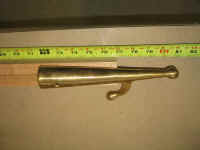 tart.
When sawing the blank in the direction parallel to the glue line between
the two boards, I sawed equal amounts off each side, so the glue line
remained in the middle of the blank. tart.
When sawing the blank in the direction parallel to the glue line between
the two boards, I sawed equal amounts off each side, so the glue line
remained in the middle of the blank.
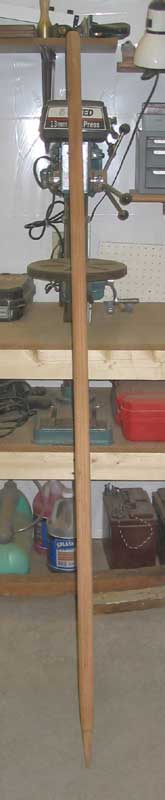
Next, I mocked up the
hook end to determine how long I wanted the boathook to be. I
finally settled on six feet of exposed handle beyond the hook, and an
overall length of about 80". This seemed to be plenty long
without being overwhelming or awkward to handle. On a 28' boat
with only 8' of beam, I think this is about as big as a one-piece
boathook can get without being ridiculous. I cut the excess off
with my miter box, leaving me with a 2' blank with which to practice
ultimate boathook shape. |
|
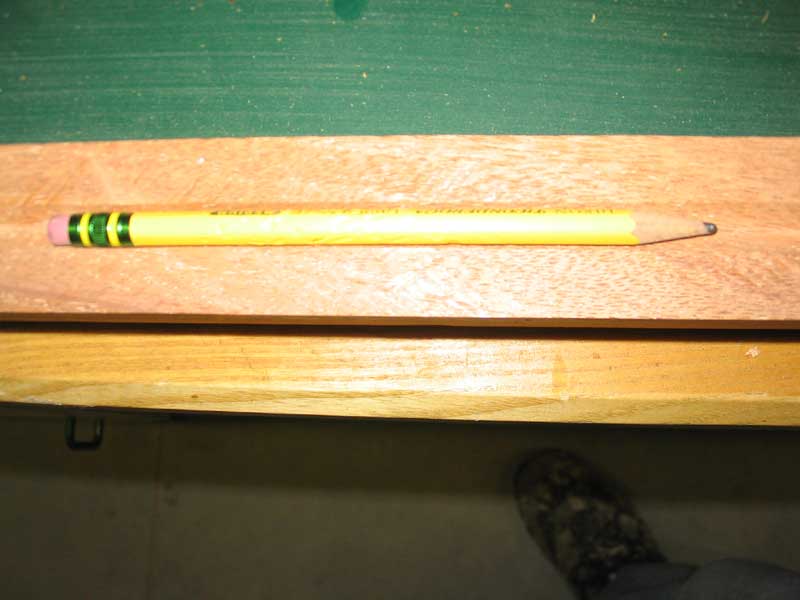
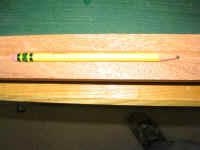 I
continued by working on milling the blank into the shape I wanted.
Using the scrap from the end of the blank, I set up my large router
table with a cove bit and adjusted the fence till it cut down the center
of one side of the blank. I set the depth so that the bit left a
shallow groove in the side of the blank. When I was satisfied with
the settings, I ran the actual blank over the router table, plowing out
the groove on one side. I stopped the groove short of each
end. When installed, the hook part of the bronze end will be in
line with this groove, so it will be easy to tell which direction the
hook is facing even in the dark. And the groove helps with a sure
grip on the pole, too. (The pencil is there to help show the
groove.) I
continued by working on milling the blank into the shape I wanted.
Using the scrap from the end of the blank, I set up my large router
table with a cove bit and adjusted the fence till it cut down the center
of one side of the blank. I set the depth so that the bit left a
shallow groove in the side of the blank. When I was satisfied with
the settings, I ran the actual blank over the router table, plowing out
the groove on one side. I stopped the groove short of each
end. When installed, the hook part of the bronze end will be in
line with this groove, so it will be easy to tell which direction the
hook is facing even in the dark. And the groove helps with a sure
grip on the pole, too. (The pencil is there to help show the
groove.)
|
|
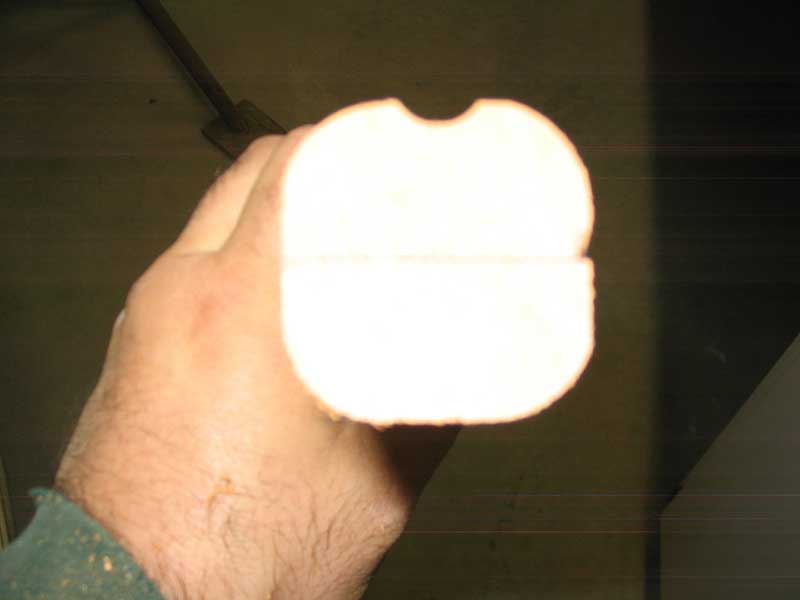
 With
the groove milled, I changed the bit in the router to a 3/8"
roundover bit and, after some adjustment and trial runs with the scrap,
ran the main blank through, rounding over all four corners. The
end result was a beefy squareish-roundish handle with smoothly rounded
edges and a pleasing finger groove. With
the groove milled, I changed the bit in the router to a 3/8"
roundover bit and, after some adjustment and trial runs with the scrap,
ran the main blank through, rounding over all four corners. The
end result was a beefy squareish-roundish handle with smoothly rounded
edges and a pleasing finger groove.
|
|
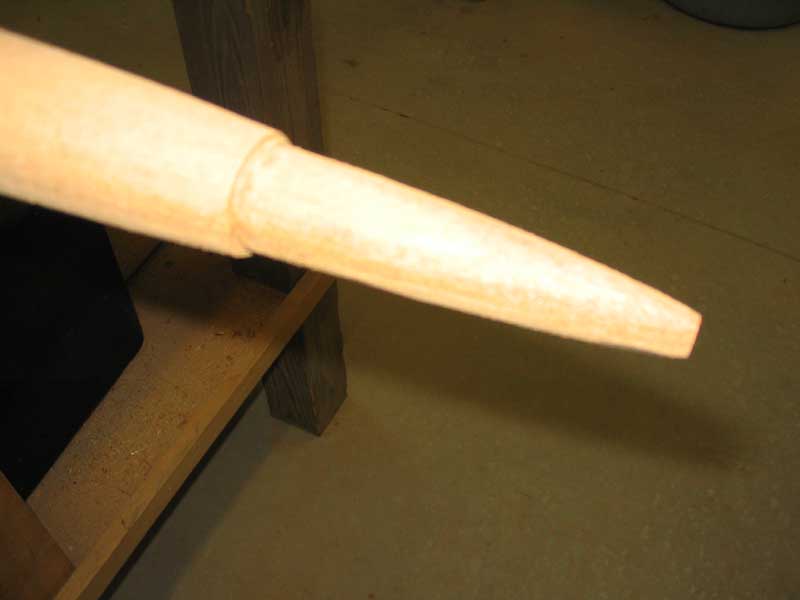
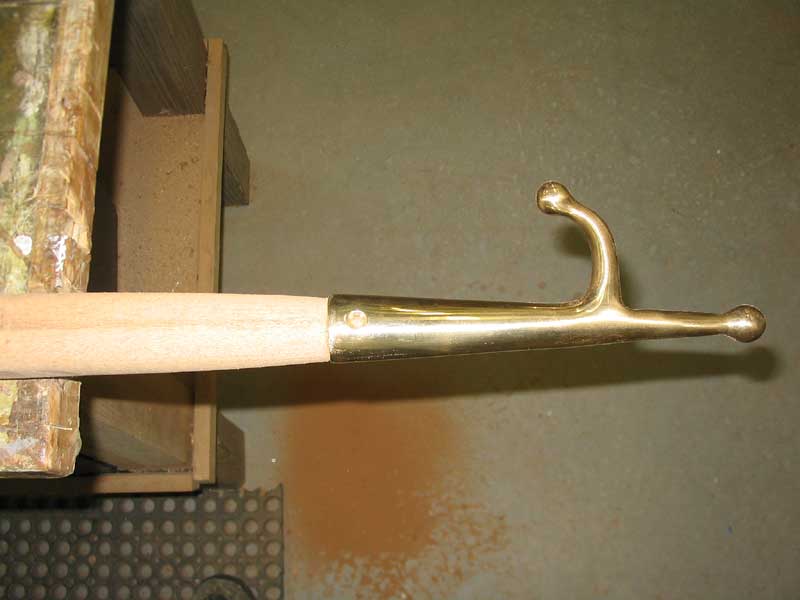
 To
fit the hook on the end of the blank, I sanded the profile into roughly
the right shape, tapering the wood down evenly on all sides so that I
could insert an appropriate length into the hollow hook end. I
left a small shoulder on the top end of the taper, so that the hook fit
more or less flush and tightly with the exposed part of the
handle. With that done, I sanded the entire blank, smoothing all
the rounded corners and creating a rounded top end opposite the
hook. There was a worm hole or something that was exposed on one
of the cut edges, so I mixed up some epoxy thickened with mahogany
sawdust and a bit of cabosil, and pressed it into the opening, and set
the handle aside to dry overnight before finish sanding it and beginning
the varnish application. To
fit the hook on the end of the blank, I sanded the profile into roughly
the right shape, tapering the wood down evenly on all sides so that I
could insert an appropriate length into the hollow hook end. I
left a small shoulder on the top end of the taper, so that the hook fit
more or less flush and tightly with the exposed part of the
handle. With that done, I sanded the entire blank, smoothing all
the rounded corners and creating a rounded top end opposite the
hook. There was a worm hole or something that was exposed on one
of the cut edges, so I mixed up some epoxy thickened with mahogany
sawdust and a bit of cabosil, and pressed it into the opening, and set
the handle aside to dry overnight before finish sanding it and beginning
the varnish application.
Work Remaining: 10
coats of varnish. Photos of the completed boathook will follow in
due time. |
 |
|