|
The Hull:
Preparation and Surfacing (Page 2)
This page was last updated on 30 January 2002
Hull Preparation Page 1
| Hull Painting
|
|
STEP 4: 5
March 2000
 With
the partially (initially) sanded, it was time to go over the entire surface with a
fine tooth comb to look for gouges and dings that needed to be sanded out, as
well as to look for smaller scratches and stress cracks that should be removed
prior to painting. One of the caveats of high gloss topside
paints--especially liner polyurethane (like Awlgrip) in dark colors--is that
they highlight all blemishes that there might be on the surface.
Therefore, extra care must be taken to ensure that they are all repaired.
In Glissando's case, this meant grinding these areas out so that they can be
filled with epoxy putty and sanded smooth. There were numerous areas that
needed attention, between gouges, stress cracks, and smaller blemishes--as well
as the poorly filled screwholes along the waterline and boottop, as mentioned
earlier. I spent a fair bit of time going over the hull closely, marking
the areas first, then grinding them out one at a time. Other areas may
come to light later as I continue the sanding of the hull through various
grits. One of the techniques used to highlight these areas later will be
to lightly spray a mist coat of dark laquer over the hull; when the hull is
sanded, the dark laquer will remain in any low spots that require additional
attention. I'll post more on this technique when I get to that part of the
project. With
the partially (initially) sanded, it was time to go over the entire surface with a
fine tooth comb to look for gouges and dings that needed to be sanded out, as
well as to look for smaller scratches and stress cracks that should be removed
prior to painting. One of the caveats of high gloss topside
paints--especially liner polyurethane (like Awlgrip) in dark colors--is that
they highlight all blemishes that there might be on the surface.
Therefore, extra care must be taken to ensure that they are all repaired.
In Glissando's case, this meant grinding these areas out so that they can be
filled with epoxy putty and sanded smooth. There were numerous areas that
needed attention, between gouges, stress cracks, and smaller blemishes--as well
as the poorly filled screwholes along the waterline and boottop, as mentioned
earlier. I spent a fair bit of time going over the hull closely, marking
the areas first, then grinding them out one at a time. Other areas may
come to light later as I continue the sanding of the hull through various
grits. One of the techniques used to highlight these areas later will be
to lightly spray a mist coat of dark laquer over the hull; when the hull is
sanded, the dark laquer will remain in any low spots that require additional
attention. I'll post more on this technique when I get to that part of the
project.
|
|
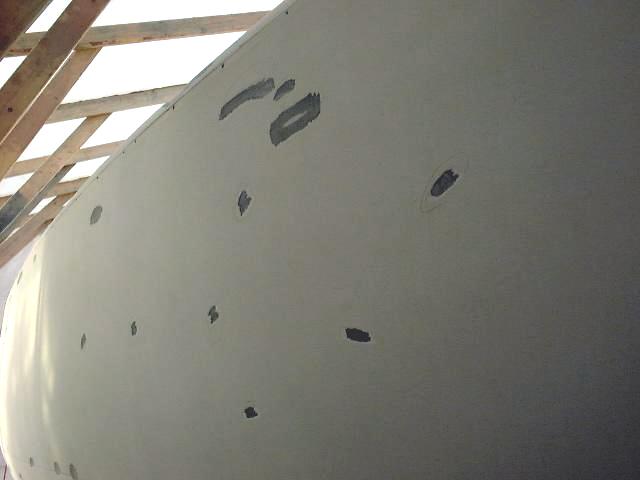
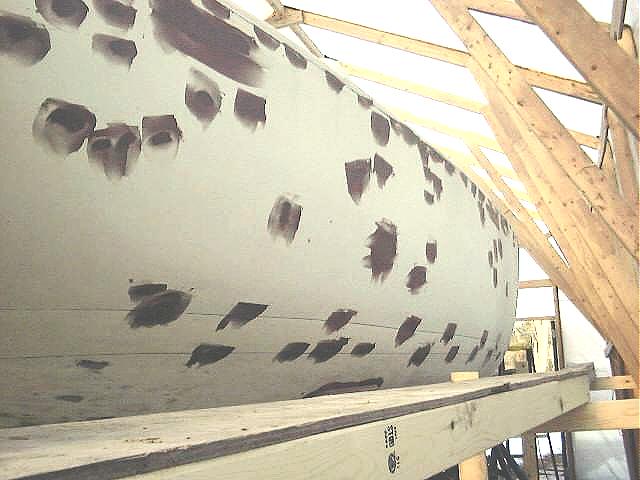
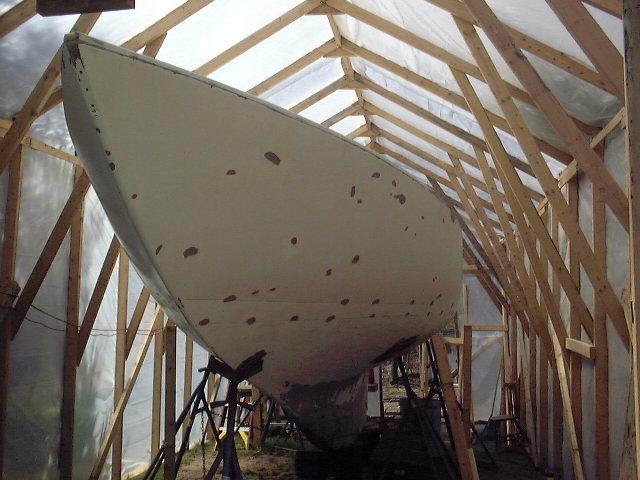
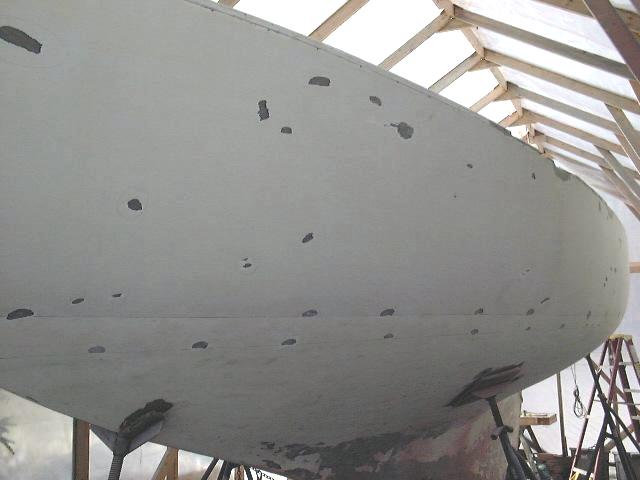 This
photo (left) shows the port side of the hull after grinding out the numerous
dings present. You can see the fairly regular screwholes along the top and
bottom of the boottop at the waterline; these were present on both sides of the
hull This
photo (left) shows the port side of the hull after grinding out the numerous
dings present. You can see the fairly regular screwholes along the top and
bottom of the boottop at the waterline; these were present on both sides of the
hull
|
|
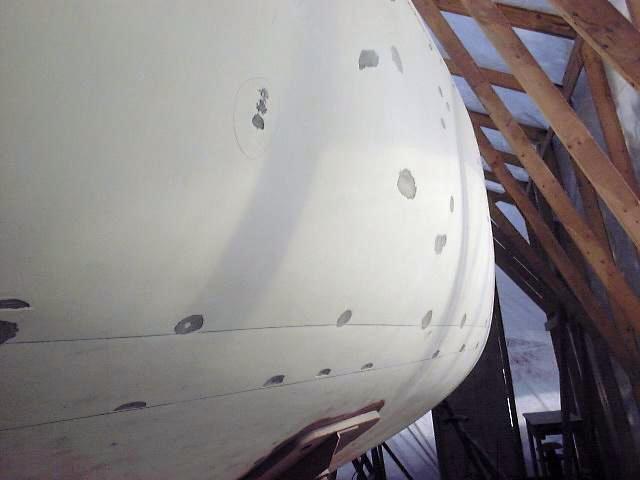
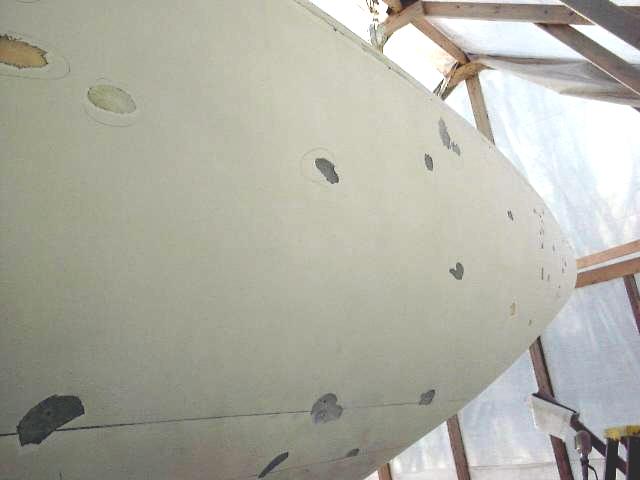
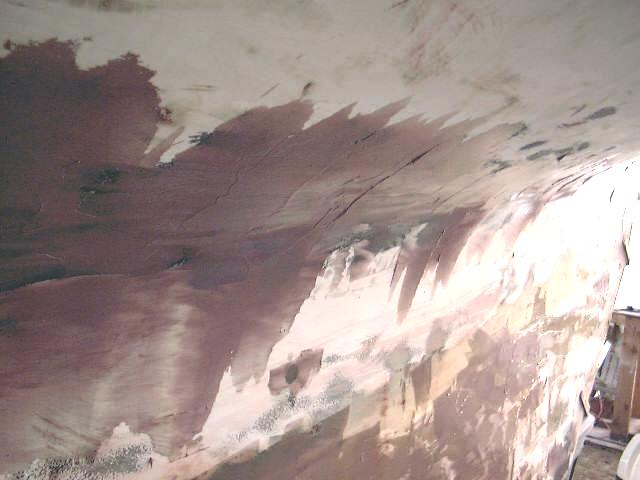
 You can see how many areas needed to be ground
out. This is the starboard quarter, just forward of the
transom. Most of the areas ground out were fairly shallow gelcoat
scratches, the type that may have been caused by docking accidents and
scrapes. They all needed to be ground out deep and wide enough so that any
filler will have a good area to stick to. Next, I'll feather them out a
little more when I resand the hull with 120 grit a little later on; I will then
fill them with epoxy putty, sanding and refilling as necessary till they're flush
with the surrounding area. You can see how many areas needed to be ground
out. This is the starboard quarter, just forward of the
transom. Most of the areas ground out were fairly shallow gelcoat
scratches, the type that may have been caused by docking accidents and
scrapes. They all needed to be ground out deep and wide enough so that any
filler will have a good area to stick to. Next, I'll feather them out a
little more when I resand the hull with 120 grit a little later on; I will then
fill them with epoxy putty, sanding and refilling as necessary till they're flush
with the surrounding area.
|
|


|
|
STEP 5:
March 8, 2000
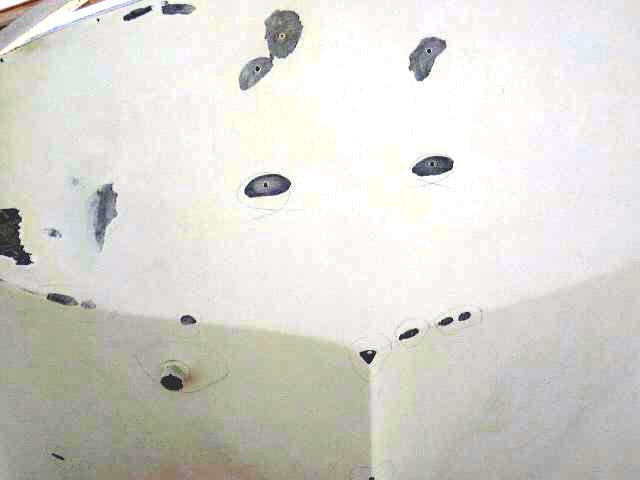
 With the gouges and cracks ground out to a
suitable depth, it was time to apply the initial coat of epoxy putty to begin to
fair these out. I used the same mixture I used on the deck (West System
with #403 and #406 mixed in) to fill these areas. I overfilled slightly,
as the kicked mixture is fairly easy to sand. I'm sure some additional
filling will be required to fair these in perfectly, but that will occur a
little later. With the gouges and cracks ground out to a
suitable depth, it was time to apply the initial coat of epoxy putty to begin to
fair these out. I used the same mixture I used on the deck (West System
with #403 and #406 mixed in) to fill these areas. I overfilled slightly,
as the kicked mixture is fairly easy to sand. I'm sure some additional
filling will be required to fair these in perfectly, but that will occur a
little later.
The next step after this initial fairing, to
occur in a couple days, will be to spray the entire hull with a "mist
coat" of spray paint. This is a very light coat that just mists the
surface with color. The idea behind this is to highlight any low spots
there are that will require filling; when the misted hull is sanded, the color
remains in the low spots, making them easy to see and repair.
|
|
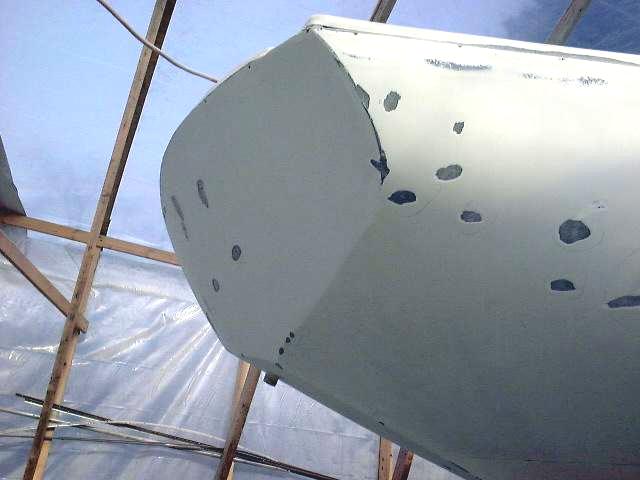
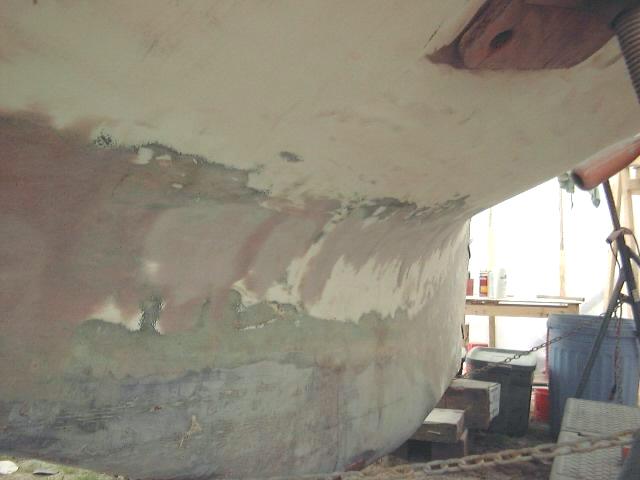
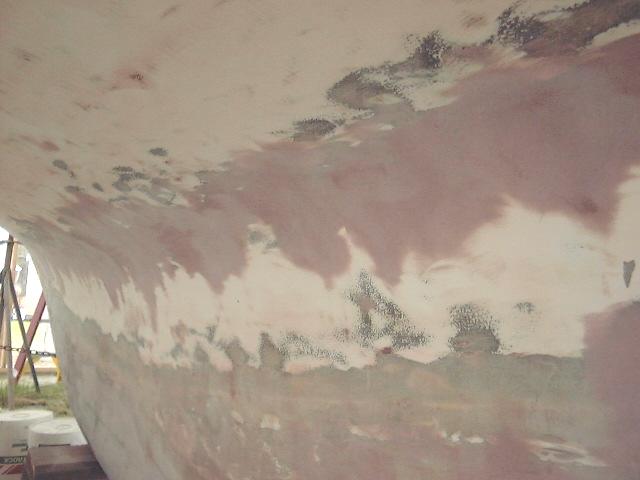
 I
also began filling the areas in the keel that I had ground out when I stripped
the bottom. These areas are concentrated on the port side along the turn
of the bilge, but there were a few areas on the starboard side as well.
These areas will require at least one more application of fairing compound to
smooth out completely and fair with the rest of the hull, with sanding in
between coats. The photo shows the port side at about amidships. I
also began filling the areas in the keel that I had ground out when I stripped
the bottom. These areas are concentrated on the port side along the turn
of the bilge, but there were a few areas on the starboard side as well.
These areas will require at least one more application of fairing compound to
smooth out completely and fair with the rest of the hull, with sanding in
between coats. The photo shows the port side at about amidships.
|
|
March 14-16, 2000
 Once the initial coat was cured, I sanded the spots flush with the surrounding
hull (80 grit on topsides, 40 grit on the bottom and keel). Many of the
areas were deep enough that they required a second coat to fully fill, so I
mixed more epoxy and filled these
spots again. The next day, I was able to sand these spots again, which
resulted in a smooth, flush surface. There is much more sanding to come,
but the major filling is done with. As I sand the hull again and again
with various grits, using a mist coat as necessary, other low spots that require
filling may appear and will be filled at that point. Once the initial coat was cured, I sanded the spots flush with the surrounding
hull (80 grit on topsides, 40 grit on the bottom and keel). Many of the
areas were deep enough that they required a second coat to fully fill, so I
mixed more epoxy and filled these
spots again. The next day, I was able to sand these spots again, which
resulted in a smooth, flush surface. There is much more sanding to come,
but the major filling is done with. As I sand the hull again and again
with various grits, using a mist coat as necessary, other low spots that require
filling may appear and will be filled at that point.
|
|
 April
18, 2000 April
18, 2000
In the past month I haven't had to do
much to the hull. There is still final sanding--I'll be moving the staging
soon and resanding the hull with 120 grit soon--but not much else has needed to
be done while I concentrated on finishing the deck fairing and sanding.
During this time, however, I did finish the filling and fairing of the turn of
the bilge at the keel. Filling this area took multiple coats of compound
and much sanding.
|
|
|
|
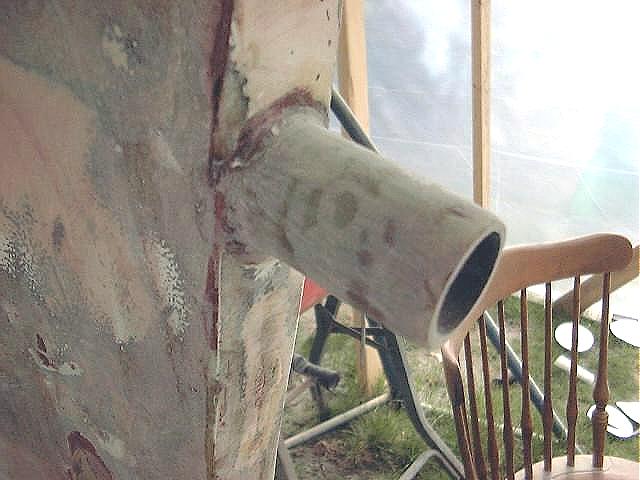
 I
also repaired the stern tube, which had
several holes in it where set screws for the cutless bearing had been installed
over the years. I filled the holes with thickened epoxy, being careful not
to intrude on
the inside of the cylinder, then wrapped the outside of the tube
with several layers of fiberglass cloth. This should be ready for the engine
installation now. I
also repaired the stern tube, which had
several holes in it where set screws for the cutless bearing had been installed
over the years. I filled the holes with thickened epoxy, being careful not
to intrude on
the inside of the cylinder, then wrapped the outside of the tube
with several layers of fiberglass cloth. This should be ready for the engine
installation now.
Work remaining: moving the staging down
so I can complete the sanding of the hull with 120 grit, and attending to the
transom, which has not been filled or faired yet.
STEP 6:
April 24, 2000
After completing
the bulk of the work on the deck, I lowered the staging so I could work on the
hull a little more. Because of the way the staging had been built to work
on the decks, I could not get to the transom, so I set up staging there, too, as
there is a fair bit of filling and fairing to be done.
|
|
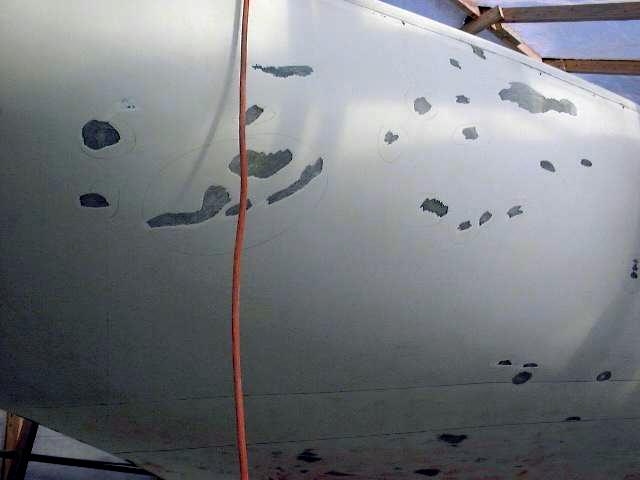
That done, I
sanded the transom again, and ,after cleaning with acetone, filled the gouged
out areas with thickened epoxy. I then went ahead and sanded the hull with
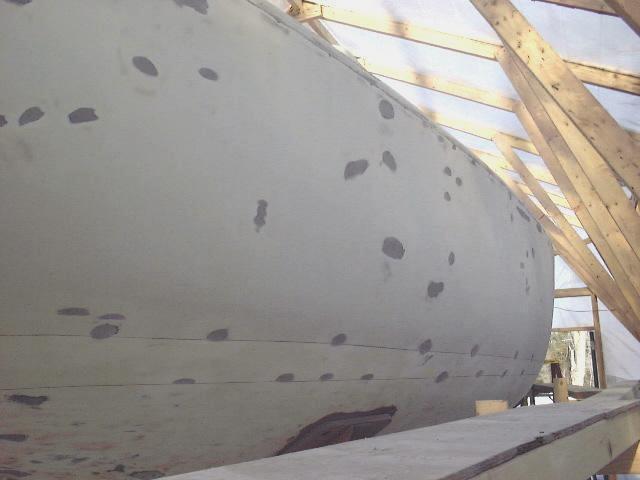
120 grit on the DA sander. After brushing and  wiping
off the hull, I sprayed a mist coat of spray paint over the hull (right).
The mist coat acts as a sanding guide. I then sanded the hull with 80 grit
on my small palm sander. I believe these multiple steps, as well as
reverting to a coarser grit again, are necessary to ensure that all swirl marks
are removed. With a dark hull color, this is very important; if I were
using white or another light color, it would probably not be necessary. wiping
off the hull, I sprayed a mist coat of spray paint over the hull (right).
The mist coat acts as a sanding guide. I then sanded the hull with 80 grit
on my small palm sander. I believe these multiple steps, as well as
reverting to a coarser grit again, are necessary to ensure that all swirl marks
are removed. With a dark hull color, this is very important; if I were
using white or another light color, it would probably not be necessary.
I had good luck
with the mist coat when I painted my Ensign. This time, however, it was a
real pain to sand, since the gelcoat is so porous that the paint kind of soaked
in a bit, requiring a lot of sanding pressure. I think I will forgo the
mist coat when I move to 120 and 220 grits.
With the 80-grit
sanding completed, I moved on to 120 grit, again on the palm sander. The
hull is now very smooth, with only a few small dings that I marked as I went
along. The dings are barely noticeable, but with expensive paint it pays
to be picky in the preparation. I'll go back and fill these areas with
putty soon, and carefully sand them out.
At this point I'm
trying to finish all the sanding and grinding, so that I can clean up the boat
and work area. My goal had been to finish by the end of April, but a
stretch of cold, raw, lousy weather pretty much stopped work for nearly a week,
so I've extended my deadline, reluctantly, for another week or so. The
initial fill on the transom came out well, and I only had to spot fill a couple
small areas. These areas were resanded the next day.
|
|
 Finally,
I was able to clean the boat and shed. Removing the huge amount of dust
has made a profound difference in the atmosphere in the boat and shed, and will
make further work on other projects more enjoyable. Finally,
I was able to clean the boat and shed. Removing the huge amount of dust
has made a profound difference in the atmosphere in the boat and shed, and will
make further work on other projects more enjoyable.
With all the final filling and sanding done,
with the exception of pinhole and spot fairing, the hull is ready for primer. I may
do this sooner than later. Final painting, however, will occur later
on--I'm undecided exactly when, but it will be after some heavy work is done,
like installing the engine and installing the wooden toerail. Obviously, I don't
want to risk scarring my new paint job.
|
|
August, 2000
I have purchased the paint and supplies
necessary for the hull and deck, and will be beginning shortly! First,
however, I went over the hull with a fine tooth comb looking for pinholes or
other imperfections. These were filled with Interlux epoxy surfacing
compound, a fine, creamy filler designed for final filling.
The hull has been sanded one last time with
120 grit and is now ready for primer.
Please click here to continue with the
hull project (step 7).
|
|