|
The Head:
A New Sink and Vanity
This page was last updated on
19 March 2002
|
|
 Several
other Tritons have been retrofitted with a small sink in the head, opposite the
toilet area. We thought this was a good idea and decided to follow
suit. The hanging locker is pretty much a waste of space, so it won't be
missed. Several
other Tritons have been retrofitted with a small sink in the head, opposite the
toilet area. We thought this was a good idea and decided to follow
suit. The hanging locker is pretty much a waste of space, so it won't be
missed.
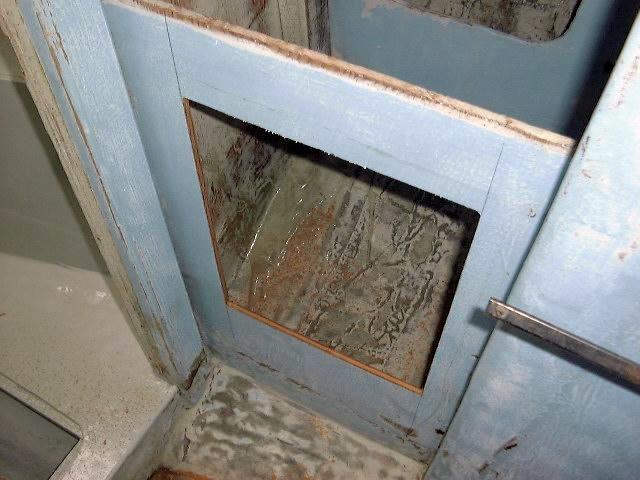
The first thing to do was to cut an
opening in the existing hanging locker front, which will eventually be covered
with a new cabinet door. I measured the desired opening, drilled 1/2"
holes at the four corners, and cut out the plywood with a jigsaw.
|
|
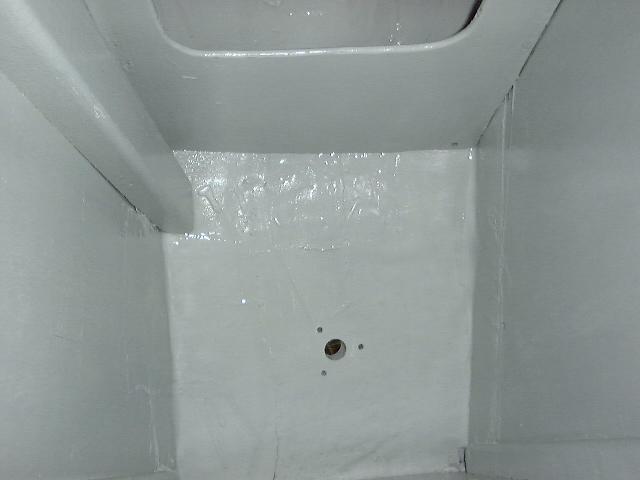 Next, I painted out the lockers behind the
vanity, as well as the entire area that will eventually be enclosed. I
also installed the new through hull fitting and seacock
that will service the drain for the new sink. Next, I painted out the lockers behind the
vanity, as well as the entire area that will eventually be enclosed. I
also installed the new through hull fitting and seacock
that will service the drain for the new sink.
|
|
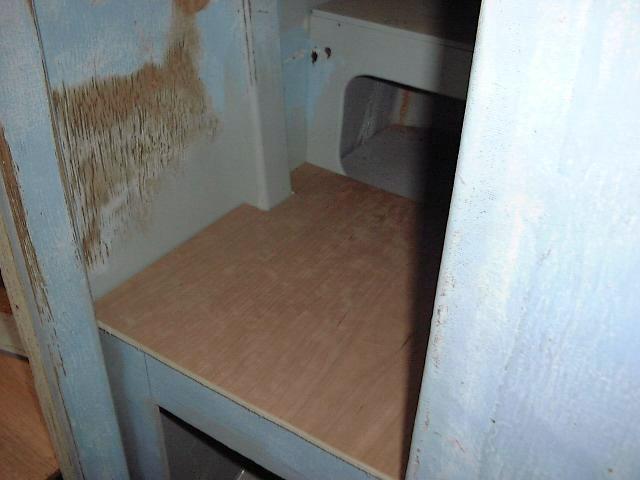 The
next step was to cut and fit a piece of scrap 1/2" plywood for the
countertop. (Yes, that's Cherry, but it's what I have around.) Using
a level, I transferred the height of the existing front to the rear of the
cabinet and installed a cleat there to support the countertop. I then
measured and cut as necessary the plywood to fit. The countertop is now
loosely installed; I will be installing Formica on the bulkheads in the next
couple of days, and will then permanently install the countertop base and
install more Formica on top. First, though, I need to buy a small sink and
make the cutout. The
next step was to cut and fit a piece of scrap 1/2" plywood for the
countertop. (Yes, that's Cherry, but it's what I have around.) Using
a level, I transferred the height of the existing front to the rear of the
cabinet and installed a cleat there to support the countertop. I then
measured and cut as necessary the plywood to fit. The countertop is now
loosely installed; I will be installing Formica on the bulkheads in the next
couple of days, and will then permanently install the countertop base and
install more Formica on top. First, though, I need to buy a small sink and
make the cutout.
|
|
 I
purchased a 13 1/2" round sink for use in the vanity. This is large
enough to be useful, but small enough to leave lots of room for maneuverability,
faucets, and the like. With the new sink on hand, I traced the outline of
the flange onto the bare wood countertop, drew a second line 1/2" inside
the first, and cut along the second line. Then, with the counter out of
the boat, I laminated Formica on top and routed the edges flush. Drilling
a large pilot hole in the middle of the sink cutout, I inserted the router there
and trimmed the opening. I
purchased a 13 1/2" round sink for use in the vanity. This is large
enough to be useful, but small enough to leave lots of room for maneuverability,
faucets, and the like. With the new sink on hand, I traced the outline of
the flange onto the bare wood countertop, drew a second line 1/2" inside
the first, and cut along the second line. Then, with the counter out of
the boat, I laminated Formica on top and routed the edges flush. Drilling
a large pilot hole in the middle of the sink cutout, I inserted the router there
and trimmed the opening.
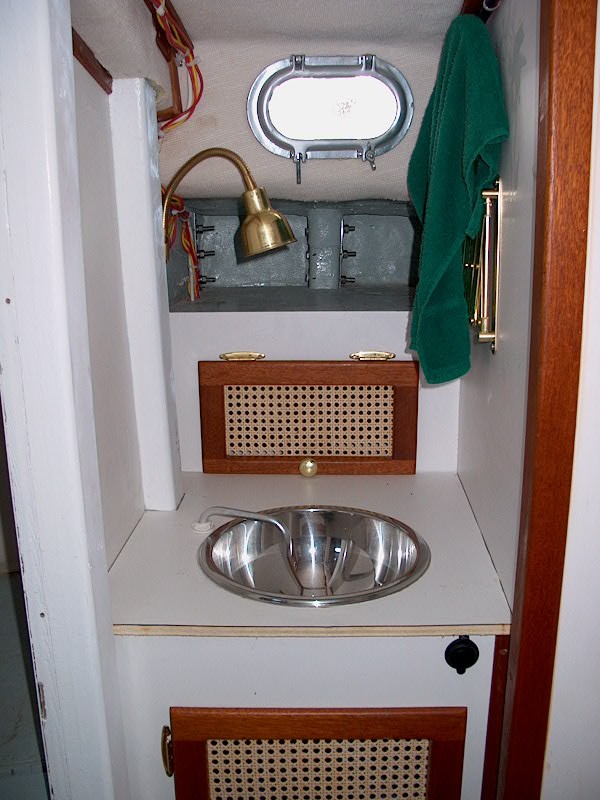
I installed the sink with
caulk and plumbed it as described in the plumbing section of the site. I
installed the cabinet doors I built and the vanity was done, with the exception
of some minor trim and finish details.
|
|
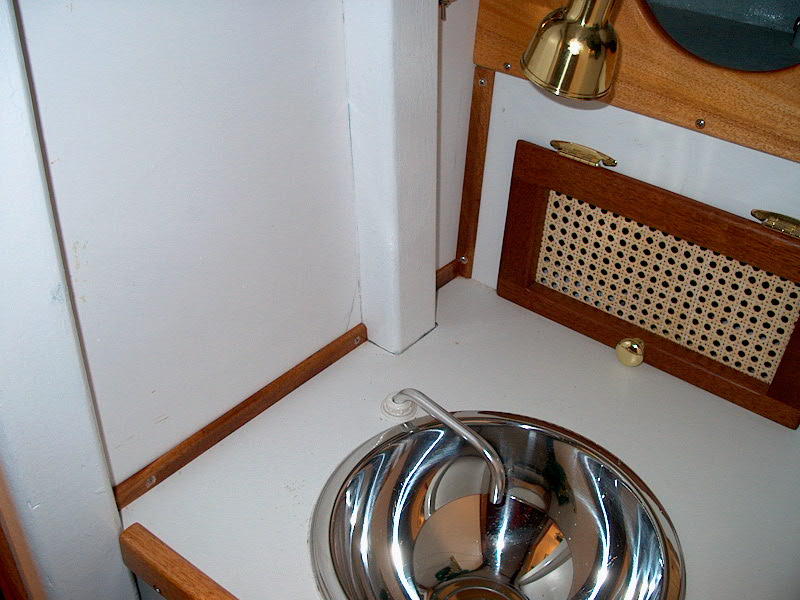
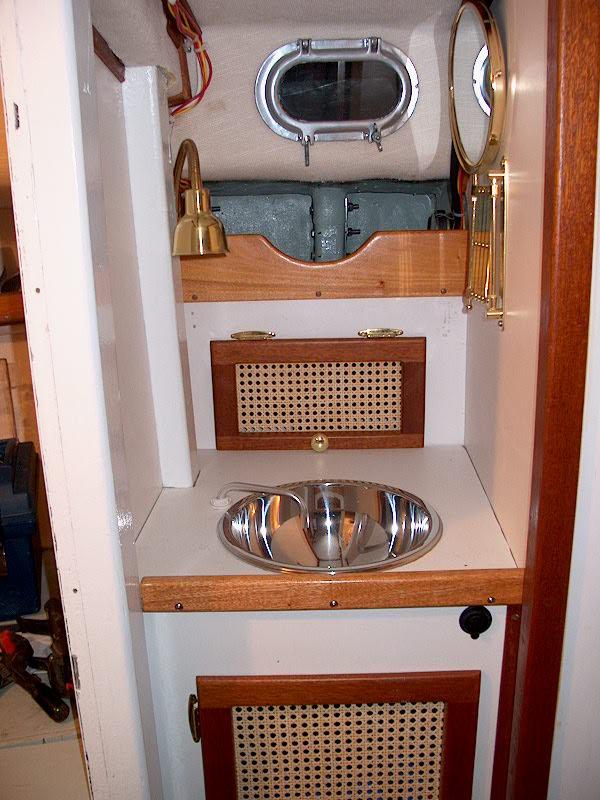 Finally,
a year or so after completing most of the vanity and trim (as you see to the
photo just above), I milled a couple more pieces of mahogany trim to cover the
last bits of exposed plywood and such. I installed a mahogany fiddle on
the vanity countertop, and also a high fiddle on the shelf above the vanity to
help hold things in that open storage area. These trim pieces feature a
simple rabbet on the bottom edge, which allows the top part of each piece to sit
on top of, and be supported by, the countertop. Then I rounded all corners
and finished them with several coats of tung oil to match the other mahogany
trim. Unfortunately, this batch of mahogany is somewhat lighter than the
last batch. It should darken with age. Finally,
a year or so after completing most of the vanity and trim (as you see to the
photo just above), I milled a couple more pieces of mahogany trim to cover the
last bits of exposed plywood and such. I installed a mahogany fiddle on
the vanity countertop, and also a high fiddle on the shelf above the vanity to
help hold things in that open storage area. These trim pieces feature a
simple rabbet on the bottom edge, which allows the top part of each piece to sit
on top of, and be supported by, the countertop. Then I rounded all corners
and finished them with several coats of tung oil to match the other mahogany
trim. Unfortunately, this batch of mahogany is somewhat lighter than the
last batch. It should darken with age.
To complete the
trim, I installed some small pieces of mahogany along the edges of the vanity
countertop and the back edges. This trim closed off the last visible
seams.
|
|


Finally: the vanity is
complete!
|
|