|
Deck Trim:
Companionway, Coamings, and More
This page was last updated on 12 May 2001.
Companionway |
Cockpit Coamings | Sea Hood
| Other Deck Trim
|
|
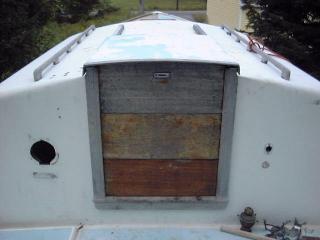
 The
companionway features weathered mahogany trim, a rough-sliding, flimsy
fiberglass hatch, and badly weathered mahogany swashboards. The handrails
are also weathered mahogany. All the trim, despite being weathered, is in
good condition, and I expect to be able to fully restore it. (Update:
Well, maybe not. See below!) The
companionway features weathered mahogany trim, a rough-sliding, flimsy
fiberglass hatch, and badly weathered mahogany swashboards. The handrails
are also weathered mahogany. All the trim, despite being weathered, is in
good condition, and I expect to be able to fully restore it. (Update:
Well, maybe not. See below!)
Once the
boat shed was constructed over the boat, I started
removing all the trim from the boat. The companionway trim came off easily
with the removal of multiple screws, although a few of the heads had been
sanded, rendering the slots shallow and difficult to grip. Inside and out,
the trim was sealed with heavy beads of gray caulk that was in surprisingly good
condition. The fiberglass sliding hatch slid right off the back of the
tracks--it is in poor condition and will require some beefing up and
refinishing. I also would like to add a sea hood.
|
|
 The
handrails were more difficult to remove, as they feature a two-piece threaded
attachment (a screw from the top threads into a female insert projecting upwards
from the cabin liner). A few of these unthreaded easily, but the rest had
to be cut from below. This damaged the fiberglass cabin liner a little,
but it was not in good condition to begin with, and repair will be
straightforward. The cockpit coamings were loosely installed when I bought
the boat; they were removed entirely and will undergo a complete refinishing.
(Update: Not! I am replacing the coamings with new. See
below!) The
handrails were more difficult to remove, as they feature a two-piece threaded
attachment (a screw from the top threads into a female insert projecting upwards
from the cabin liner). A few of these unthreaded easily, but the rest had
to be cut from below. This damaged the fiberglass cabin liner a little,
but it was not in good condition to begin with, and repair will be
straightforward. The cockpit coamings were loosely installed when I bought
the boat; they were removed entirely and will undergo a complete refinishing.
(Update: Not! I am replacing the coamings with new. See
below!)
|
|
Companionway and Sliding Hatch
Over a year ago, when I removed
the trim around the companionway, I had my mind on other details, so I stored
the various pieces out of the way somewhere. Restoring the wood and
reinstalling it seemed, at that time, to be a million years away. My
original plan had been to reuse much of the trim, that it would be in good
enough shape to reinstall.
Wrong! I pulled the
pieces out of storage the other day and, upon greater reflection, decided that
most of them were a little too beat to reinstall. In particular, the
companionway stool (the piece at the bottom) and the grooved rails into which
the swashboards slide were really worn and pretty lousy looking. The lip
on the stool was grease stained from working on removing the engine, and there
were any number of old screw holes in the side pieces. I decided to start
fresh with new mahogany more befitting the overall condition of the boat.
|
|
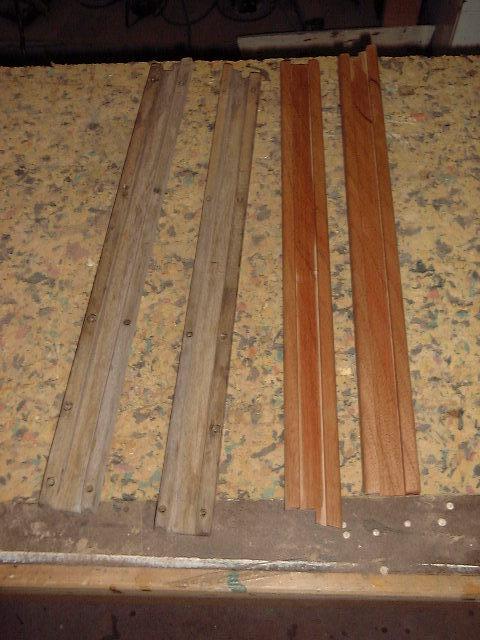 The
grooved side rails are fairly straightforward to mill. They consist of a
3/4" piece of stock with a wide dado grooved out of one side. The dado was
easy to make on the table saw, and I rounded both outer edges with a 1/4"
roundover bit in a router table. There was a complex cutout at the bottom
edge where the side rails meet the stool; recreating this was a simple matter of
using the old rails as a pattern and then cutting the profile with a saber
saw. The
grooved side rails are fairly straightforward to mill. They consist of a
3/4" piece of stock with a wide dado grooved out of one side. The dado was
easy to make on the table saw, and I rounded both outer edges with a 1/4"
roundover bit in a router table. There was a complex cutout at the bottom
edge where the side rails meet the stool; recreating this was a simple matter of
using the old rails as a pattern and then cutting the profile with a saber
saw.

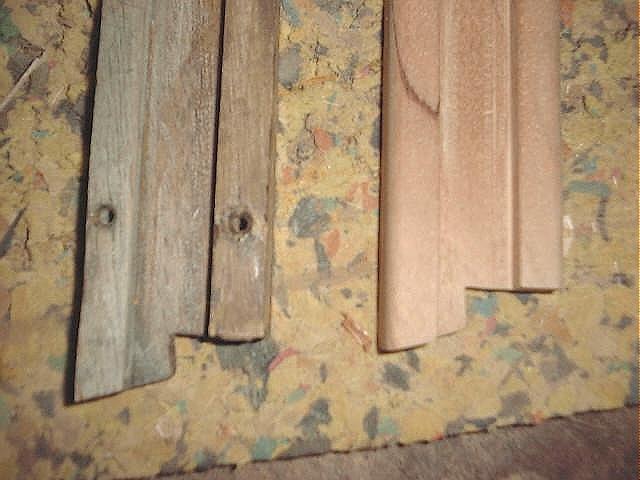
I sanded the pieces smooth
with 120 and 220 grits. They look great. This photo shows the old
and new side by side for comparison. the light bands of color on the inside of
the grooves on the new rails is just dry wood; I had wiped them down with paint
thinner to simulate their varnished color and missed those inside corners.
|
|
 Milling
the stool, with its angled top and other profiles, was a little more
challenging, but well within the realm of anyone with a table saw. Milling
the stool, with its angled top and other profiles, was a little more
challenging, but well within the realm of anyone with a table saw.
First, I cut out the grooves
at either edge, which fit around the fiberglass of the cabin trunk. Next,
I traced the outline of the small protruding chunks of wood that must remain on
either side (see the thumbnail below) and laid out the remainder of the angled
cut as necessary.
The most complex part
of the piece is the angled portion that faces the cockpit. This
turned out to be a 14 degree angle, which was easy enough to figure out
on the table saw by using the old one as a pattern. I
cut the angle in two passes: the first cut in the stock (which was
already dimensioned to the proper width, height and thickness according
to the old piece) runs from edge to edge, while completing the angle
requires plunging the blade into the wood in a stopped cut, since the
inner portion of the cut--the part closest to the lip--does not extend
all the way to the edges of the piece. (Click on the thumbnail to
get a visual on this.)
|
|
 I
finished the cut into the square corners with a chisel, since there was no way
to use a saw to finish the angle. I then rounded the corners with my
router and sanded everything smooth with 120 and 220. I
finished the cut into the square corners with a chisel, since there was no way
to use a saw to finish the angle. I then rounded the corners with my
router and sanded everything smooth with 120 and 220.
|
|
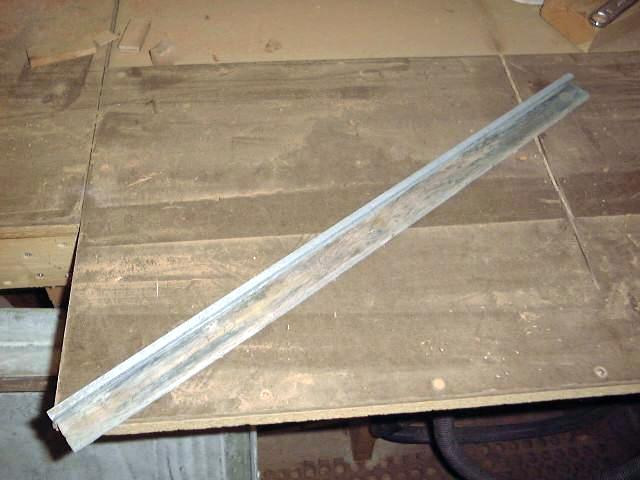 The
fiberglass companionway hatch slides on a system of wooden and metal runners and
guides, which were all in need of restoration. I milled new supports for
the horizontal hatch guides--the ones that are attached to the coachroof--and
will be installing them, and the metal tracks that go on top, soon. The
hatch originally included corresponding metal guides, which were screwed to thin
strips of wood and attached inside the hatch. The wood was in poor
condition, so I milled some new pieces 1/4" thick out of oak, which should stand
up well to the constant sliding back and forth as the hatch is used. I
secured the metal tracks in place, and epoxied the wood strips to the inside of
the hatch, making a few small repairs to other parts of the hatch at the same
time. The
fiberglass companionway hatch slides on a system of wooden and metal runners and
guides, which were all in need of restoration. I milled new supports for
the horizontal hatch guides--the ones that are attached to the coachroof--and
will be installing them, and the metal tracks that go on top, soon. The
hatch originally included corresponding metal guides, which were screwed to thin
strips of wood and attached inside the hatch. The wood was in poor
condition, so I milled some new pieces 1/4" thick out of oak, which should stand
up well to the constant sliding back and forth as the hatch is used. I
secured the metal tracks in place, and epoxied the wood strips to the inside of
the hatch, making a few small repairs to other parts of the hatch at the same
time.
With the epoxy kicked, I sanded
the hatch inside and outside (again), cleaned it with acetone, and applied a
coat of Brightside primer to portions of the underside. I plan to put some
sort of liner over the raw glass so the hatch looks a little better from inside
when it is closed, so I didn't paint the entire thing. Later, I'll prime
and paint the exterior as well, then mill some trim pieces for it to dress it up
a bit.
I began the long process of
applying 10 coats of varnish to all the milled companionway trim pieces.
As with the other brightwork on board, I am using Epifanes gloss as follows:
first coat thinned 50%; second coat thinned 25"; third coat thinned 15%;
subsequent coats thinned only as necessary for proper flow and leveling, usually
about 5% or less. When the trim is completely varnished, probably in about
3 weeks, I will install it on the boat as soon as temperature allows the use of
sealant.
I painted the companionway
sliding hatch with Interlux Brightside white, using three coats: first a
coat of primer, then two coats of the white, thinned as necessary with Interlux
233 Brushing Liquid. I didn't see the need to get geared up for Awlgrip
for this small piece that will effectively never be seen in normal usage, and
the Brightside looks fine for smaller pieces.
With an improvement in the weather,
and the fact that installation of the hatch is fairly critical to the launch
date, I began to reinstall the companionway slide and trim. The first step
was to lay out the pieces--the two varnished wooden bases, the metal tracks, and
the companionway slide--and make sure things lined up properly. Here I
faced a minor problem: the metal tracks that I epoxied to the bottom of
the slide appeared to be on the wrong side. I had placed the "L"-shaped
side of the track toward the inside of the hatch, and it appears that it should
have gone towards the outside. Who could remember, when I took the thing
apart a year and a half ago? This means that things don't quite
line up right--the inside of the track (the short part of the "L") ended up
interfering with the insides of the wood supports and the inside of the hatch
frame, preventing it from operating properly. The proposed fix?
Raise the track up about 1/2", so it stands proud of the wood trim beneath
rather than flush. This will allow the metal track to ride along without
hanging up on anything. I can't move the track easily, since the whole
arrangement is epoxied to the hatch, so I think is the best solution. To
raise the track, I simply placed a stainless steel hex nut at each screw
location; they act as spacers, raising the track the proper height.
Well, that actually didn't work
as planned. The problem was that this raised the track--and hatch--up
higher than it should have been, which could have allowed water to get in and
under the edges of the hatch. Plus, it looked stupid and unprofessional in
the end. Back to square one.
|
|
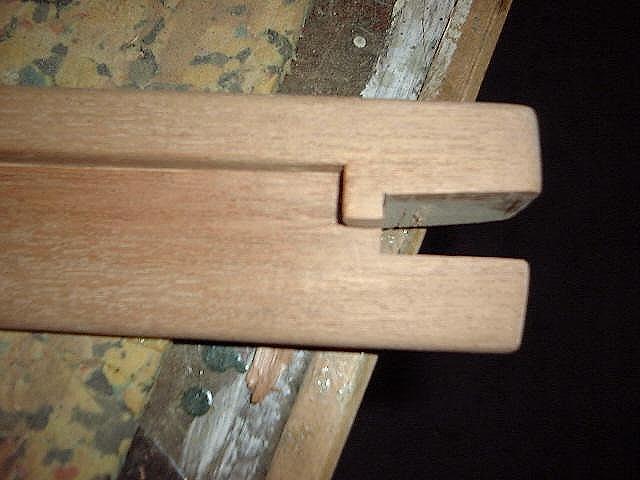
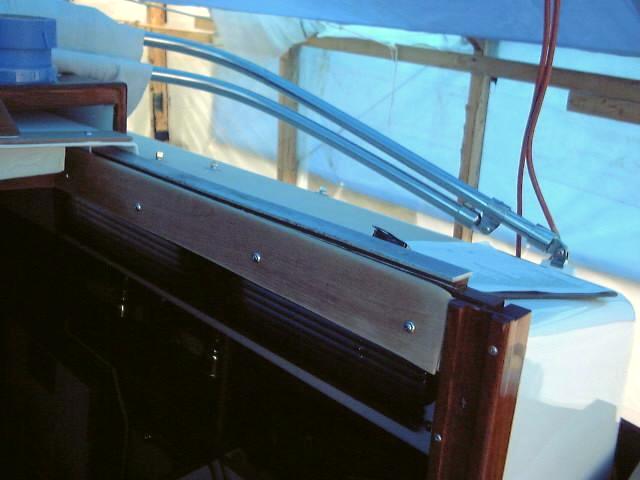
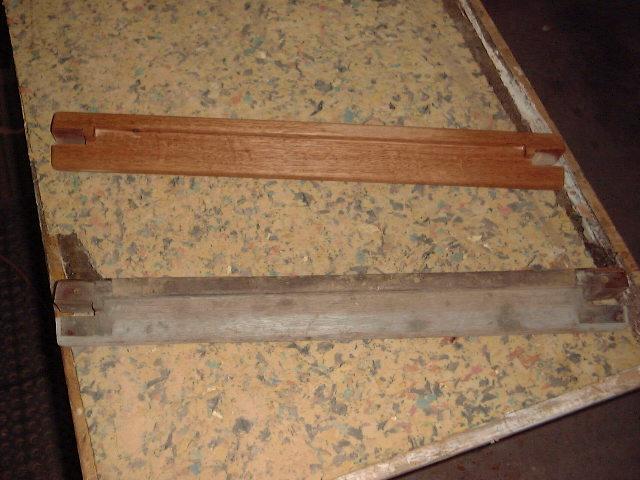
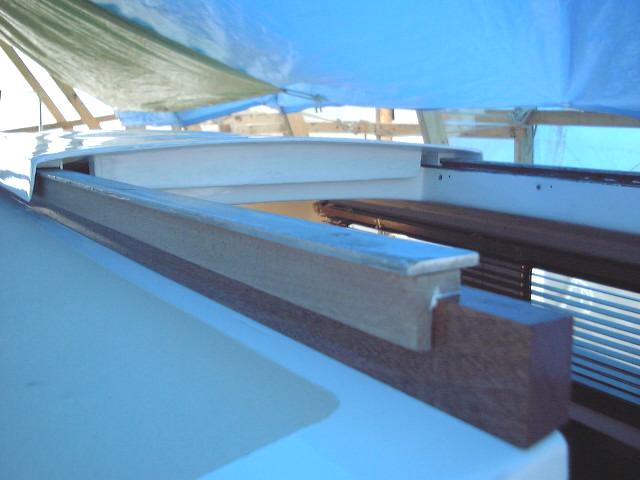 The
permanent fix involved installing an auxiliary piece of wood. I figured
out that the metal track needed to be raised about 3/16" higher than it was,
which would allow the "L" to properly slide beneath it. I milled two
pieces of mahogany 3/4" thick by 1" wide, and milled a 1/2" x 13/16" rabbet on
one side of each. I installed this piece on top of the original wood
supports with caulk and screws, overhanging the outer edge. See the photo
(left) for a better idea of this. When the wood piece was installed, I
could then install the metal track directly on top, giving the companionway
slides the lift and overhang to work properly. All in all, this was kind
of a pain, and took a lot more time than I expected. I guess it's my
fault--I should have paid more attention to the way it was originally set up
when I took it apart forever ago. The
permanent fix involved installing an auxiliary piece of wood. I figured
out that the metal track needed to be raised about 3/16" higher than it was,
which would allow the "L" to properly slide beneath it. I milled two
pieces of mahogany 3/4" thick by 1" wide, and milled a 1/2" x 13/16" rabbet on
one side of each. I installed this piece on top of the original wood
supports with caulk and screws, overhanging the outer edge. See the photo
(left) for a better idea of this. When the wood piece was installed, I
could then install the metal track directly on top, giving the companionway
slides the lift and overhang to work properly. All in all, this was kind
of a pain, and took a lot more time than I expected. I guess it's my
fault--I should have paid more attention to the way it was originally set up
when I took it apart forever ago.
|
Once I had the sliding
mechanism figured out, I marked the location of the wood rails on the
deck, removed them and taped off the rails and the surrounding deck.
Then, I laid down a heavy bead of polysulfide, and reinstalled the rails
permanently. There are four screws in each rail that are secured
through   the
inside of the companionway opening, and three screws that extend from
the salon overhead into the forward portion of the rails. With the
rails bedded and installed, I installed the sliding hatch and resecured
the metal tracks. The hatch has to go into place first, with the
tracks then slid through the openings. With this done, I moved on
to installing the sea hood.
Sometime in the near future, I plan to install some more trim at the end
of the sliding hatch, and maybe a sturdy pull rail. There's also
trim to be installed along the inside of the opening. Posting will
follow (see below) the
inside of the companionway opening, and three screws that extend from
the salon overhead into the forward portion of the rails. With the
rails bedded and installed, I installed the sliding hatch and resecured
the metal tracks. The hatch has to go into place first, with the
tracks then slid through the openings. With this done, I moved on
to installing the sea hood.
Sometime in the near future, I plan to install some more trim at the end
of the sliding hatch, and maybe a sturdy pull rail. There's also
trim to be installed along the inside of the opening. Posting will
follow (see below) |
|
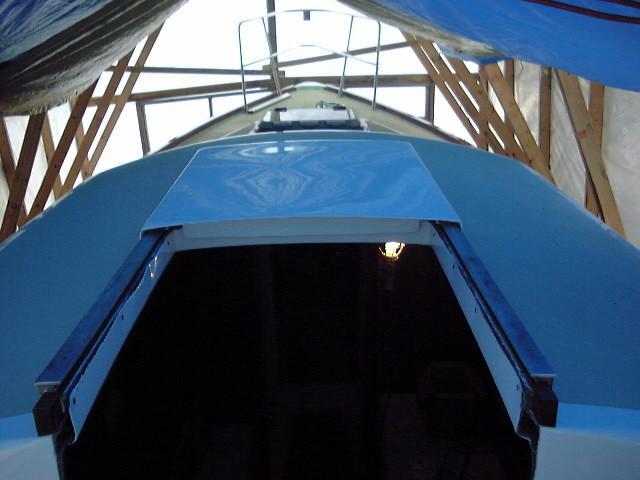
 With
launching looming ever closer, I
decided it was time to install my new
companionway trim. I installed these pieces in a bedding of polysulfide
caulk with 1" stainless screws from the inside, the same as original. The
grooved side pieces that support the swashboards have to be face-screwed.
Because I had raised the companionway slide a little, the new trim is a little
shorter than it could have been, even though it is identical to the original.
Not a big deal, but I'll have to install some trim on the sliding hatch to help
fill the gap, and build a new top swashboard that is a little taller. With
launching looming ever closer, I
decided it was time to install my new
companionway trim. I installed these pieces in a bedding of polysulfide
caulk with 1" stainless screws from the inside, the same as original. The
grooved side pieces that support the swashboards have to be face-screwed.
Because I had raised the companionway slide a little, the new trim is a little
shorter than it could have been, even though it is identical to the original.
Not a big deal, but I'll have to install some trim on the sliding hatch to help
fill the gap, and build a new top swashboard that is a little taller.
The original swashboards (see
photos at top of this page) are weathered and look horrible, but I think I might
be above to salvage them, at least for this season. They are solid wood,
so I was able to sand them sufficiently that I think they'll look OK when
varnished. I'll paint the back sides. Because the hatch is a little
higher than original, I had to add about 5/8" in height to the bottom board so
that the top one would extend all the way to the bottom of the hatch.
Varnishing is next.
|
|
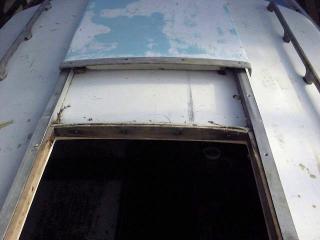
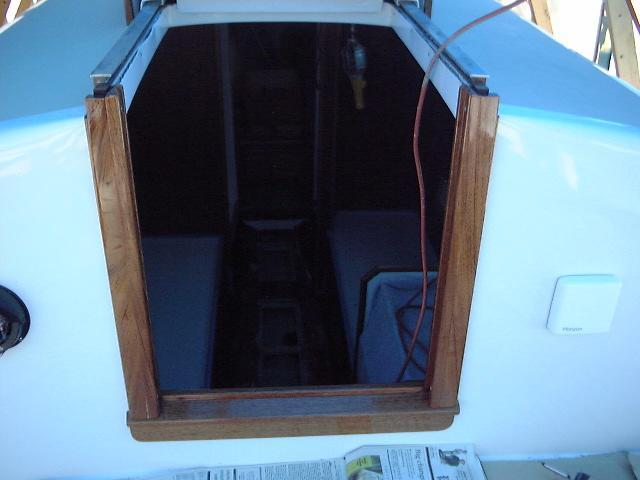
 The
inside of the companionway required some trim. As of this posting, there
is still some trim I would like to add along the overhead inside the cabin, but
that can wait for a while. I did install some trim pieces along the
vertical openings of the hatch, covering up the wavy fiberglass and screw heads
there. These pieces are simply 1/4" mahogany cut to shape and screwed in
place with finishing washers. I set them in a bed of polysulfide;
varnishing is next. The
inside of the companionway required some trim. As of this posting, there
is still some trim I would like to add along the overhead inside the cabin, but
that can wait for a while. I did install some trim pieces along the
vertical openings of the hatch, covering up the wavy fiberglass and screw heads
there. These pieces are simply 1/4" mahogany cut to shape and screwed in
place with finishing washers. I set them in a bed of polysulfide;
varnishing is next.
|
|
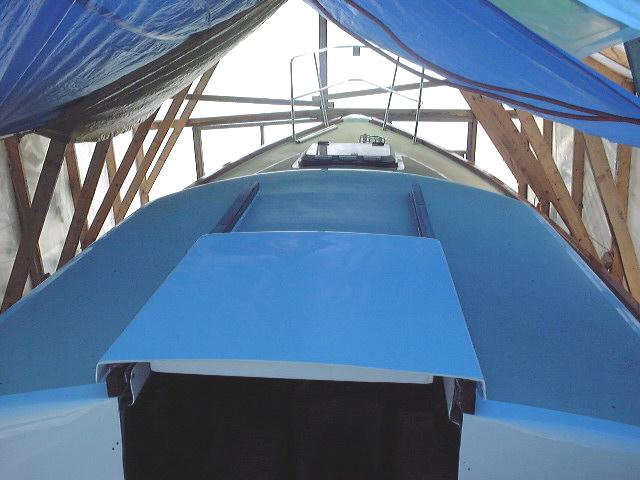
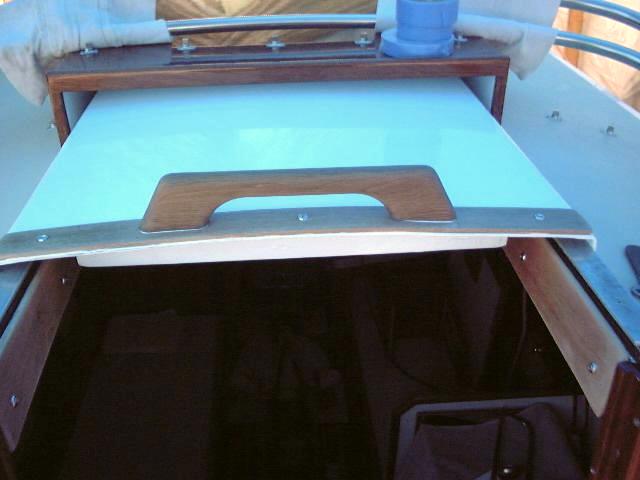
 I
also added a thin strip of wood to the aft end of the sliding hatch, and
installed a teak handrail in the middle to make pulling the hatch closed easier.
These are attached with screws and polysulfide, and will soon be varnished to
match the rest of the trim. I
also added a thin strip of wood to the aft end of the sliding hatch, and
installed a teak handrail in the middle to make pulling the hatch closed easier.
These are attached with screws and polysulfide, and will soon be varnished to
match the rest of the trim.
|
|
Other Deck Trim
Rather than go to the trouble
of fabricating new handrails, I purchased four (two inside, two outside) teak
5-loop rails from Hamilton Marine. The cost is well worth it compared to
the time it would take me to make them, plus I don't have enough stock left in
the shop to make them anyway. The old rails were 5-loop, and I figured the
new would be the same size, so I did not fill the original screw holes during my
deck reconstruction. D'OH! It seems the new loops are significantly
shorter than the old, and the new rails are approximately 10-12" shorter overall
than the old, which means, of course, that the boltholes do not line up.
Grrrrr...I guess I'll fill the existing holes as necessary and plan on one more
coat of nonskid on the coachroof to cover the repairs. No big deal, but I
wish I'd thought of it earlier. I will install the new rails as soon as it
is warm enough to apply the sealant required.
I filled the old rail holes
with two applications of epoxy. When the epoxy kicked, I sanded it smooth,
cleaned the whole area and applied one more coat of the nonskid deck paint over
the top. It looks great, and took about 5 minutes to apply...after about
20 minutes of masking, of course.
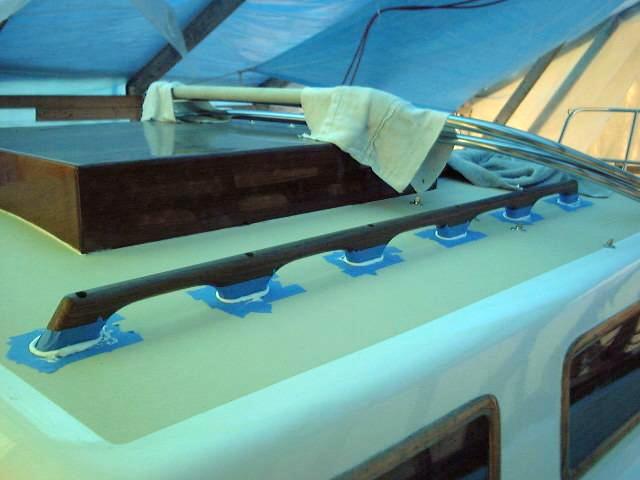
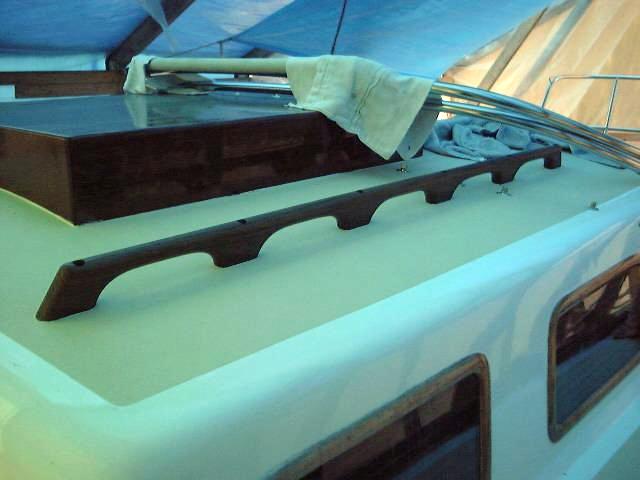
I installed
new handrails
on both sides, inside and out. I used long pan head wood screws inserted
through the outside railing. (Those are the ones with the large head that
is flat on the bottom). First, I carefully laid out the locations of
the screw holes through each of the outside rails, and drilled pilot holes on my
drill press, keeping everything straight and level. The holes are just
larger than the screws. Next, I drilled 1/2" holes about halfway into the
rails--this recessed the screw head, and provides enough thread belowdecks to
properly secure the inside handrails. There's still enough beef above for
strength, too. These holes will also accommodate some plugs made
from teak dowel later.
With the holes completed in the
outside rails, I lined up each rail with its respective interior rail and
drilled smaller pilot holes into the second rail, making sure to keep the drill
straight and level. Then, I moved to the boat and drilled pilot holes
through the coachroof using the outside rails as a guide. These holes
received the standard treatment for deck holes--epoxy-filled, redrilled, and a
countersink milled at the top to hold a little well of sealant. Then, I
spent some time masking off the handrails, and the deck around each base to make
cleanup easier.
|
|
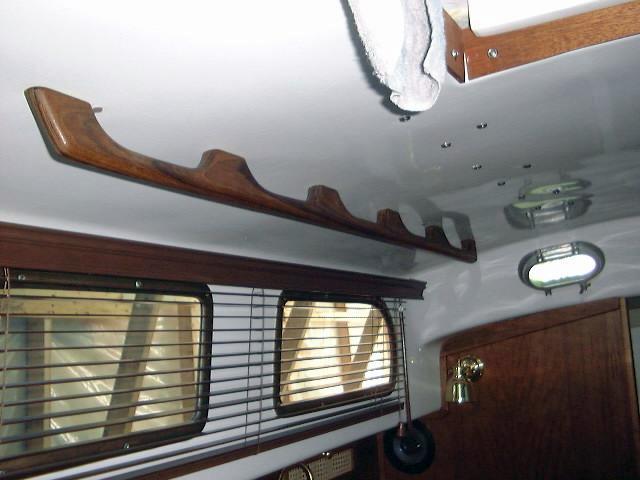
 To
install the rails, I actually figured out a way to do it by myself...one gets
good at that after a while. The aftermost two or three holes on each side
are reachable from inside the companionway, so I was able to get a couple screws
started into the interior rail, thus supporting it in place. Then, I could
go outside and get the remained of the screws started. When all screws
were engaged a few threads, I made sure it was pretty even and pulled the
outside rail up, revealing a space beneath--but the inside rail was still
attached. I could easily caulk the space beneath the outside rail; I used
polysulfide. After running a heavy bead of caulk at each location, making
sure to add some extra near the screws, I pressed the outer rails down, and
tightened the screws one by one, gradually pulling the two rails together
against the coachroof. It worked like a charm. I left the
squeezed-out caulk to cure overnight before returning to cut away the excess and
clean up. To
install the rails, I actually figured out a way to do it by myself...one gets
good at that after a while. The aftermost two or three holes on each side
are reachable from inside the companionway, so I was able to get a couple screws
started into the interior rail, thus supporting it in place. Then, I could
go outside and get the remained of the screws started. When all screws
were engaged a few threads, I made sure it was pretty even and pulled the
outside rail up, revealing a space beneath--but the inside rail was still
attached. I could easily caulk the space beneath the outside rail; I used
polysulfide. After running a heavy bead of caulk at each location, making
sure to add some extra near the screws, I pressed the outer rails down, and
tightened the screws one by one, gradually pulling the two rails together
against the coachroof. It worked like a charm. I left the
squeezed-out caulk to cure overnight before returning to cut away the excess and
clean up.
|
|
|
|
|
|
The rails have one coat of
varnish on them at the moment, which I applied mostly to protect them from being
stained by the caulk during installation. 9 coats to go (on the exterior,
at least)!
Click
here to continue with the sea hood and coamings.
|
|