|
Deck Hardware
Installation
|
|
This page was last updated on 8
May 2010
Mooring
Bit and Chocks Mainsheet
Traveler Winch Stands
Cockpit Locker Hasps
Stern Cleats and Chocks
Bronze
Cowl Vent
|
|
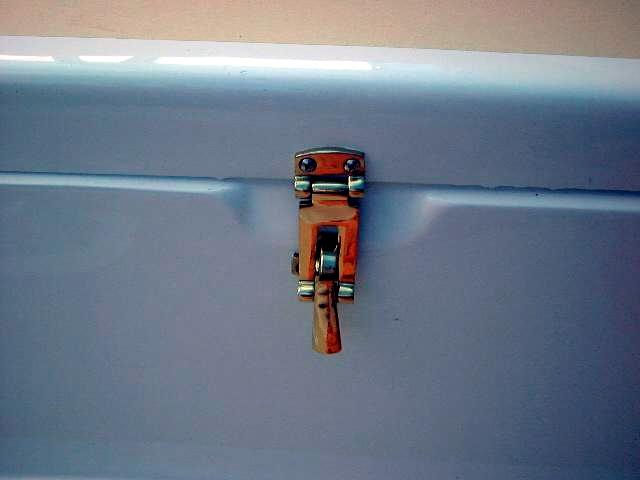
Mooring
Bit and Chocks
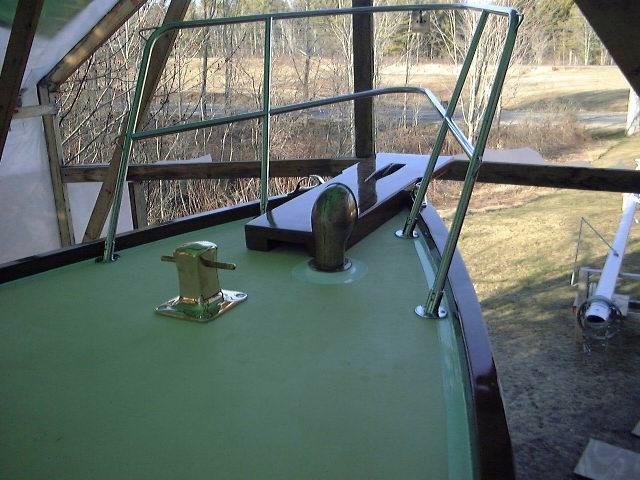 Well,
I splurged (big surprise there, right?) and bought a great 7" bronze
mooring bit for the bow. It weighs a ton, looks classic and great,
and I think it will be a nice addition, as well as supremely functional. Well,
I splurged (big surprise there, right?) and bought a great 7" bronze
mooring bit for the bow. It weighs a ton, looks classic and great,
and I think it will be a nice addition, as well as supremely functional.
You can source an identical bit from Hamilton
Marine. Model # BKA-01MB7X7, Catalog Item # 103684. (I had so
many requests for info on this bit that I figured it would be helpful to put the
information right here!)
I installed the bit with some
1/2" bolts. Because the bit is over the forward end of the vee berth,
any bolts and backing plates will be exposed. To make the installation as
attractive as possible, I made a wooden backing plate out of some left over 8/4
mahogany (roughly 2" thick). I  made the backing block larger than the
base of the mooring bit. Of course, I did the usual preparation to the
boltholes before finally securing the bit to the deck--ream out the core,
replace with epoxy, redrill.
made the backing block larger than the
base of the mooring bit. Of course, I did the usual preparation to the
boltholes before finally securing the bit to the deck--ream out the core,
replace with epoxy, redrill.
|
|
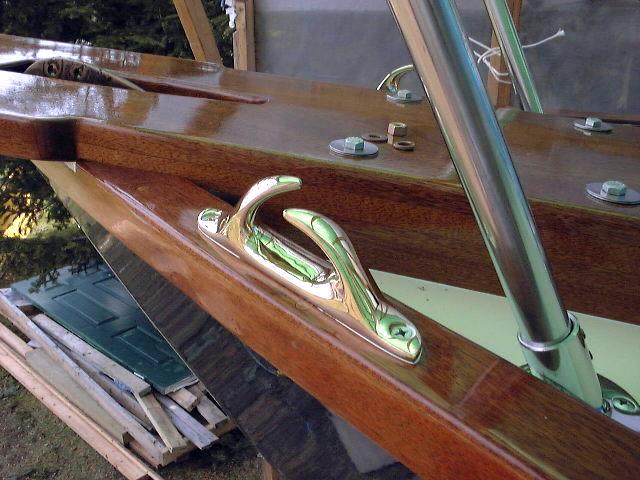 I
also installed new bronze Skene chocks at the stem, one on each side. I
didn't like the design of the old ones--I'm a stickler for traditional (and
highly fair and effective) Skene chocks. Using a line tied to the mooring
bit, I decided upon the best, most fair location (sounds like something out of Snow
White) and attached the chocks to the toerail with screws and caulk.
Later, I'll install some stainless or bronze chafe protectors to parts of the
anchor platform to keep mooring lines from chafing. I
also installed new bronze Skene chocks at the stem, one on each side. I
didn't like the design of the old ones--I'm a stickler for traditional (and
highly fair and effective) Skene chocks. Using a line tied to the mooring
bit, I decided upon the best, most fair location (sounds like something out of Snow
White) and attached the chocks to the toerail with screws and caulk.
Later, I'll install some stainless or bronze chafe protectors to parts of the
anchor platform to keep mooring lines from chafing.
The bronze Skene
chocks are also from Hamilton Marine.
Model # BKA-01BC600S, Catalog Item # 103654.
|
|
Mainsheet
Traveler
 Thanks
to Jeff--Kaynee, # 30--I became the proud owner of a very nice,
unused--but 10-year old--Schaefer mainsheet traveler. It is a beefy
arrangement, and is already curved and cut to length to fit perfectly at the aft
end of the cockpit between the coamings. What a find! Thanks
to Jeff--Kaynee, # 30--I became the proud owner of a very nice,
unused--but 10-year old--Schaefer mainsheet traveler. It is a beefy
arrangement, and is already curved and cut to length to fit perfectly at the aft
end of the cockpit between the coamings. What a find!
I installed the traveler in a
bed of polysulfide with sixteen 1/4" x 2" stainless steel machine
screws, secured from beneath with a full-length backing plate that came with the
traveler, stainless fender washers and bolts. The installation was fairly
straightforward--a matter of marking the holes, drilling, masking off and
installing. I could do it by myself by turning the screws from above while
holding a wrench in place beneath, reaching through the access panel in the
vertical aft end of the cockpit. Nice!
|
Traveler Update:
May 2010
After some thought and discussion, we elected to do
away with the traveler in May 2010. Please
follow this link
for more information about the change, and reasoning behind it. |
|
Winch
Stands
The original winches were
attached to some built-up wooden winch bases, which were bolted through the deck
and screwed to the original coamings. These were in bad condition, as they
were all end grain, and were badly checked and dried. Rather than
construct new, similar pads, we decided to use some nice bronze winch
bases. These are manufactured by Spartan Marine;
they are available through Defender
as well. They are heavy bronze castings, and quite attractive.
 With
the dodger installed, I determined the best location for the new stands,
ensuring that the winch handle can make a complete turn without running into any
obstructions. The front of the winch stands ended up 41-1/2" aft of
the front of the coaming in our case. Installation was easy: place
the stand in the proper position and mark the four holes, then drill the deck
and coaming. On the inside of the coaming, I milled a countersink for the
screwheads (1/4" x 1-1/2" silicone bronze flathead machine screws); I
used hex head bolts of the same size on the two holes through the deck.
There is no core in the deck aft of the cabin trunk, so I didn't have to worry
about sealing the core; I only milled a small countersink at the top of the
holes to hold a little extra sealant right around the fasteners. I secured
the hex bolts from beneath with fender washers and nuts; I used regular washers
and nuts on the two upper bolts. Total installation of both sides took
about 30 minutes or less, including cleanup of excess sealant. With
the dodger installed, I determined the best location for the new stands,
ensuring that the winch handle can make a complete turn without running into any
obstructions. The front of the winch stands ended up 41-1/2" aft of
the front of the coaming in our case. Installation was easy: place
the stand in the proper position and mark the four holes, then drill the deck
and coaming. On the inside of the coaming, I milled a countersink for the
screwheads (1/4" x 1-1/2" silicone bronze flathead machine screws); I
used hex head bolts of the same size on the two holes through the deck.
There is no core in the deck aft of the cabin trunk, so I didn't have to worry
about sealing the core; I only milled a small countersink at the top of the
holes to hold a little extra sealant right around the fasteners. I secured
the hex bolts from beneath with fender washers and nuts; I used regular washers
and nuts on the two upper bolts. Total installation of both sides took
about 30 minutes or less, including cleanup of excess sealant.
|
|
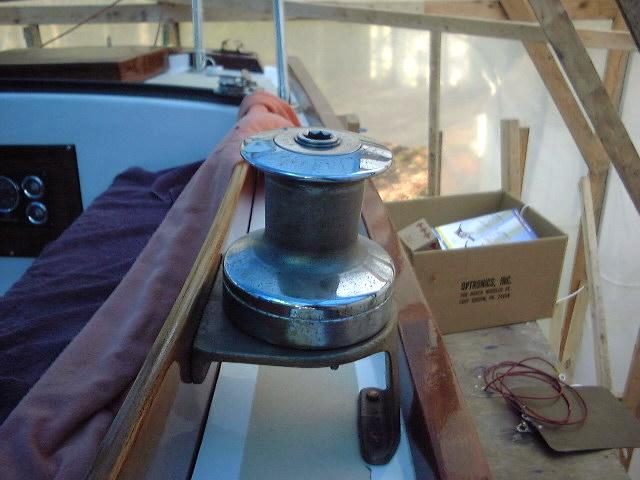
We are not using the
original Southcoast winches; instead, we purchased a pair of used Barient
#24 two speed winches (non self-tailing) from The Marine Exchange in Peabody,
MA. They were a bargain and might be slightly oversized, but that may come
in handy someday, and it's what they had for the right price.
Installation involved removing
the top of the winch to expose the base and bolt holes. Then, it was a
simple matter of drilling five, 5/16" holes through the winch pads for each
winch. The bronze drilled easily. I bolted the winches with
5/16" bolts, washers, and nylock nuts--no sealant required--a nice bonus.
|
|
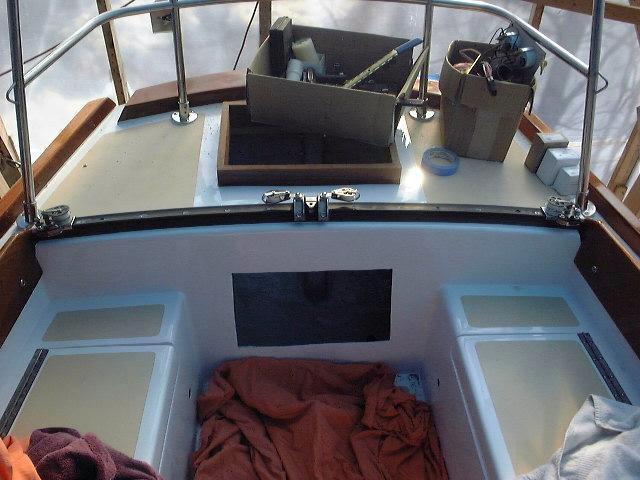
Cockpit
Locker Hasps
 The
cockpit lockers did not appear to have had hasps on them. These are
necessary if you want to lock the lockers (we don't) and also if you anticipate
any offshore sailing (we do) to keep the lockers tightly closed. The
cockpit lockers did not appear to have had hasps on them. These are
necessary if you want to lock the lockers (we don't) and also if you anticipate
any offshore sailing (we do) to keep the lockers tightly closed.
I found some bronze locking
hasps at Hamilton Marine
and installed them in a bed of polysulfide. It's hardly worth going
into...but here they are.
|
|
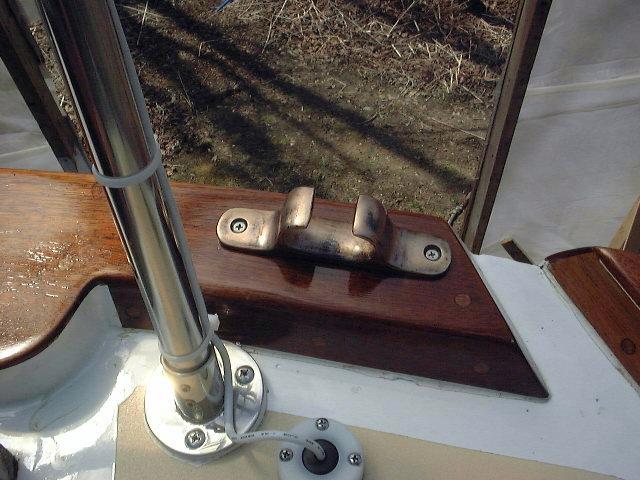
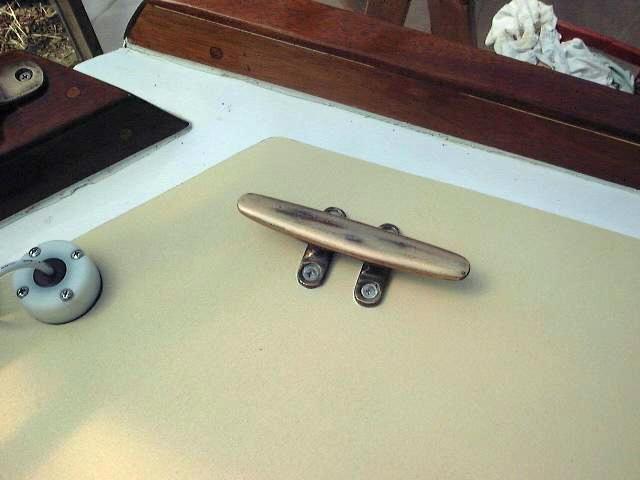
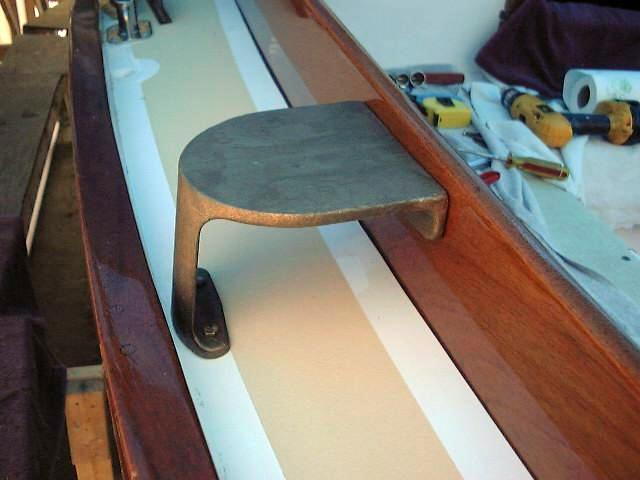
Stern
Cleats and Chocks
  Amazing!
I actually reused something original! I cleaned up the original stern
cleats and straight chocks, applied several coats of clear lacquer, and
installed them on the poop deck. The cleats are secured with backing
plates and fender washers, while the chocks are screwed into the taffrail.
Installation was straightforward, as there is no core to worry about in the poop
deck. The antique bronze, when finished with the clear lacquer, has a very
nice look. Amazing!
I actually reused something original! I cleaned up the original stern
cleats and straight chocks, applied several coats of clear lacquer, and
installed them on the poop deck. The cleats are secured with backing
plates and fender washers, while the chocks are screwed into the taffrail.
Installation was straightforward, as there is no core to worry about in the poop
deck. The antique bronze, when finished with the clear lacquer, has a very
nice look.
|
|
Bronze
Cowl Vent
 Another
original piece that I reused was the huge, heavy bronze cowl vent that installs
above the chain locker. Although this was not on the boat when we
purchased her, the previous owner sent it to us a few months later. It was
green, and the vent, which threads into a deck plate, was totally frozen in
place. On and off throughout the winter, I soaked the threads repeatedly
with an industrial penetrating oil, and finally, after several months of this, I
succeeded in removing the vent from the base. I would not have reinstalled
the vent if I hadn't been able to remove it from its base, as it may be
necessary or desirable to remove it from time to time. I was
thrilled. I sanded and polished the green oxidation off the exterior, but
didn't even make an attempt to remove it from the inside. As with the
other reused bronze on board, I didn't spend too much time worrying about
getting everything polished like new; I actually like a little of the old patina
on there. I sprayed several coats of clear lacquer over the vent. To
install the vent, I screwed it into the base as far as it would go, and marked
the proper position on the raised circular portion of the foredeck where it was
to be installed. Then, I could unscrew the vent and install the base
plate, keeping the alignment right so that the vent would end up facing straight
forward when it was tightened all the way. We'll probably make a canvas
cover for it to cover it if we are sailing into heavy head seas, and/or a solid
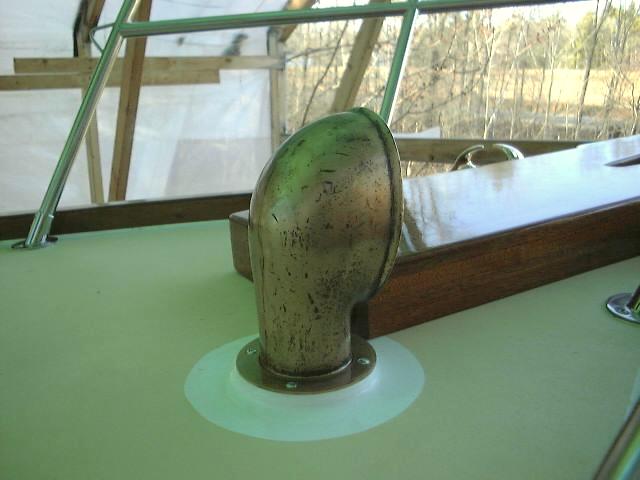
deck plate to replace the vent entirely. Another
original piece that I reused was the huge, heavy bronze cowl vent that installs
above the chain locker. Although this was not on the boat when we
purchased her, the previous owner sent it to us a few months later. It was
green, and the vent, which threads into a deck plate, was totally frozen in
place. On and off throughout the winter, I soaked the threads repeatedly
with an industrial penetrating oil, and finally, after several months of this, I
succeeded in removing the vent from the base. I would not have reinstalled
the vent if I hadn't been able to remove it from its base, as it may be
necessary or desirable to remove it from time to time. I was
thrilled. I sanded and polished the green oxidation off the exterior, but
didn't even make an attempt to remove it from the inside. As with the
other reused bronze on board, I didn't spend too much time worrying about
getting everything polished like new; I actually like a little of the old patina
on there. I sprayed several coats of clear lacquer over the vent. To
install the vent, I screwed it into the base as far as it would go, and marked
the proper position on the raised circular portion of the foredeck where it was
to be installed. Then, I could unscrew the vent and install the base
plate, keeping the alignment right so that the vent would end up facing straight
forward when it was tightened all the way. We'll probably make a canvas
cover for it to cover it if we are sailing into heavy head seas, and/or a solid
deck plate to replace the vent entirely.
|
|