|
Cockpit Structural Repairs (Page 2)
This page was last updated on January 20, 2002.
Strengthening
the Cockpit Sole and Seats | Fairing
and Sanding | Filling the
Gauge Holes
Cockpit, Part 1
| Cockpit, Part 3
|
|
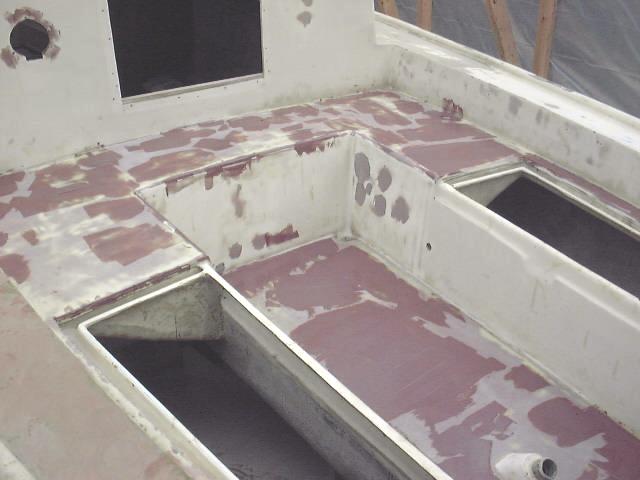
STRENGTHENING
THE COCKPIT SOLE and SEATS
March 15-16, 2000
The next step in the cockpit was to install
new 1/2" balsa core over the cockpit sole. The existing sole was very
thin, weak and poorly supported, and required substantial stiffening. I
had originally intended to use Coremat for this purpose, but decided that--for
the sole--new core and glass would make for a better job.
I cut the balsa roughly to size, allowing room
at the edges where the cockpit sole curves up into the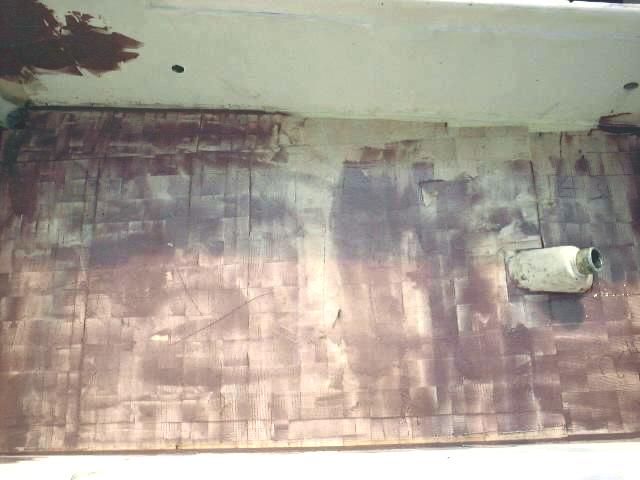 sides of the well; any
gaps will be filled with epoxy during the installation. I also cut out the
front corners where the cockpit drains are (I'll reshape and fair the drains
later). This done, I wet out a couple small pieces of cloth and glassed
over the old access port hole and the hole where the gearshift lever used to
be. This thin layer of glass is intended only to support the core and,
especially, the thickened epoxy I am going to use to set the core. I
waited overnight for the resin to kick before proceeding. sides of the well; any
gaps will be filled with epoxy during the installation. I also cut out the
front corners where the cockpit drains are (I'll reshape and fair the drains
later). This done, I wet out a couple small pieces of cloth and glassed
over the old access port hole and the hole where the gearshift lever used to
be. This thin layer of glass is intended only to support the core and,
especially, the thickened epoxy I am going to use to set the core. I
waited overnight for the resin to kick before proceeding.
Next day, I first scrubbed the new fiberglass
with water and a Scotchbrite pad to remove Amine Blush, which forms on the
surface of cured epoxy. I then sanded the area with 40 grit to rough it up
and smooth out any rough spots. Then, I mixed up more of my epoxy slurry,
fairly loose, and troweled it on the sole with a notched trowel, being sure to
completely fill the small depressions where the cloth from yesterday sank into
the old cutouts as it kicked. Then, I set the core pieces into the epoxy
mess, pushing down firmly to ensure that they were well seated in the
epoxy. With any leftover mixture, I filled the gaps around the edges and
around the rudderpost area. I let the core and epoxy partially kick before
proceeding; the epoxy was set, but still "green", which means that any
further epoxy laid over the top will chemically bond. Because there was a
thin coat of epoxy over the entire top of the core, this chemical, primary bond
should mean that the fiberglass over the top will be firmly attached. Time
will tell.
|
|
 To cover the core and add even more strength,
I cut out two layers of mat and woven roving, and a single layer of 6 oz.
cloth. (Please click here for a lesson in
pattern making that will make the job more accurate and easier.) The mat and roving will provide the strength and impact resistance,
and the fine cloth over the top will make for a smoother surface and easier
fairing. I laminated the material on top of the new core, rolling out the
cloth with a plastic air roller to ensure a void-free laminate. To cover the core and add even more strength,
I cut out two layers of mat and woven roving, and a single layer of 6 oz.
cloth. (Please click here for a lesson in
pattern making that will make the job more accurate and easier.) The mat and roving will provide the strength and impact resistance,
and the fine cloth over the top will make for a smoother surface and easier
fairing. I laminated the material on top of the new core, rolling out the
cloth with a plastic air roller to ensure a void-free laminate.
The end result of this procedure is a strong,
stiff cockpit sole that needs no stiffening from beneath. I will be adding
a large inspection/access hatch to the forward end for access to the rear of the
engine and the stuffing box. Details will be posted when this project is
underway.
A few days later, I was able to begin
laminating new material over the cockpit seats and locker covers. I made a
pattern of the seats and cut out two layers of 2mm
Coremat, and two layers of fiberglass cloth. This laminate schedule should
provide adequate additional strength to the seats.
|
|
To prepare, I first resanded the seats to
remove remnants of resin from doing the sole repair, and cleaned then with
acetone. Then, I laminated the material on with epoxy resin--two layers of
Coremat followed by two layers of cloth over the top. The Coremat is
difficult to wet out and required a lot of resin. Doing this on a
relatively cool day--around 60 in the shed--prevented the resin from beginning
to cure too quickly as I laid up the relatively thick laminate. Any
material that extended beyond the edges of the seats was trimmed off a couple
hours later when still in the "green" stage to make for less grinding
later. Click on the thumbnails below for some full size pictures of the
cockpit right after laminating the material on top of the seats.
|
|


|
|
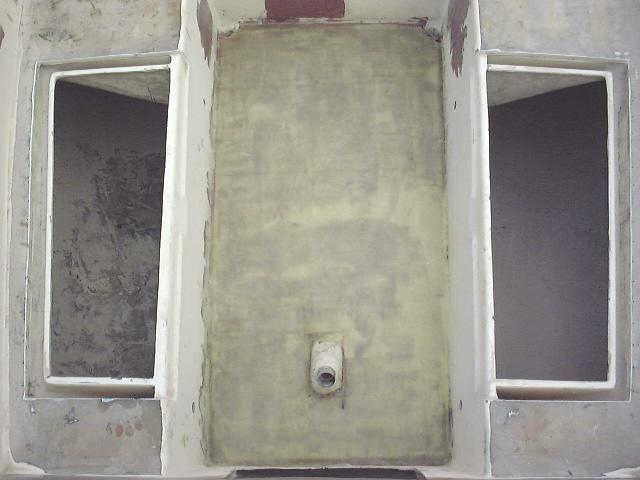
FAIRING
AND SANDING THE COCKPIT
March 24/30/31, 2000
 Fairing
the cockpit is exactly like fairing the sidedecks, only somewhat more difficult
because of the many inside corners. I spread a relatively even, fairly
heavy coat of fairing compound (#407/406 as usual) over most of the surface,
after cleaning the blush and sanding. When this first coat dried, I sanded
it thoroughly, leaving the low spots untouched. Then, I applied a second
coat of filler over the low spots (picture, right). When this kicked I was
able to sand once again. Any further low spots will be filled a third
time, with more sanding to follow. Fairing
the cockpit is exactly like fairing the sidedecks, only somewhat more difficult
because of the many inside corners. I spread a relatively even, fairly
heavy coat of fairing compound (#407/406 as usual) over most of the surface,
after cleaning the blush and sanding. When this first coat dried, I sanded
it thoroughly, leaving the low spots untouched. Then, I applied a second
coat of filler over the low spots (picture, right). When this kicked I was
able to sand once again. Any further low spots will be filled a third
time, with more sanding to follow.
I spent a fair bit of time
working on the edges of the cockpit seats, to provide a decent, fair radius
there that will be comfortable and will stand up to the abuse that the cockpit
takes.
I also had to recreate the deck
and cockpit scuppers. Click here to see the
steps involved.
With the rough fairing and
sanding done, I can move on to final sanding
of the deck and cockpit. This sanding, beginning with 80 and 120 grits on
my rotary sander, will be followed with final finish sanding with a palm sander
for the smoothest surface. Applying mist coats of laquer between sandings
will highlight any low spots, which can be filled as necessary. All in
all, the fairing of the decks and cockpit was a much more labor-intensive and
time consuming job than I had anticipated.
|
|
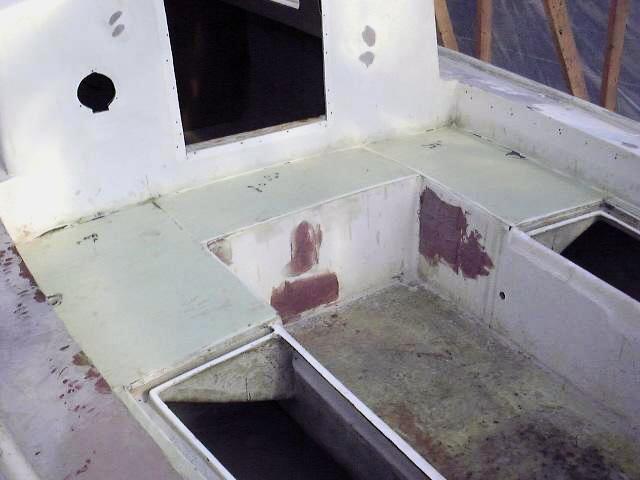
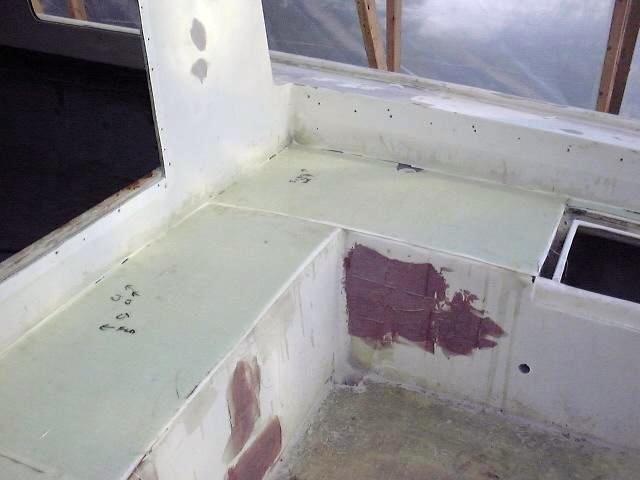
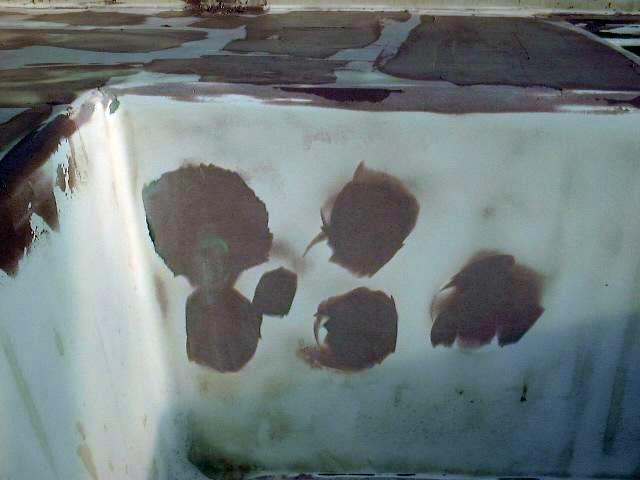
FILLING THE GAUGE
HOLES
 Once the gauge holes were backed
up with cloth (see Cockpit page 1) it
was a now-routine matter to fill the voids with more thickened epoxy. I
used two coats to completely fill the gauge holes, throttle hole, the hole where
the old blower intake was (port side) and three holes in the forward end of the
well, including the old icebox drain. With a little more finish sanding,
these areas will be ready for primer. Once the gauge holes were backed
up with cloth (see Cockpit page 1) it
was a now-routine matter to fill the voids with more thickened epoxy. I
used two coats to completely fill the gauge holes, throttle hole, the hole where
the old blower intake was (port side) and three holes in the forward end of the
well, including the old icebox drain. With a little more finish sanding,
these areas will be ready for primer.
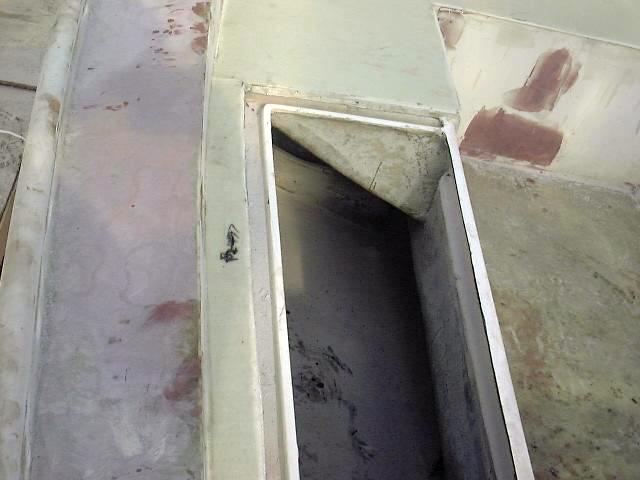
I will be adding a large hatch
through the cockpit for access to the stuffing box and the like. I have
not yet chosen my hatch, but I have my eye on some nice commercial aluminum ones
at Hamilton Marine. I'll post details when I get into the project.
Tasks remaining: final
sandings of the deck and cockpit, building a storage locker in the fantail, and
constructing a new gauge panel. Click below
to continue the cockpit project.
|
|
|
Please click
here to continue the cockpit project.
|
|