|
The New Boom and
Gooseneck (Page 4)
This page was last updated on 28 August 2004.
|
|
<Back to Page 3
|
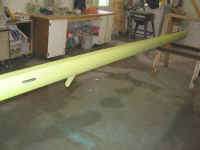
Painting the New Aluminum Boom
Originally, I had planned on painting the new boom in a week or
so. However, when I ordered the etching and painting
supplies I needed late in the afternoon of the day I picked up the boom
Thursday), I realized that they might arrive early enough the next day
for me to jump right on the painting project. The next-day truck
delivery (for free) is perhaps the greatest benefit for me of working
with wholesale suppliers.
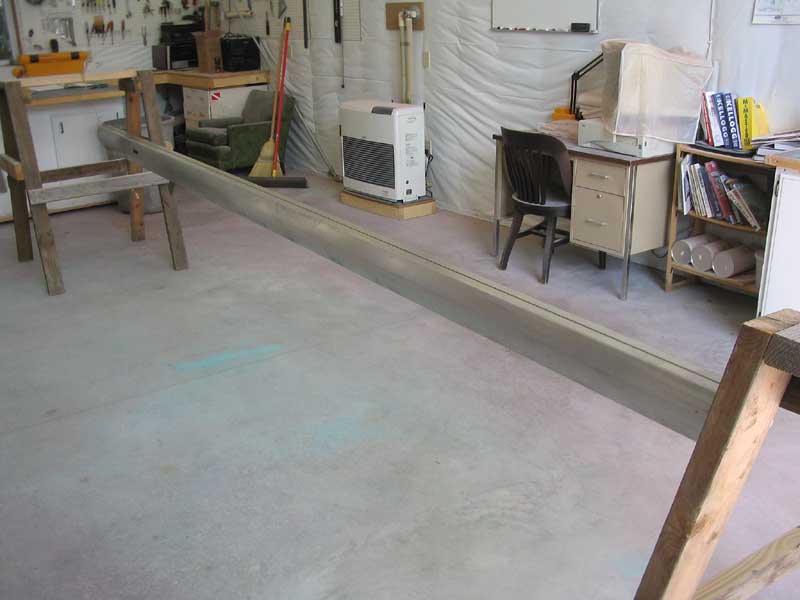
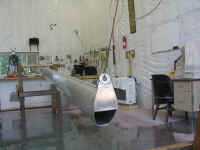
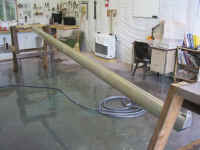
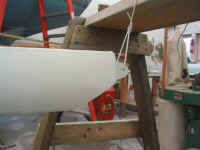
 Friday
morning, I began preparing for the upcoming painting process by clearing
out part of the shop (moving out our trailered 23' Lyman), and
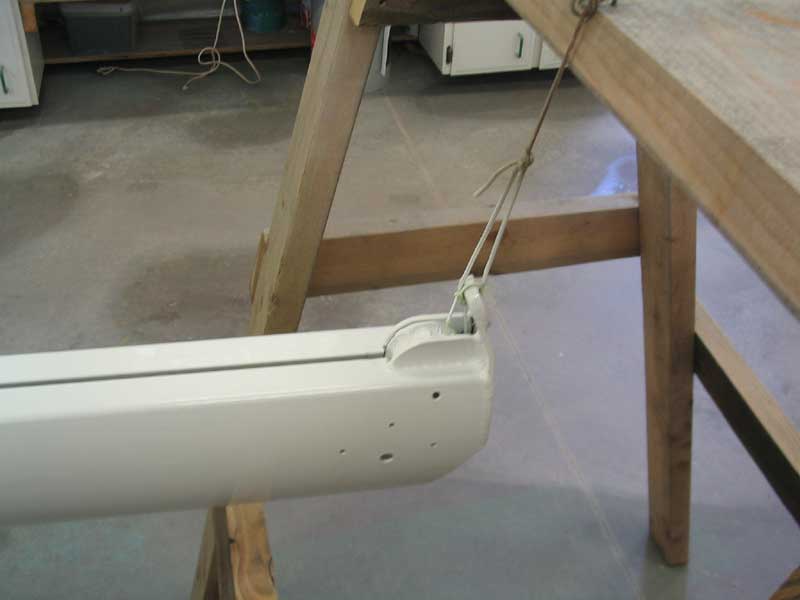
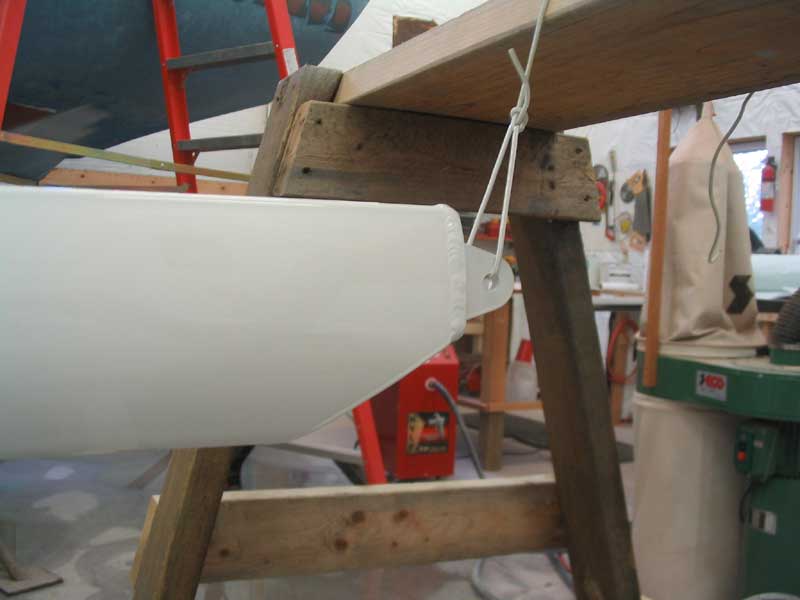
suspending the new boom between two large sawhorses to allow the entire
surface to be reached and painted. I hung the boom with some scrap
wire, one piece at each end. At about the time I finished with
these preparations, the delivery truck arrived with my etching and
painting materials, so I got right to work. Friday
morning, I began preparing for the upcoming painting process by clearing
out part of the shop (moving out our trailered 23' Lyman), and
suspending the new boom between two large sawhorses to allow the entire
surface to be reached and painted. I hung the boom with some scrap
wire, one piece at each end. At about the time I finished with
these preparations, the delivery truck arrived with my etching and
painting materials, so I got right to work.
|
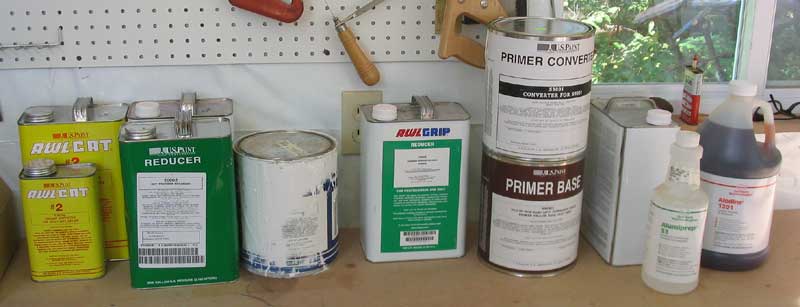
Before beginning, I laid out all my
materials and ensured that I had everything required. The etching
and painting process I planned to use, as prescribed by the US Paint
website and Awlgrip users guide, dictated a specific, time-sensitive
order in which to proceed, and once the process was begun, I would have
to follow it through to completion on that very day.
|
|
|
I began by cleaning the new spar with
commercially available degreaser and a light Scotchbrite pad, to remove
dirt, oil, and fingerprints. I rinsed the boom thoroughly to remove
all traces of the detergent, then dried the surface and solvent-washed it
with Awl-Prep solvent.
 Next,
I chemically etched the boom using Alumiprep 33, an acid treatment
designed for the purpose. Wearing rubber gloves, I diluted 1/2 cup
of the acid with 1-1/2 cups of water, then applied it to the boom using a
Scotchbrite pad, beginning at the bottom and working my way up.
Since I was working indoors--albeit with the large shop doors open--the
work area was out of the direct sunlight, so I didn't have to worry too
much about the material drying too fast; it's not supposed to dry on the
surface, so I cleaned about 1/3 of the boom length (both sides), let the
material work for a minute or two, then rinsed off the area with clear
water. Once each section was done, I moved on and cleaned the next
portion, till the entire boom was cleaned and etched. I rinsed the
whole thing thoroughly, including the inside, as the acid can cause
corrosion and deterioration problems if any is left behind. The
product directions indicated that the rinse water should be free from
breaks, leaving a constant sheet of water behind. Next,
I chemically etched the boom using Alumiprep 33, an acid treatment
designed for the purpose. Wearing rubber gloves, I diluted 1/2 cup
of the acid with 1-1/2 cups of water, then applied it to the boom using a
Scotchbrite pad, beginning at the bottom and working my way up.
Since I was working indoors--albeit with the large shop doors open--the
work area was out of the direct sunlight, so I didn't have to worry too
much about the material drying too fast; it's not supposed to dry on the
surface, so I cleaned about 1/3 of the boom length (both sides), let the
material work for a minute or two, then rinsed off the area with clear
water. Once each section was done, I moved on and cleaned the next
portion, till the entire boom was cleaned and etched. I rinsed the
whole thing thoroughly, including the inside, as the acid can cause
corrosion and deterioration problems if any is left behind. The
product directions indicated that the rinse water should be free from
breaks, leaving a constant sheet of water behind.
|
 While
the boom was still wet from rinsing the Alumiprep 33 away, I applied a
coat of Alodine 1201 conversion liquid, a nasty, gold-colored chromate
product that is designed to seal the aluminum and provide superior
corrosion resistance and adhesion of subsequent products. With a
small amount of the foul-smelling liquid in a cup, I applied it to the
boom using a chip brush, again working from the bottom up. I made
sure to get the material on all surfaces, and, as before, completed the
application in sections, this time about half the boom at a time, before
rinsing off the material as directed. Again, it was undesirable to
allow the material to dry on the surface before rinsing: doing so
would require reapplication of Alumiprep 33 before continuation. While
the boom was still wet from rinsing the Alumiprep 33 away, I applied a
coat of Alodine 1201 conversion liquid, a nasty, gold-colored chromate
product that is designed to seal the aluminum and provide superior
corrosion resistance and adhesion of subsequent products. With a
small amount of the foul-smelling liquid in a cup, I applied it to the
boom using a chip brush, again working from the bottom up. I made
sure to get the material on all surfaces, and, as before, completed the
application in sections, this time about half the boom at a time, before
rinsing off the material as directed. Again, it was undesirable to
allow the material to dry on the surface before rinsing: doing so
would require reapplication of Alumiprep 33 before continuation.
|
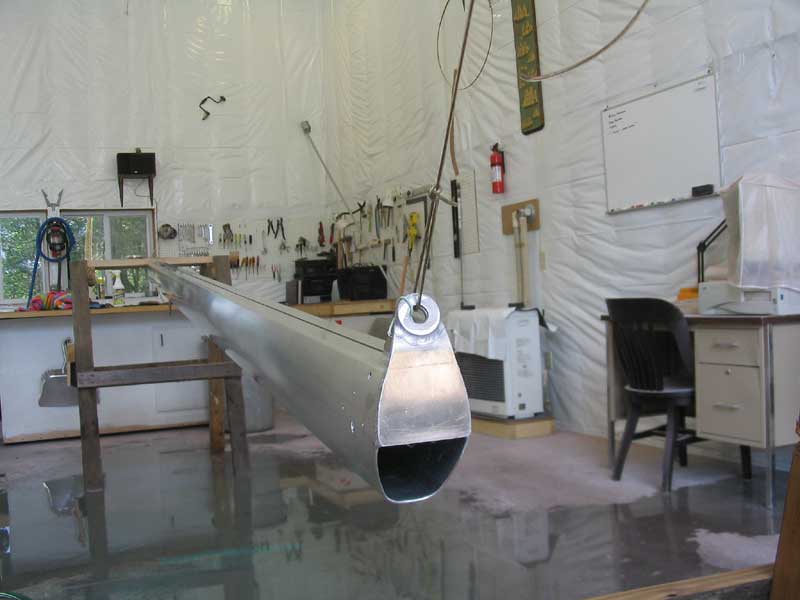
 Once
I had treated the entire boom with Alodine, I rinsed the entire thing
carefully, ensuring that I rinsed the mainsail foot slot, the corners
around the outhaul sheave, and the inside of the boom, particularly at the
ends. I raised one end of the boom to promote drainage from within,
and flushed the whole unit repeatedly; again, I was looking for a constant
sheeting action of the rinse water with no breaks. The Alodine left
behind a subtle gold tint on the aluminum. Once
I had treated the entire boom with Alodine, I rinsed the entire thing
carefully, ensuring that I rinsed the mainsail foot slot, the corners
around the outhaul sheave, and the inside of the boom, particularly at the
ends. I raised one end of the boom to promote drainage from within,
and flushed the whole unit repeatedly; again, I was looking for a constant
sheeting action of the rinse water with no breaks. The Alodine left
behind a subtle gold tint on the aluminum.
|
When I was satisfied that I had rinsed thoroughly, I left the boom to
dry. To assist in removing standing water from the slot and corners,
I used the air hose from my HVLP turbine to blow away the excess water
(since I don't have compressed air in the shop), and dried the surface as
much as possible. Then, I left the boom to dry thoroughly for some
time, though only as long as necessary, since primer application was to
occur as soon as possible after the boom was dry.
|
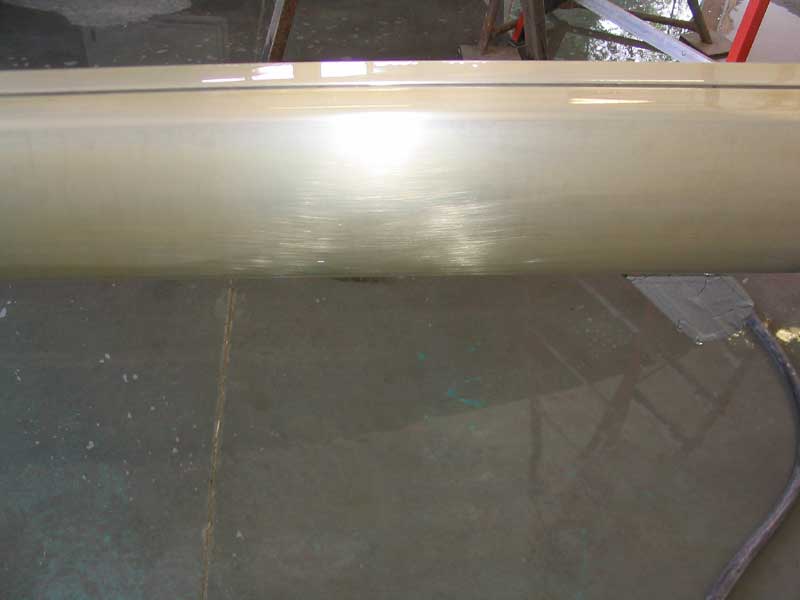
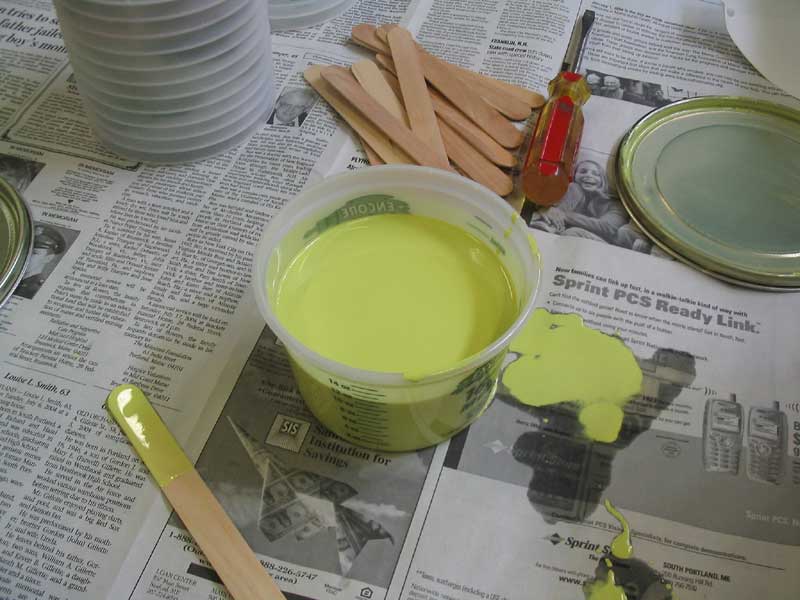
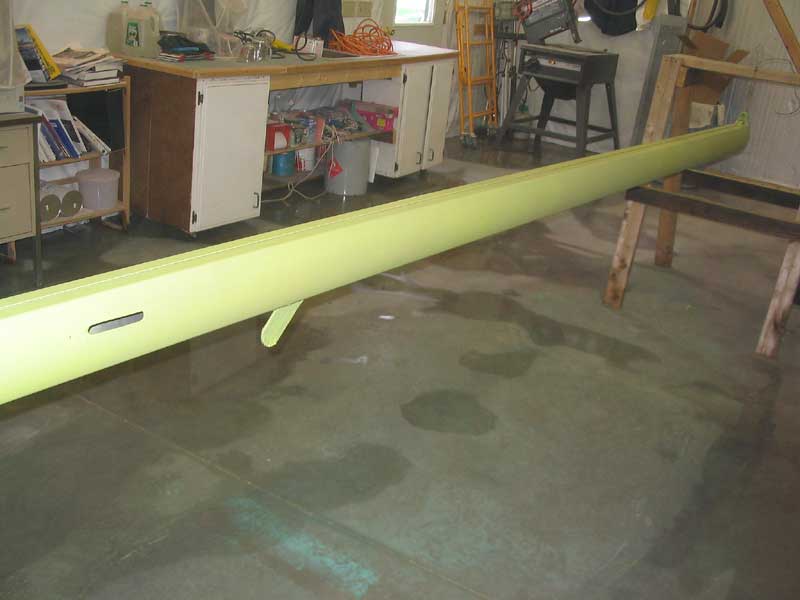
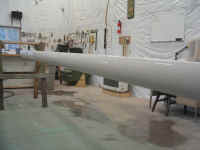
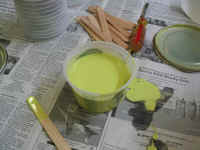 I
chose Awlgrip 30-Y-94 yellow anticorrosive primer, a vile-colored product
reminiscent of what one might imagine water runoff at Chernobyl might have
looked like. I mixed the primer base 1:1 with the appropriate
converter and allowed the mixture to prereact for 15 minutes as directed
before reducing with a further 1 part of T0006 primer reducer. I
then poured the very thin resultant product into my spray gun and
spray-applied a single coat of the primer, as directed. The primer
was extremely thin and ran easily, but I managed to achieve the coat
required with minimal problems; I carefully dabbed away some drips at the
boom ends, and decided that a couple small curtain-type runs were not
problematic enough to worry about; the material was so thin to begin with
that the curtains were nearly unnoticeable. I
chose Awlgrip 30-Y-94 yellow anticorrosive primer, a vile-colored product
reminiscent of what one might imagine water runoff at Chernobyl might have
looked like. I mixed the primer base 1:1 with the appropriate
converter and allowed the mixture to prereact for 15 minutes as directed
before reducing with a further 1 part of T0006 primer reducer. I
then poured the very thin resultant product into my spray gun and
spray-applied a single coat of the primer, as directed. The primer
was extremely thin and ran easily, but I managed to achieve the coat
required with minimal problems; I carefully dabbed away some drips at the
boom ends, and decided that a couple small curtain-type runs were not
problematic enough to worry about; the material was so thin to begin with
that the curtains were nearly unnoticeable.
|
 I
left the primer coat to dry for a little over two hours--the minimum
prescribed time--before continuing. Topcoats could be applied
anywhere between two and 24 hours following the primer application; if
more than 24 hours elapsed, the primer would have to be sanded and the
boom recoated with Alodine, then reprimed, before continuing.
Fortunately, I was unconcerned about the 24 hour limit, as I had all
intentions of completing the job as soon as possible. I
left the primer coat to dry for a little over two hours--the minimum
prescribed time--before continuing. Topcoats could be applied
anywhere between two and 24 hours following the primer application; if
more than 24 hours elapsed, the primer would have to be sanded and the
boom recoated with Alodine, then reprimed, before continuing.
Fortunately, I was unconcerned about the 24 hour limit, as I had all
intentions of completing the job as soon as possible.
|
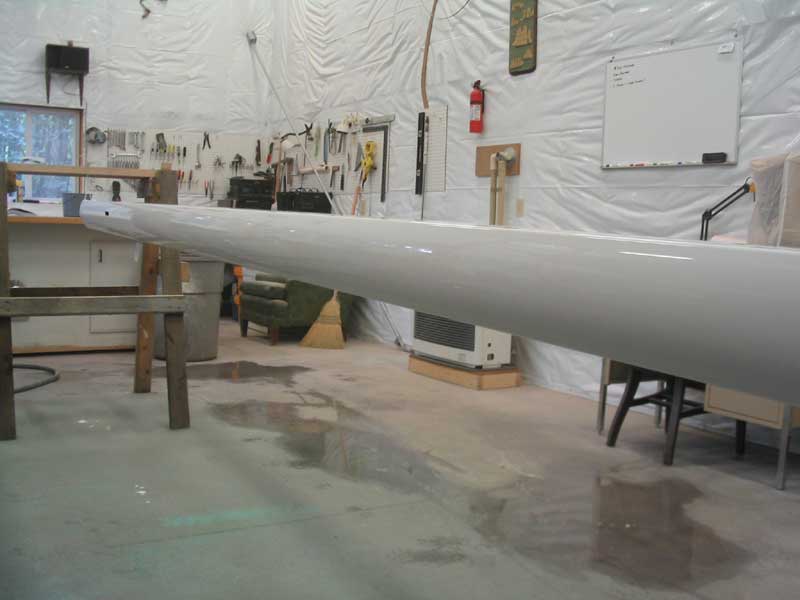
 When
the primer had dried sufficiently, I prepared to spray the final
topcoats. I chose Awlgrip Snow White for the spar, as it matches the
color of Glissando's decks; plus, I just like the color, as it is
clean and crisp while somehow maintaining more warmth, and less starkness,
than pure white, though with no yellow or bluish tones either. I had
half a gallon remaining in stock. (Later, once the mast was
unstepped at the end of the season, I planned to paint it as well.) When
the primer had dried sufficiently, I prepared to spray the final
topcoats. I chose Awlgrip Snow White for the spar, as it matches the
color of Glissando's decks; plus, I just like the color, as it is
clean and crisp while somehow maintaining more warmth, and less starkness,
than pure white, though with no yellow or bluish tones either. I had
half a gallon remaining in stock. (Later, once the mast was
unstepped at the end of the season, I planned to paint it as well.)
|
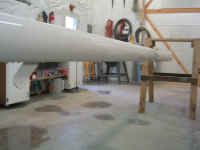 In
the space of a little over an hour, I spray-applied two coats of Snow
White. Because of some orange-peel issues I had experienced in
previous projects using my HVLP spray equipment, I used a slower reducer
this time, one that would allow the paint more time to self-level properly
before kicking. I was pleased with the results: there was
virtually no orange peel in the surface this time. I applied one
coat, allowed it to partially cure for about an hour, then applied the
second--and final--coat. In
the space of a little over an hour, I spray-applied two coats of Snow
White. Because of some orange-peel issues I had experienced in
previous projects using my HVLP spray equipment, I used a slower reducer
this time, one that would allow the paint more time to self-level properly
before kicking. I was pleased with the results: there was
virtually no orange peel in the surface this time. I applied one
coat, allowed it to partially cure for about an hour, then applied the
second--and final--coat.
|
|
|
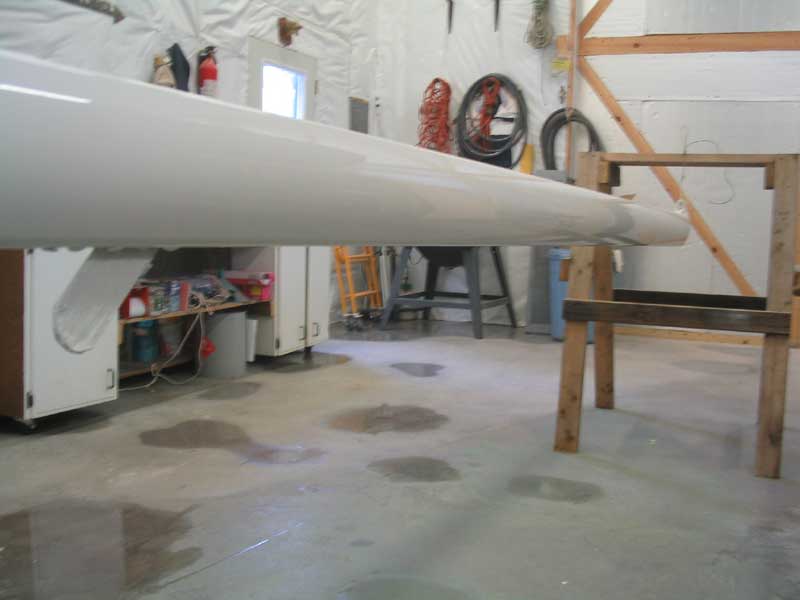
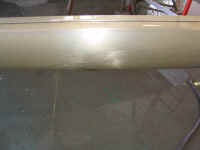
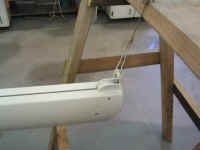
The next day, I returned to inspect the
finished product. I noticed that there were a few drips that had
formed on the bottom of the boom, where the paint had run down and
collected. I wasn't sure how to deal with it: they weren't
that noticeable, but I wondered if they would drive me nuts once the boom
was installed on the boat. They would only be noticeable under
sail: when the boat is at rest, the boom is of course covered by the
flaked sail and sailcover. I decided to ponder the issue for a short
while before deciding whether to sand the drips out and repaint, or to
leave it be and chalk it up, one way or another, to good experience,
lessons learned, and things not to do again. Painting the bottom
portion of the boom was decidedly difficult, and it was easy to overload
the area with paint, which is what seemed to happen in this case.
In any event, the drips (maybe 10 separate
drips) were not a big deal, and my inclination was to leave well enough
alone--and to simply be extra careful in the future when painting the
mast. We'll see. For now, the boom painting was complete.
|
|