|
Tools Used During the Glissando Project
This page was last updated on March 19, 2002
|
|
UPDATE: 2011
Please note that the listing of tools
found on this page is now mostly obsolete. As with all areas of this
site, please use this page for your reference if you like, but remember
that each page on this site represents only a moment frozen in time, and
that the information may be completely out of date and subject to change.
I only still have very few of the tools
listed below. These are only the tools I used for this
project, which I completed between 1999 and 2001. Please keep this
in mind as consider the listings below.
At this time, I do not have a listing of
current tools. Most of the tools below have died or otherwise been
replaced.
|
|
Click here
for the tool and equipment inventory I keep on the boat.
I admit it--I used to be sort of a tool
hound. I still am, to some extent--that is, if I need a tool, and feel it
would be useful in the future, I buy it. I don't like to "make
do" with something else if I know that there is a better tool
available. Of course, I have realistic budget constraints--no huge
220-Volt cabinet saws or anything like that. Most of my power tools are
handheld, and these are the most important for boat restoration anyway.
In this section, you'll see exactly what tools
I used, and what was essential to my project--as well as some tools that ended
up being less useful than originally anticipated. I have devised the
following ratings to help judge the usefulness of each tool, at least as it
relates to this specific project:
Completely
Useless............................................................................0-1
Much less useful than
expected...........................................................2-3
Helpful, but would have done without if I hadn't
already had the tool..........4-5
Very useful, but would have done without if I
hadn't had it already.............6-7
Extremely useful, and instrumental to the
completion of the project..........8-10
Don't even consider a project without this one,
or one like it.....................10+
|
|
Handheld Power
Tools Stationary
Power Tools Hand Tools
Mechanic's Tools
Special
Tools Boat Tools
|
|
Handheld
Power Tools
These tools form the core of my inventory, and
are generally the most used. Many of them I couldn't do without.
|
|

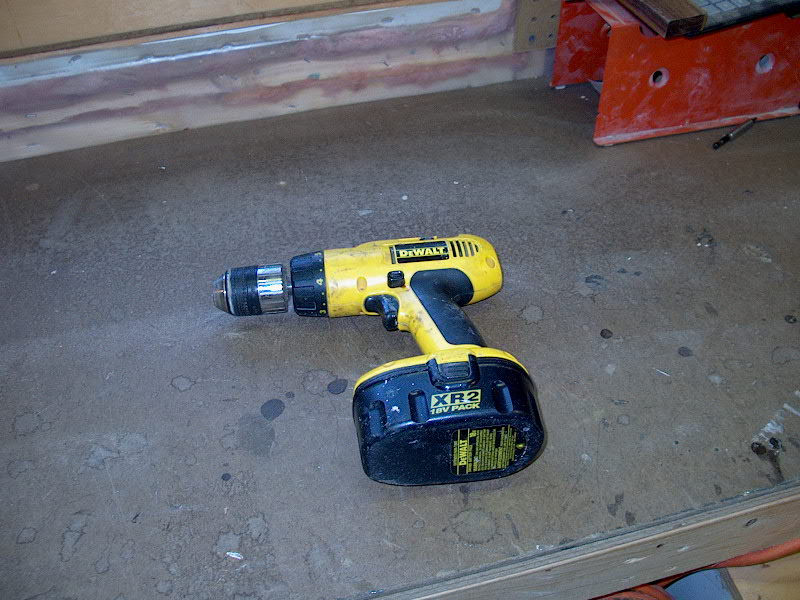
DeWalt DW995 18 volt cordless driver/drill,
1/2" Usefulness Rating: 10+
I love this tool. Cordless drills have
to be one of the best advances in the history of tooldom. This drill is a
real workhorse, and I used it so many times that it almost became part of my
hand. To me, there's no substitute for professional grade tools--they
always prove to be worth the extra money. I've dropped this tool to the
ground (accidentally) from the tops of ladders, it's been dropped to a concrete
floor, and generally used and abused...all with no ill effects. I can't
imagine doing this, or any project, without this tool. I wish I had a
second battery, but it charges in only an hour. Initially, I wanted the 18
volt drill not just for its power, but also for the 1/2" chuck, so that I
could use larger drill bits.
|
|

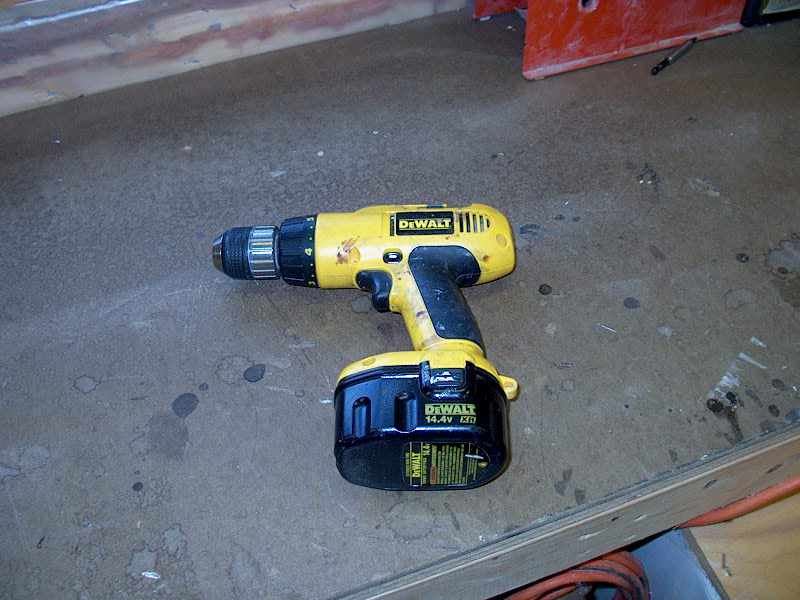
DeWalt DW991 14.4 volt
cordless driver/drill, 3/8" Usefulness Rating: 10+
If one cordless drill is good, then two must
be better. Actually, I wish I had one or two more (and probably will buy
another soon). I got this one to replace an older, 12 volt DeWalt that
died. I have several other old, anemic cordless drills that I can't use
anymore, but still haven't thrown away. This particular tool is somewhat
lighter and easier to manage than the big 18 volt, but is otherwise the same,
and every bit as useful. I use two or more drills to avoid switching
bits (from screwdriver to pilot drill), or in two different locations to avoid
having to lug one back and forth (or, even worse, to prevent forgetting one on
the boat or something and being annoyed at having to go retrieve
it). Both of these cordless drills pretty much lived on the boat in the
project shed during the core of the project, in the spring-summer-fall of 2000
and the winter of 2000-2001. I have two batteries for this drill, which is
really handy. I always keep one in the charger. This summer, when
the boat was in the water, I kept this drill and the charger/extra battery on
board the boat, where it proved immensely useful. When I used up a
battery, I had the spare ready to go...and in theory, I can charge the spare on
board using my inverter. This season, I never had to--I just brought it
home instead--but if we were cruising, this would be handy. As much as I
like having this excellent tool on board, I think I may buy a less expensive
version specifically for the boat, with extra batteries. That way, I won't
have to worry about dropping a very expensive tool overboard, or otherwise
ruining it--plus, I'll have two cordless drills at home again, which I
occasionally missed this summer. If you haven't experienced the pleasure
of having two of these great tools, I highly recommend it!
|
|

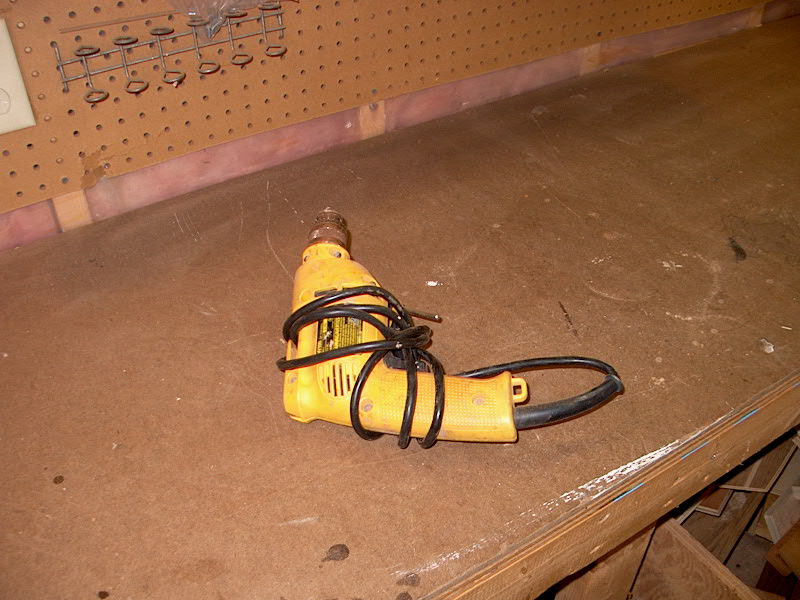
DeWalt 3/8" electric drill
(corded) Usefulness Rating: 8
I bought this years ago, before cordless
drills were as excellent as they now are. This is still a great tool, and
sometimes you just want the extra rotational speed of a good corded drill.
As always, redundancy is the best thing, and there were several
times--especially during hardware installation on the deck--where three drills
were used--one for the pilot hole, one for a countersink, and one for driving
screws. This one came in handy at those times, and I mainly used it in
conjunction with my two cordless drills.
|
|

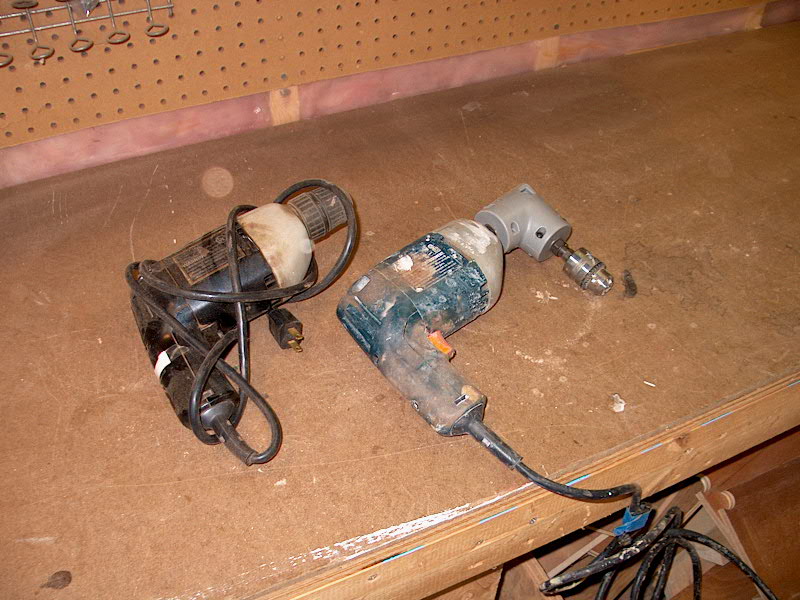
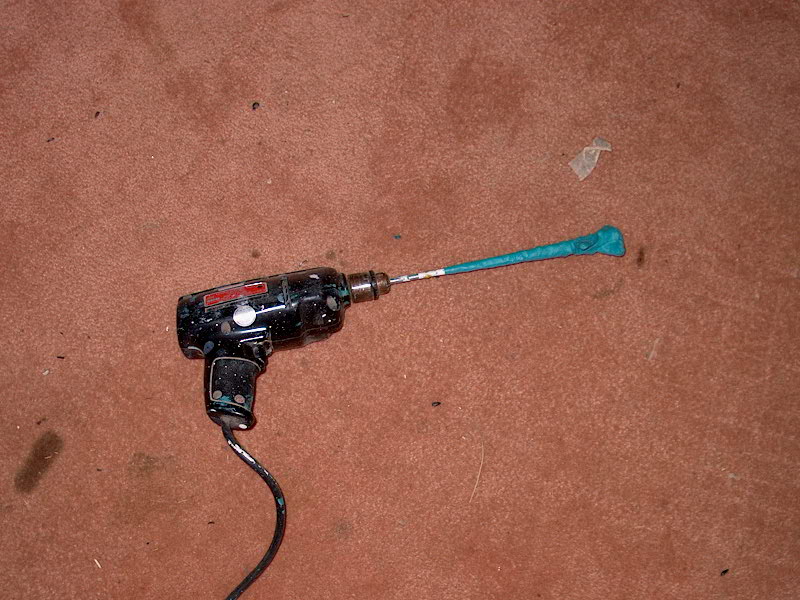
Three Older Black and Decker and Craftsman
drills (corded) Usefulness Rating: 5
Who even knows where these came from?
One is an ancient 1/4", non-variable speed Craftsman that I think was my
Dad's when I was growing up. The other two cheap B&Ds came from my grandfather,
I think. I use the Craftsman specifically for mixing paint--it has a paint
mixer attached that is pretty much permanent, as the chuck doesn't  really work
any more. I used one of the B&Ds during all my epoxy work, attached to
another mixing attachment. The drill got pretty gunked up with epoxy, but
still works fine. I left it in the project shed during the whole project,
dating back to November 1999 when I began epoxy work. Again, it was nice
to have a dedicated mixing tool--no messing around with changing attachments or
anything. The third cheapo drill comes in handy every now and again for
whatever reason...you can never have too many, it seems--especially when they're
given to you.
really work
any more. I used one of the B&Ds during all my epoxy work, attached to
another mixing attachment. The drill got pretty gunked up with epoxy, but
still works fine. I left it in the project shed during the whole project,
dating back to November 1999 when I began epoxy work. Again, it was nice
to have a dedicated mixing tool--no messing around with changing attachments or
anything. The third cheapo drill comes in handy every now and again for
whatever reason...you can never have too many, it seems--especially when they're
given to you.
|
|

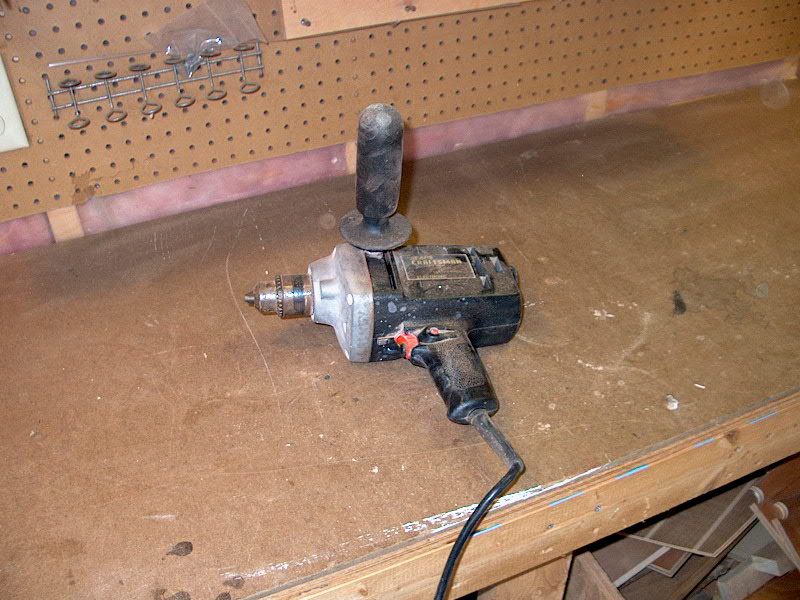
Craftsman 315-105050 heavy duty 1/2"
electric drill Usefulness Rating: 5
Sometimes you need a slow-speed, heavy duty
1/2" drill. It's not often, but when I do--I pull out this one.
It's good for cutting stubborn metal. I might have used this drill 3 or 4
times during the project, and probably could have done without it.
|
|

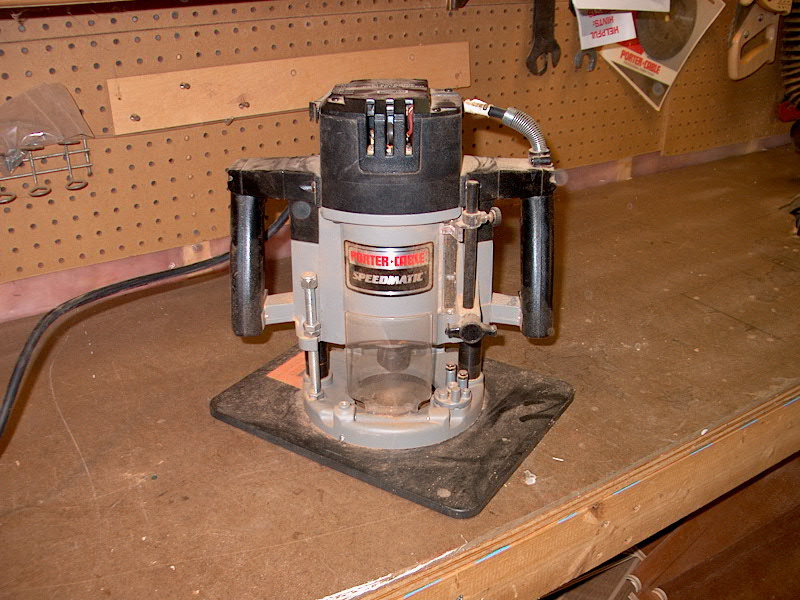
Porter Cable 7539 plunge router, 3 HP,
variable speed; collets for 1/4" and 1/2" Usefulness
Rating: 6
I don't always need this huge, powerful
router. But when I do, it is invaluable to have around. I originally
acquired it for use in cabinetmaking, particularly in a homemade router table,
for spinning large diameter bits used for raised panel doors. It was also
the first (and--still--only) plunge router in my collection, so when I need to
make a plunge cut I reach for this one. I only used it a couple times
during this project, and could have made do without it. Some of the bits I
have, particularly large-radius roundover bits, are just too big to fit through
the small holes in standard router base plates. I have a special plate for
the large router with a 3" cutout, so, rather than make new, task-specific
bases for my other routers, I just reach for this one if I have to spin a large
bit. If I didn't have this tool, I would have been able to make do just
fine. But it is nice to have, and as an overall part of my tool inventory
it is a wonderful thing.
|
|

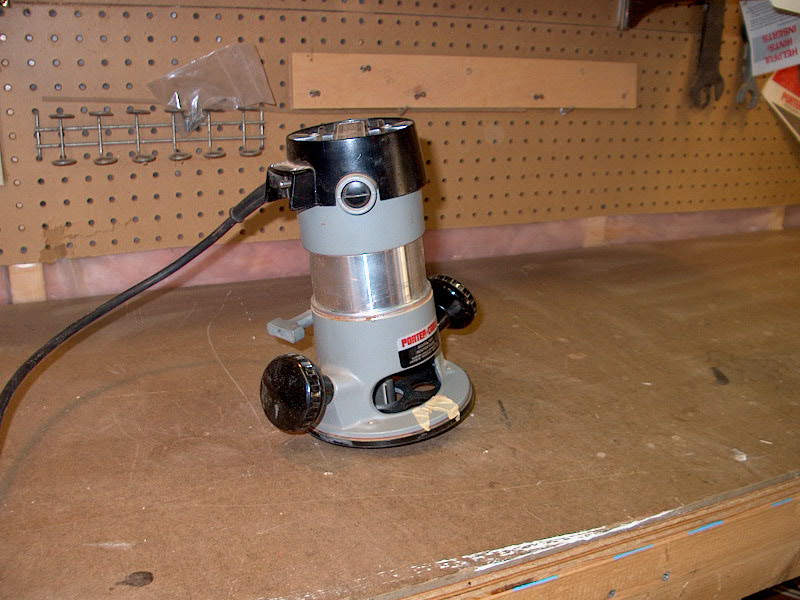
Porter Cable 690 router, 1.5 HP; collets
for 1/4" and 1/2" Usefulness Rating:
8
This is my workhorse router, and I love
it. It's easy to change bits because the whole base just spins off the
router motor in about a pair of seconds, allowing easy access. This also
allows you to switch bases from the standard base to a plunge base, if you have
one. (I don't have the plunge base yet.) For some reason, this
router ate through its first set of brushes very quickly after I got it (a
number of years ago), but since I replaced them (an easy task) it's been
flawless. I can use most of my bits with this router, although, as I
mentioned above, some of them are too large to fit through the hole in the base
plate. I could make a new plate with a larger hole, but so far it
hasn't been necessary. This tool is fairly lightweight and compact, so it
fits most everywhere I need it to. I suppose, strictly speaking, that
nothing I used this tool for would be impossible without it--roundovers and
simple edge details, and general stock removal could all be done by hand, hence
the "8" rating rather than "9" or
"10".
|
|

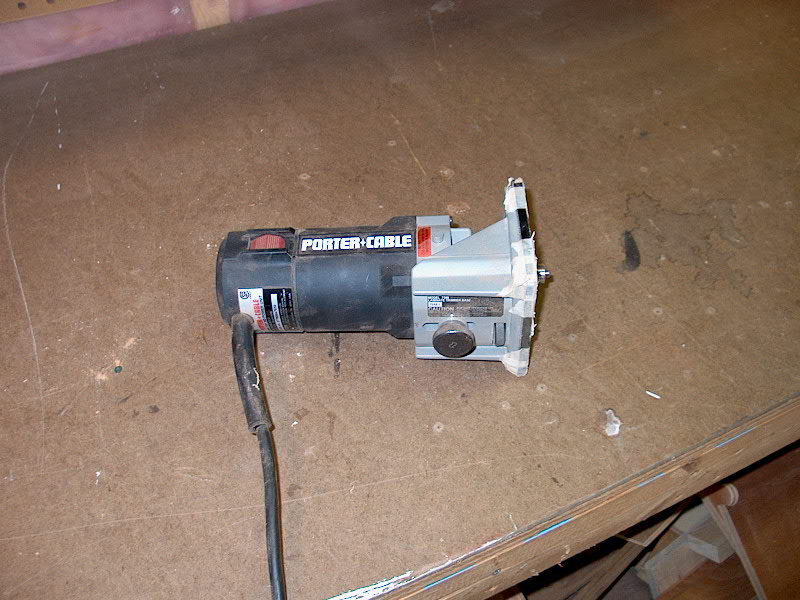
Porter Cable 7301/7309 laminate trimmer;
1/4" collet Usefulness Rating: 9
If you do any amount of work with Formica
(generically called "high pressure laminate"), this is a great
tool. I used it extensively to cut all the Formica for my project--there
was a lot of it. I also have a pair of manual laminate shears, which are
fine and helpful, but for straight lines, accurate cuts, and cleanliness of the
cut, this is the only tool for the job. I use it with a bottom-bearing
flush cutting laminate bit. For most of my cuts--say, for the pieces of Formica
that I applied over the bulkheads in the head and forward cabin--I'd lay out the
pattern on the sheet, then, using a straight piece of plywood beneath as a guide
and clamping the Formica in place, run the laminate trimmer along the
edge. The bearing on the bottom of the bit runs against the straight
plywood, therefore guaranteeing a straight cut. Sometimes I'd use it
freehand to buzz off a larger than needed piece of Formica to make handling the
sheet easier. Of course, I also used it for making the countertops and
trimming the laminate flush with the plywood underlayment; I used it to hold a
small 1/4" roundover bit, a but I use frequently to soften the edges of
various pieces of wood. The small size is very convenient to hold, and the
motor is powerful enough to spin pretty much any bit that will fit in the
tool. One could argue that this is a specialty tool, and that you could
use a regular router for most of these jobs--true enough, but this is a better
tool for the job, and worth the investment if you foresee doing any of this kind
of work in the future. I originally bought it for projects around my house
and for use in furniture making projects.
|
|

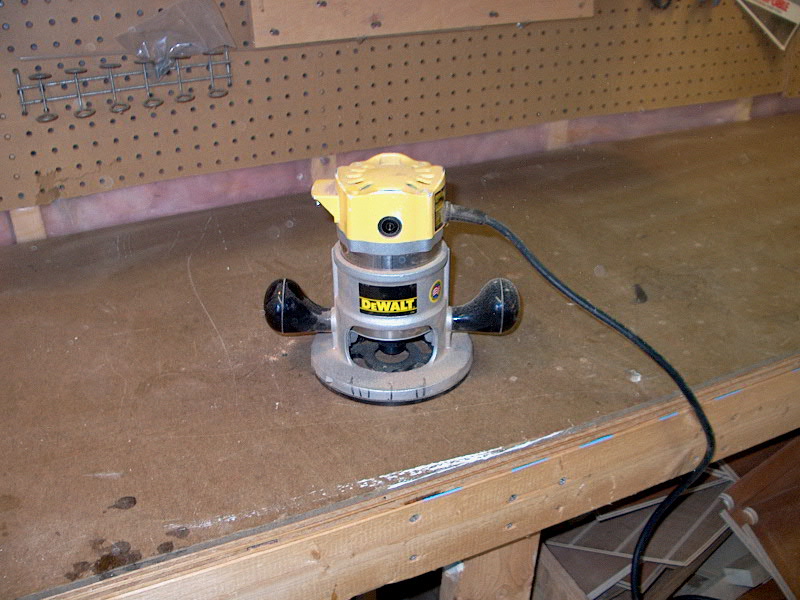
DeWalt DW610 router, 1.5 HP; collets for
1/4" and 1/2" Usefulness Rating: 4
This was the first router I ever had, and it's
a good, basic, heavy duty one. The Porter Cable 690 basically replaced
this one, so I rarely use it anymore. Every now and then, I use it for
something; the adjustment screw is munched, so it's a little tricky to adjust
the height of the bit, but I get it to work when necessary. Sometimes,
it's handy to have it to install another bit so that I don't have to change the
setup on my other router. If I didn't have it, I would really not miss
it. Since I do have it, I use it when appropriate.
|
|

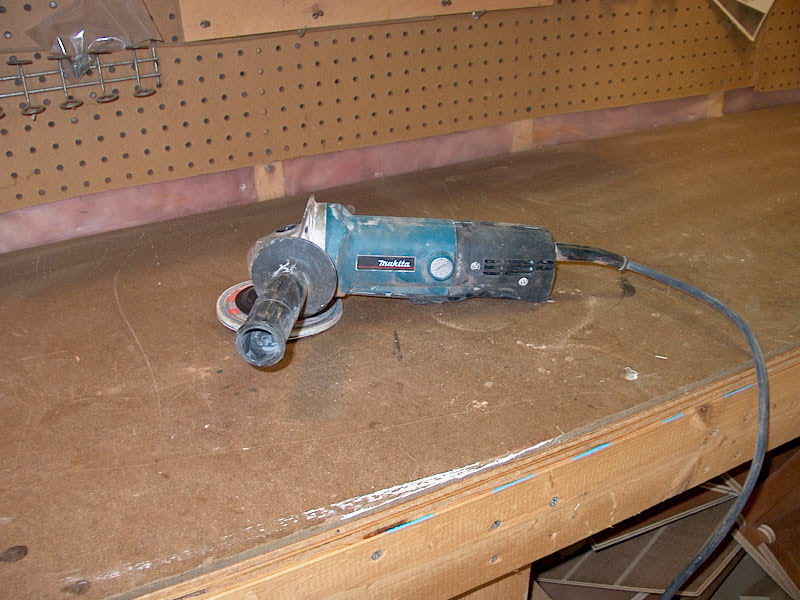
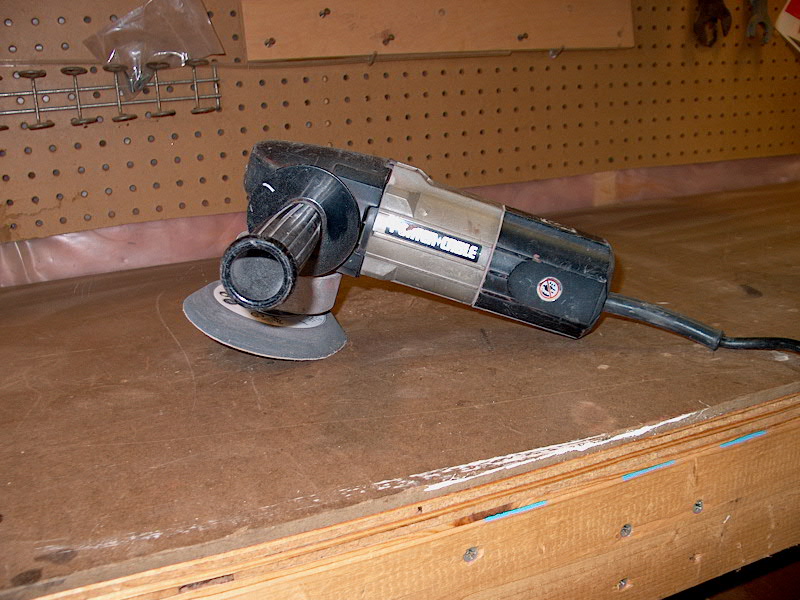
Makita 9527 PB 5" angle grinder
Usefulness Rating: 2
I bought this tool specifically for the
project. I bought it at a discount store that sells overstocks and
reconditioned tools, and the price was right. I thought it would be much
more useful than it actually was--I initially used it during the recore project,
for grinding the old core and resin off the top and bottom skins of the
deck. I also used it a few times to grind old tabbing off the inside of
the hull, and to grind down the thick ice hatch flange in the cockpit. I
could have done any of these projects without it. It's extremely easy to
grind awful half-moons in whatever surface you're grinding, and the tool has
only one speed--fast. It's really more of a metal working tool than
anything else, and, while I'm sure I'll find uses for it over the years, it
pretty much lies unused on my tool shelf.
|
|

Craftsman Industrial 900-277130 7"
angle grinder, 10 amp Usefulness
Rating: 7
I wanted this tool for the project. It
came with a 7" hard backing disc, which I promptly removed and replaced
with an 8" soft stickit pad. With the soft pad, it becomes at least
feasible to use this powerful tool on wood or fiberglass, but extreme care must
be taken with it. I used this whenever I wanted quick, down-and-dirty
stock removal--for stripping the bottom it was instrumental. I also used
it to grind the inside of the hull wherever the tool would fit, to grind all the
gelcoat off the cockpit seats and deck so that I could laminate new material on
top, and for a few other projects that I can't remember now. It's easy to
screw up a surface with this tool, even with the soft pad, as the disc spins
fast, and in only one direction--it's a true circular grinder, not anything
approaching a dual-action random orbit tool. This is not a tool for fine
finishes, and I used it mostly with 36 grit sandpaper. Sometimes, a brutal
tool like this is what you need. Most of the time, you don't.
|
|

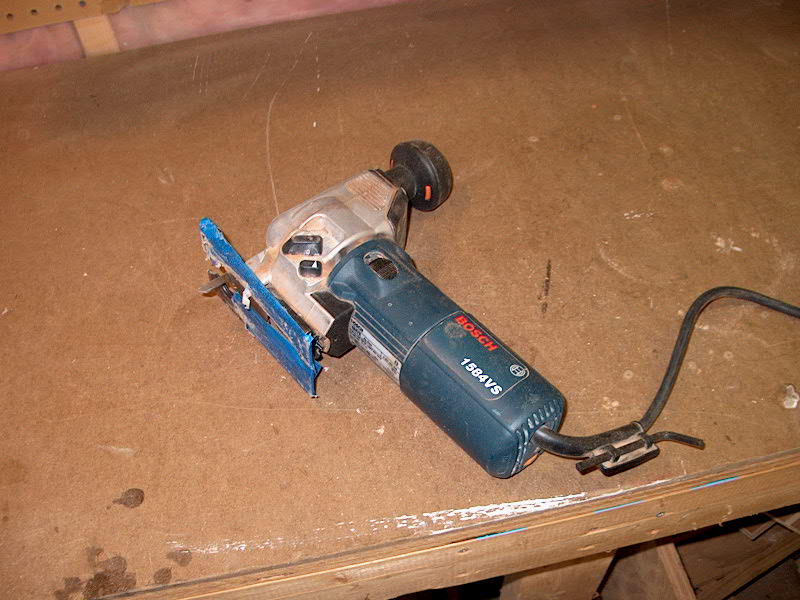
Bosch 1584 VS variable speed jigsaw
Usefulness Rating: 10+
I love this tool. I used one of these
years ago at Hinckley, and wanted one ever since. Several years ago, I got
it. It's a wonderfully smooth, easy to control jigsaw. The one
drawback is that the standard-hardware-store-type blades do not fit (you know,
the ones with the concave top end with the two holes...)--you have to buy
the (naturally) more expensive Bosch bits to fit. That's OK--the
tool is worth it. I used this endlessly, especially when I built the
interior. I don't own a bandsaw, so this tool comes into play anytime I
had to cut something that wasn't necessarily straight. The portability of
the tool was key, and I typically kept it right up in the boat during the
project for immediate use. Because nothing inside the boat is really
straight, level, plumb, or true, there were few straight cuts or 90-degree
corners. For cutting the trapezoidal shapes of all the plywood parts, the
curved sections to match the shape of the hull, and just about everything, I
used this tool. I prefer this style of jigsaw after using both types--the
handle over the top kind vs. the hold onto the motor kind. I find it
easier to delicately control. I highly recommend this specific tool!
|
|

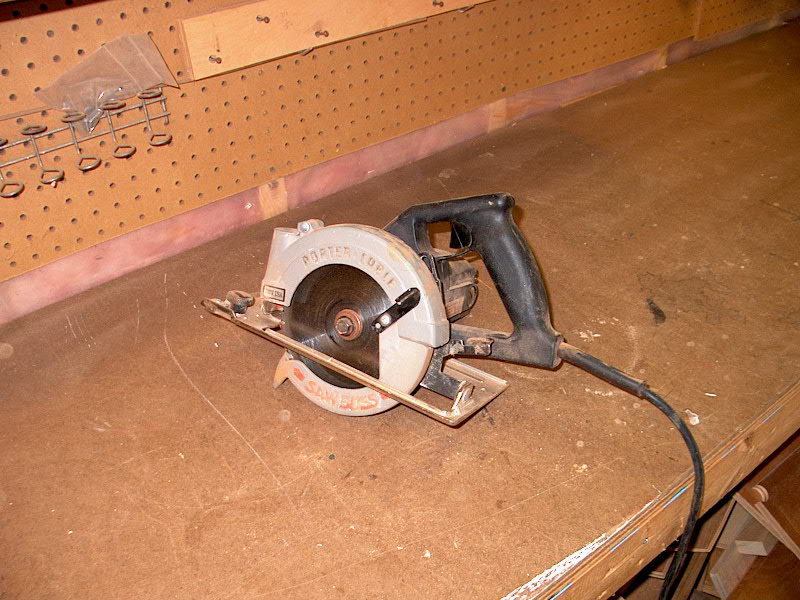
Porter Cable 345 Saw Boss 6" circular
saw Usefulness Rating: 10+
This is another of my favorite tools.
Thank Norm Abram of "The New Yankee Workshop" for this one--after
seeing one on his show years ago, I thought a small, easier-to-handle saw would
be great, and promptly bought one. I use it almost every time I need a
circular saw--rarely is the smaller size a handicap. It has plenty of
power, and is easy to handle. It's useful when away from the shop, because
of its portability; it's useful inside the boat; it's useful when I'm in my
shop, for cutting large pieces of plywood, end cuts, and any straight cuts where
using the table saw is impractical or infeasible. You could do the whole
project without a table saw if you had a good circular saw like this--it's
hardly a replacement for a table saw, but you could do everything with it
if you had to.
|
|

Makita 7" circular saw (table bent,
but still usable) Usefulness Rating: 4
I had this one before the Saw Boss, and it's a
good one. At some point, it was dropped and the saw table is now bent,
limiting the accuracy and usefulness of the saw. Eventually, I'll get
another full-size circular saw, as they're handy around the house, etc.
Usually, the smaller Saw Boss usurps the need for a larger saw. I think I
only used the Makita for one part of the project--cutting the sharp bevel on the
glued-up engine foundation blanks to accommodate the curvature of the
hull. The little saw was overwhelmed by this task, so the larger motor
with the larger blade on this Makita came in handy for this. Without it,
I'm sure I could have made do.
|
|

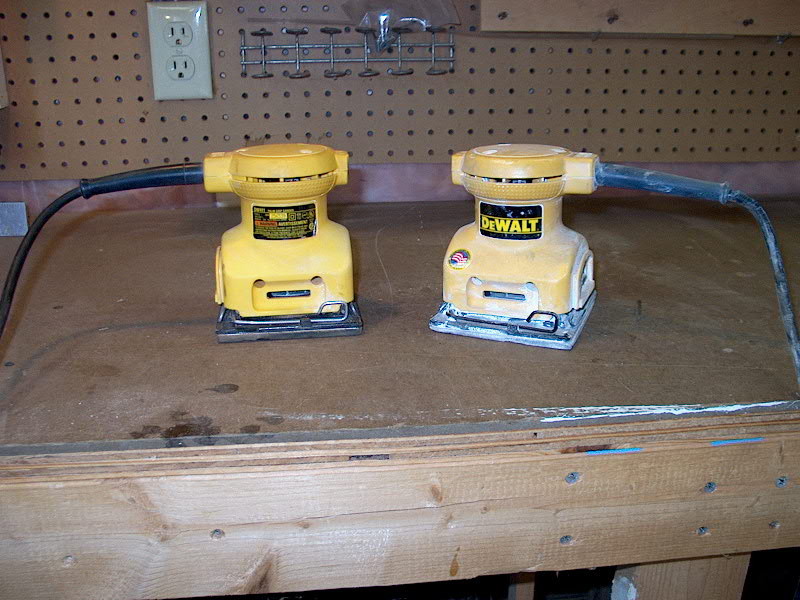
DeWalt DW411 palm sander (2)
Usefulness Rating: 10+
I had one of these that became terminal while
I was sanding the primer on the hull, so I went out and bought another just like
it. The first one probably just needs a brief hospital stay for a full
recovery, which I'll get around to sometime--probably some brushes and a new pad
for the bottom. These sanders are designed for use with normal sandpaper,
which you cut to shape and clamp in place. However, I almost exclusively
use sticky-back paper on them, which, over time, damages the foam base pads--especially
if you leave the sandpaper on for an extended period, during which the adhesive
always seems to become permanent. This is a minor issue, and it takes
years for any real damage anyway. I'm so lazy, and I hate buying
sandpaper, so I usually use the 5" circular stickit discs that I always
have on hand for the Porter Cable. For most sanding chores, the fact that
these aren't really meant for this sander doesn't matter in the
least. A true finishing sander is absolutely necessary--as good as a
circular, random-orbit sander is, they still leave tiny swirl marks that can
show up. For a glossy painted or varnished surface, you need one of
these. Except for sanding the epoxy filler on the hull when I filled all
the gouges, I never used the DA sander on the gelcoat--I did all the sanding
with the palm sander to prevent any of those swirl marks from showing up under
the Awlgrip. On the decks, I used the DA for a lot of the initial sanding
to remove nonskid, smooth out the gallons of epoxy fairing compound, etc--but I
switched to the palm sander as soon as I could for the final stages, and used
this exclusively for the sides of the cabin trunk and such where I didn't have
to remove significant material. What I like to do to help eliminate the DA
marks, whenever it applies, is this: I use the DA and smooth the surface
to 220 grit. Then, I switch to the palm sander, but with 80 grit--this
removes the small circular swirls from the 220 grit on the DA. Then, I
work my way through 120 and 220 grits with the palm sander. This has
proven to be very effective.
Of course, I used this tool all the time
during the woodworking stages of the project, for final smoothing before
varnishing. If you want a fine finish on anything, I wouldn't consider
doing the project without one of these.
|
|

Porter Cable 7334 5" HD random orbit
sander, right angle Usefulness Rating: 10+
If you don't have one of these, buy
one--simple as that. I can't think of a tool that I used more, and I can't
imagine doing any sanding chore without it. It's powerful enough for heavy
stock removal when used with 36, 60 or 80 grit paper, yet gentle enough to use
with 220 grit for finer finishes (although, for clear or glossy finishes, the
tiny swirl marks may very well show through--which is why I use the palm sander
too). It'll take off bottom paint, grind down nonskid, remove gobs of
hardened epoxy filler--pretty much whatever you want. I've had this tool
forever--I bought it when the design was brand new as the first electric
dual-action sander on the market (there were air-powered DAs available for years
before, a favorite of autobody shops everywhere). I have never done any
maintenance on it, except for replacing the soft 5" pad once, a few years
ago, when the edges of the original got worn down and torn up from use. I
think it could use some new brushes, but it still runs well
nonetheless.
This sander is different from the current new
breed of random orbit circular sanders on the market today. The new ones,
with the motor mounted above the disc, are really finishing sanders, and are
good for that. However, for power, you need one of these right angle
sanders. I can only speak specifically of the Porter Cable model that I
have--other manufacturers make similar ones, but I'm very partial to Porter
Cable. This sander is still available, and is worth whatever it
costs. Get one. Then, buy your sanding discs (aluminum oxide, open
coat) from McMaster-Carr Supply (www.mcmaster.com).
The combination of this outstanding sandpaper and excellent tool will never let
you down--guaranteed.
|
|

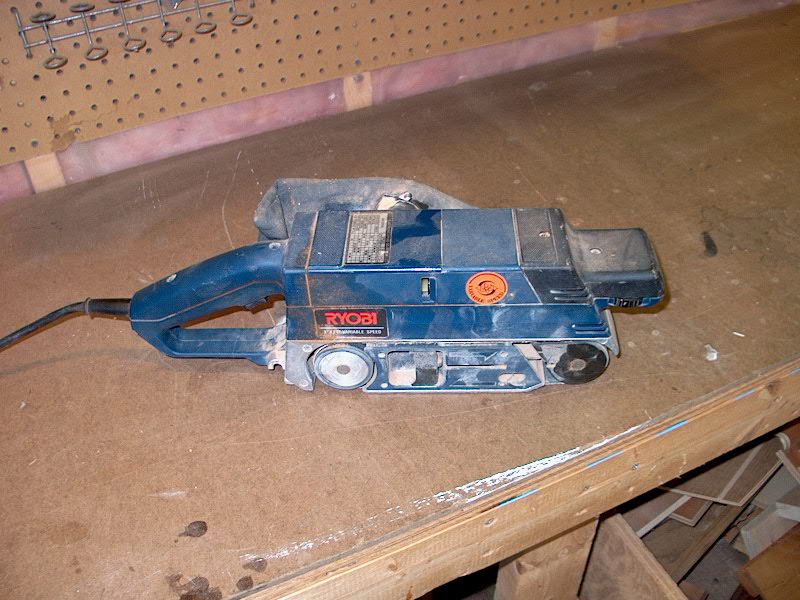
Ryobi BE321 belt sander, 3x21
Usefulness Rating: 4
I used this a few times during the
project. I've had it for years, and have always been mildly disappointed
in its performance. Granted, this is not a top-line tool, and probably
lacks the power of many other belt sanders. I find it is often most useful
to use it upside down as a quasi-stationary tool. The motor lacks the
power to be as helpful as one might think, at least in my particular tool.
Sometimes I use it, and am glad I have it. When I do, though, I generally
wish for a better, more powerful version, and may get one someday. The
belt sander is not a substitute for any of the other sanders listed here, and is
not a good all-around tool. If you don't have one, you probably don't need
it. If the time comes when you need one, you'll know it, and you can get
it then.
|
|

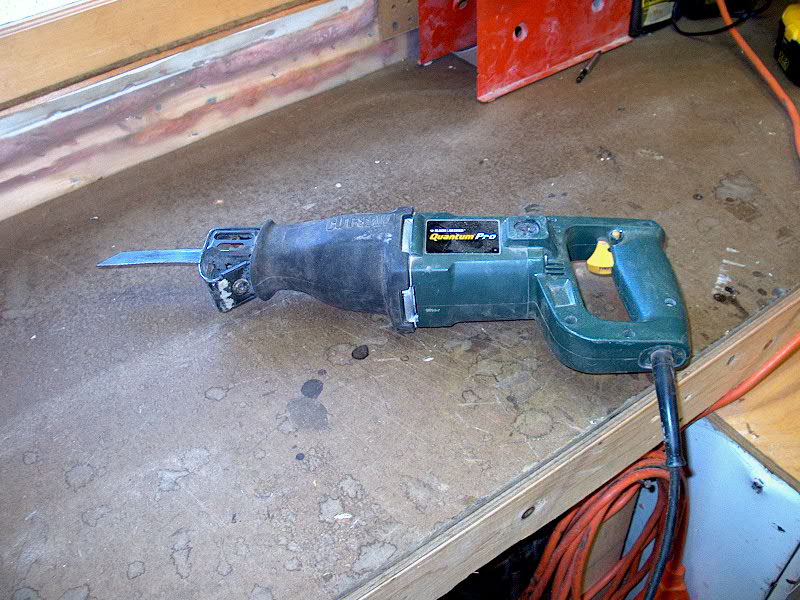
Black & Decker Quantum Q450
reciprocating saw Usefulness Rating: 7
Reciprocating saws, often called
"Sawz-Alls" after the Milwaukee tool that carries this moniker, are
another one of those tools that you can go for years and years without.
When you eventually get one, you find all kinds of uses for it. There's no
doubt they are handy for destructo-mode and rough cuts. I used it to cut
up the old jacketed exhaust system, to cut the old propeller shaft, to cut the
bolts holding the Atomic 4, to cut off the old fiberglass A4 engine mounts, to
cut tabbing, to cut up the old galley to help get it out of the boat, and so on
and so forth. I could have done all of the above without it--but it sure
made life easier. The blades are expensive, and you're virtually
guaranteed to be out of spares when you break one. (Don't ask why this
is--I don't know, but it seems to be the rule.) If I were buying tools specifically
to take on a project like this, I would probably not include this one on the
initial buy list. Eventually, the time will come when you find some chore
where one would be really useful, and you can go out and get one then. I
happened to be in a Black and Decker outlet store in New Hampshire and saw this
one. The price was good, I'd been thinking about one for years, and I
decided to go for it. (This was before I had the boat.) Oh, I'd
rather have a Milwaukee or a Porter Cable, but for the amount I use it, the
B&D is absolutely fine.
|
|
Stationary
Power Tools
For cabinet work and interior joinery, these
tools are invaluable. Most of the jobs could be done without these tools,
but they sure make it easier. I bought these tools a number of years ago
when I was into furniture making and such, and I'm really, really glad I have
them now. Higher quality, industrial-grade
professional versions would be even better...dream on! Without these
tools, and the basic skills I gained back when I was building furniture, I don't
know whether doing a boat project like Glissando would have seemed feasible to
me or not. For my purposes, these were helpful and important to the
success and relative ease of the project--but that's not to say that I think
these are required for anyone else's success. Buy these tools carefully,
as they are pretty much a one-time purchase.
|
|

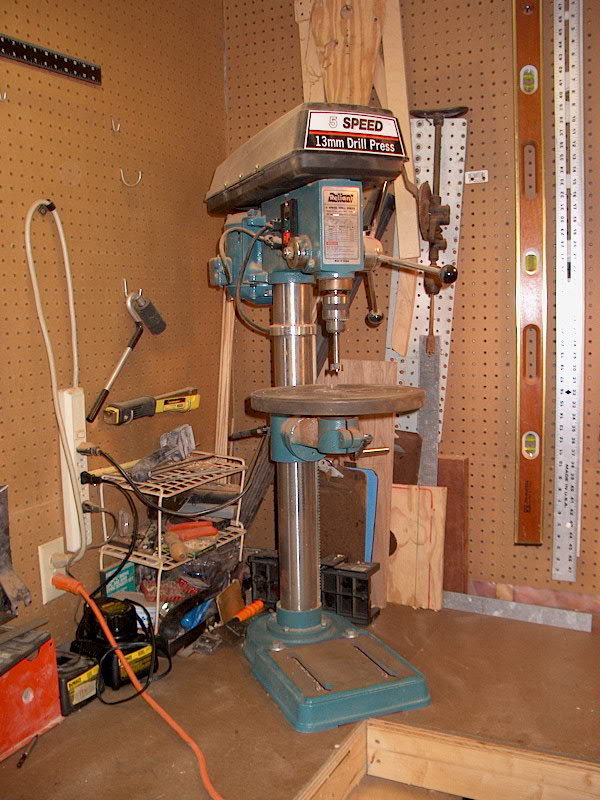
Reliant DD-50 13" drill press,
benchtop Usefulness Rating: 7
Sometimes, you just need a
drill press. Rarely is having one absolutely necessary--you can do most of
the functions with a hand drill--but it sure is handy if you happen to have
one. I used this for making bungs (lots of them--and I don't think
you could make these without the accuracy of the drill press); for drilling
straight holes with large bits like Forstner bits; to install a drum sander for
sanding curves; for drilling stubborn metal pieces; and probably some other
things that I have forgotten. This particular tool is a fairly inexpensive
one, but works OK for the amount I use it. Occasionally, I wish I had the
extra capacity of a floor model rather than the benchtop.
|
|

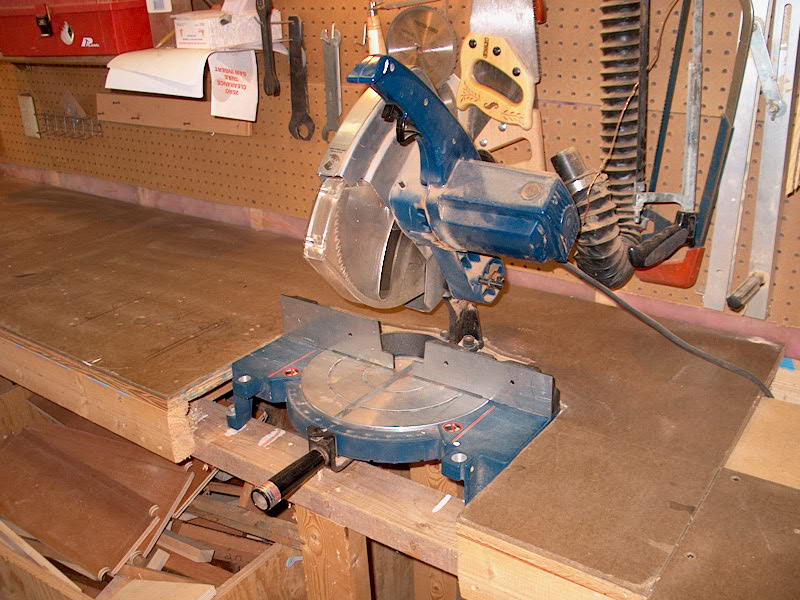
Ryobi TS254 10" miter saw
Usefulness Rating: 10
This is such a useful
tool. I use it all the time, mostly for straight, accurate cuts to shorten
a board to the proper length. However, I also use it, of course, to cut
angles, but as a cutoff tool it is the most valuable to me. It's portable,
although I keep it flush with the bench most of the time. For the boat, I
was able to bring it right up on deck when I installed the mahogany toerail, and
into the cabin while I was working on the interior joinery. I also have a
cheap plastic hand miter box, which was handy for the small trim pieces, but
this one proved its worth again and again. I have an expensive cutoff
blade that makes all the difference--glassy smooth cuts. This saw does not
make compound cuts; ideally, I would like to have a sliding compound miter
saw--that might be the next tool upgrade down the road.
|
|

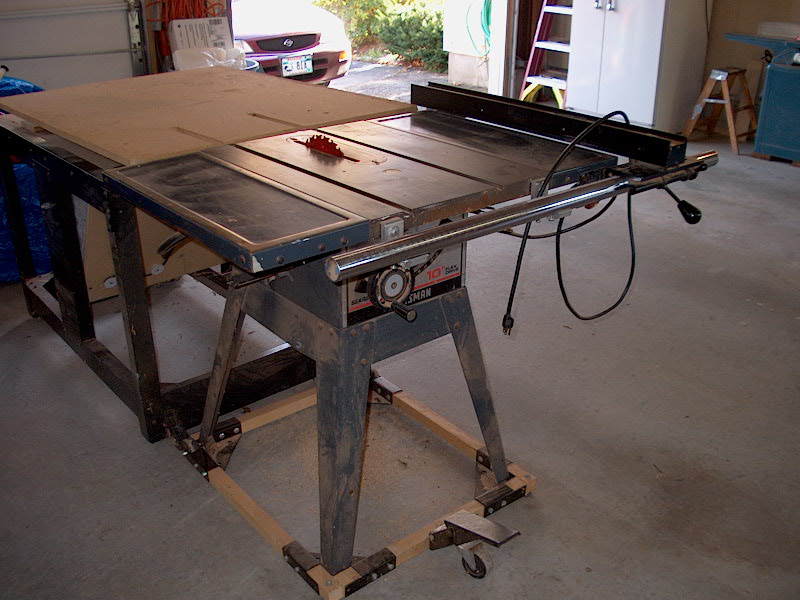
Craftsman 10" Flex Drive contractor's
table saw, equipped with 26" aftermarket Vega Utility fence Usefulness
Rating: 10
This tool is extremely handy
to have, and it's tough to make straight, parallel cuts without one. Even
one of the small portable carpenters' saws is better than nothing--I started out
with one of those and moved up to this one when a friend sold it to me for a
decent price. One of the first upgrades I made was purchasing an
aftermarket fence--the original was poor, and never stayed parallel without a
fight. The new one locks parallel, guaranteed, every time. This is
perhaps the most important (and, conversely, frustrating) part of any table
saw--without an excellent fence, you will continually fight the quality of your
cuts, and will spend much time aligning the fence for each cut. The
aftermarket fence is well worth the cost for any saw. This is a tool that
I have trouble imagining doing without, for almost any project. Granted,
many of the cuts you need for boats are not straight--but many are, including
cutting stock for various trim pieces, cutting plywood to size, you name
it. With a multitude of accessories, the saw takes on many more
uses. My favorite, and most-used, is the stacked dado head. I use
this often. I also purchased a mobile base for the saw, which allows me to
more easily move it out of the way if necessary.
|
|

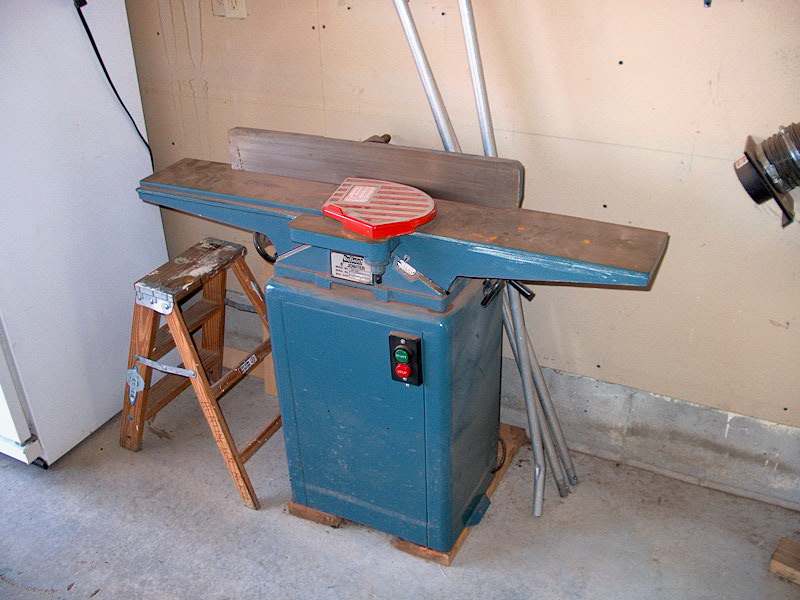
Reliant
DD39C 6" Jointer Usefulness Rating:
3
Getting this thing properly aligned is an all
day job, and even then there are no guarantees. Perhaps a more expensive
version would be easier to align for straight cuts, but this one is so much
trouble it's hardly worth it. I bought it years ago so that I could buy
rough-edged stock and mill the straight edges myself, and also to help smooth
out the saw marks from the table saw. I've had some success with it in the
past, but recently I haven't used it much. I don't think I turned it on
during the boat project. This is a tool where I though an inexpensive one
would be better than none at all...but I'm not so sure.
|
|

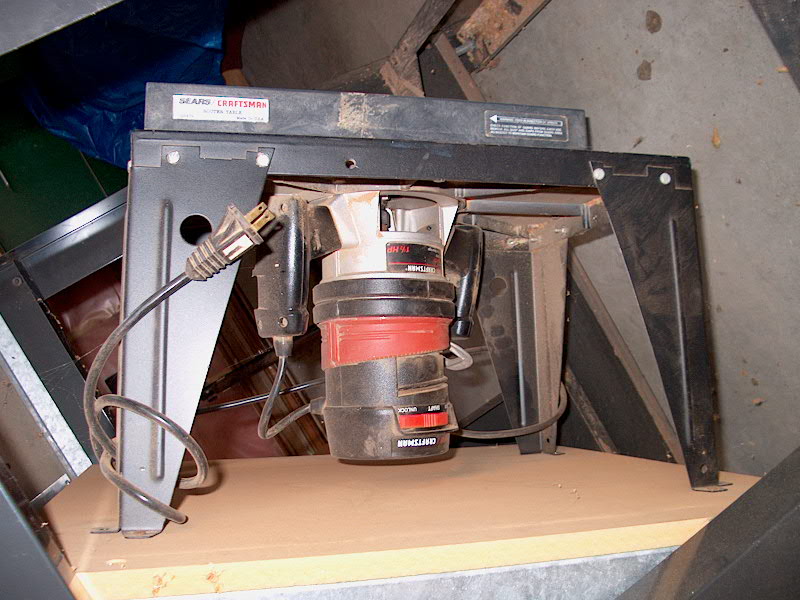
Craftsman
925479 Router Table and 1-1/2 HP Router (1/4" collet) Usefulness
Rating: 9
I use this all the time. Because I
originally had trouble getting my first router, the DeWalt, to fit the table, I
purchased a Sears router that I leave mounted in the table all the time.
The router is inexpensive, and the adjustment is a nightmare--cheap plastic
collars that broke almost immediately, so I use a little C-clamp to hold things
in place. However, this is extremely handy for routing edge details on
smaller boards, doors, trim...anywhere that using a handheld router would be
difficult, dangerous, or impractical. This particular table is small, and
the adjustments are a little finicky, but it works well once things are
adjusted. A slightly better one would be nice, but the general concept of
a router table is something I would not want to do without. If you have a
router, you need a router table for it.
|
|
Home-Built Router Table for 3 HP
Router Usefulness Rating: 5
I built this from a basic plan and modified it
to suit my needs. It's a pretty basic table, with a dust collection system
that works pretty well. The first consideration with a router table is the
stability of the top--mine is two layers of particle board with Formica on
top. I don't have a picture yet. The table is on casters so that I
can move it around as necessary.
I built the table specifically to house my
monster Porter Cable 3 HP router. I have a phenolic base plate on the
router that fits into a cutout in the tabletop. I mostly use this table
for large pieces, and large bits--such as raised panel doors bits. The
original fence design is awkward and difficult to line up properly, so I don't
use this table as often as I should. Someday I'll build or buy a
better fence system. For this project, I don't think I used the router
table at all. If I made it slightly more useful, I'd use it more often
instead of the small Craftsman one.
|
|
Hand Tools
I won't list them all, but suffice it to say
that I have everything you might expect. Hammers, deadblow mallets,
chisels, screwdrivers of all shapes and sizes, pliers, wrenches, utility knives,
levels, tape measures...and so on and so forth. There's always something
else that I wish I had for a given project, and sometimes I buy them. I
hate not having basic tools close by, so I have several sets of varying quality
and age around the house--in the garage (shop), in the boiler room, in a drawer
upstairs, in the toolbox in my truck, a few in the tractor shed...you get the
idea. I rarely get rid of any tools; instead, I take in more and more from
various sources over the years. I have a couple good sets of screwdrivers
and pliers and such, and a bunch of older, cheaper ones that I scatter
around. When I launched the boat, I bought a set of tools as necessary so
that I could have a complete set on board at all times, specifically for the
boat. Click here to see what's on the boat.
|
|
Mechanic's Tools
I have several wrench and socket sets, of
various sizes. I keep the best ones in my shop, with a couple cheap sets
in the house and truck for those occasions where I need one. I like
Craftsman because they replace any hand tool for free if it breaks (this happens
with ratchets and tape measures all the time) and the price is affordable.
They are good quality. I wanted a complete set of metric and SAE wrenches
and sockets for the boat, but didn't want to break the bank. I also didn't
want junk, so I bought a pre-cased set at Home Depot (Husky). So far, so
good. I also bought full sets of open and box-end wrenches in both Metric
and SAE for the boat, and will buy any specific tool needed to maintain the
engine or other parts of the boat. I never want to be out there and not be
able to do something because I don't have the tool. I keep all the tools
in a variety of plastic toolboxes on board--I have the mechanic's set in its own
case, the regular toolbox with all the other tools, an electrical box, and a
spare parts/fastener box. Having these tools sure beats needing to run
back and forth all the time because I forgot something. It's a must in my
book. Because I do all my own maintenance and repair, I bought some decent
tools that will last a long time, but that I won't weep over if I happen to lose
something overboard. I also keep a cordless drill, charger, and fill bit
set, along with taps, on board at all times. Click here
to see what I have on the boat.
|
|
Special Tools
I have a few specific, purposeful tools that I
don't use often, but come in handy for their assigned task. Of course,
sitting here I can't remember even close to all of them, so I'll add to this
list as memory allows, and after trips to the shop and boat.
The first thing that comes to mind is a pair
of laminate shears. These are handy for cutting large sheets of Formica
into smaller, more manageable sizes. They can be helpful in cutting curves as
well, and can be accurate enough for good straight cuts. However, it's
tough to keep them properly lined up, so I preferred the laminate trimmer for as
many cuts as possible.
I also have an electric impact driver.
Sometimes, it's just a handy thing to have. I use it once or twice a
year. On the boat, the only place I used it was to drive the long lag
screws into the rudder when I installed the rudderpost. It's hardly a
necessity, but is nice to have now that I have it.
|
|
|
|