|
A New Mahogany Tiller (Page 2)
This page was last updated
on 20 July 2004. |
|
<Back to Page 1
After several months of ignoring the
tiller project, I decided it was finally time to get the things
built. I decided that I might have success bending the strips to
the mold if I soaked them in water first, so I filled a length of PVC
pipe with water and inserted the strips, leaving them for a week.
I had broken enough strips during my initial bending attempts (see
page 1) that I had just enough
for one tiller. I wanted to build two--one for me, one for Nathan,
but I hoped that I could at least succeed with one, and deal with the
additional wood for a second one later.
With the strips thoroughly soaked, I
tried bending them around the mold. The soaking definitely helped,
and I succeeded in getting them bent to the shape--just. There was
still some minor splitting on the topmost piece, but I thought that
would be OK, as the blank was designed to be oversized in the first
place. I let the strips dry in the mold for about a week, then
tried gluing them up.
It was a disaster. I guess the wood
must have retained moisture, as my lamination failed miserably--most of
the strips just came unstuck almost as soon as I removed the
clamps. This was discouraging, and wasteful--and irritating, since
I felt like I had been rushing the process, and should have known better
than to push the drying process.
Again, I ignored the project for a few
more weeks, which allowed me time to reflect on the problems. I
decided that not only were the 1/4" thick strips too much to bend
around the difficult mold, but also were cut the wrong way off the block
of mahogany. I had trimmed them off the edge of the wood (it was a
2" thick piece), which was easy--but apparently, this left the
grain running the wrong way, and ended up weak. Or so I guessed,
anyway.
|
Eventually, I decided to try again.
From the same piece of 2" thick mahogany, I milled 18 strips of
wood, resawing the larger piece this time to ensure that the flat grain
was running the right way. Each strip was less than 1/4" in
thickness--about 5/32" - 3/16". As a result, I needed 9
strips to make each tiller, rather than the 5 I had used
previously. I soaked 9 of the pieces in my PVC pipe again, for a
week or so, then bent them around the mold and clamped them in place to
dry. They bent easily, with no signs of breakage. I was
hopeful.
After a few days, I removed the pieces
from the mold, and spread them out to dry completely; having them
pressed together in the mold seemed to retain a large amount of moisture
inside, which may have led to my previous gluing failure. When the
strips were visibly dry, I glued five of them together against the mold;
trying to glue 9 laminations at once seemed to be too much, so I chose
to do it in two stages. I used thickened epoxy resin as an
adhesive. After a day or so, I removed the half-blank, cleaned up
the hardened epoxy spillout, and laminated on the remaining four strips,
completing the blank. Being the nice guy I am, I gave the first
blank to Nathan, as he needed a new ]tiller more than I.
[Click
here to see how he shaped his tiller blank.] |
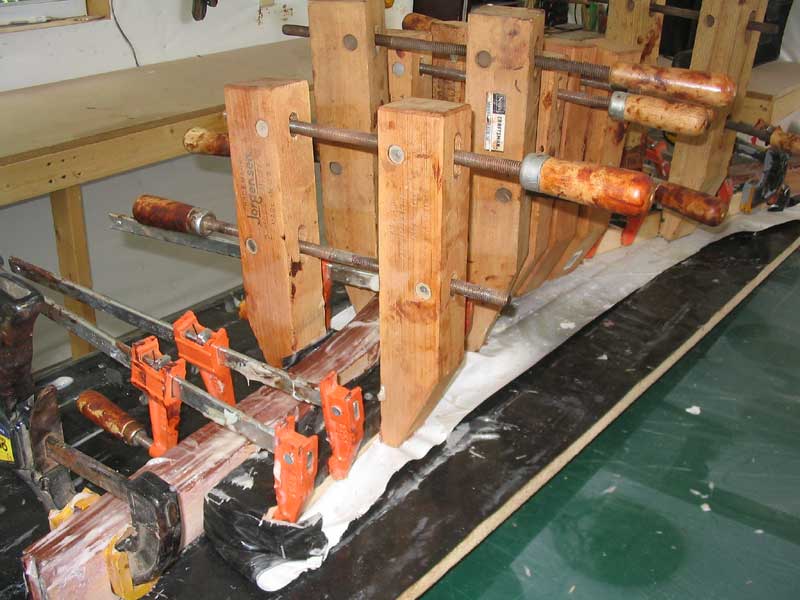
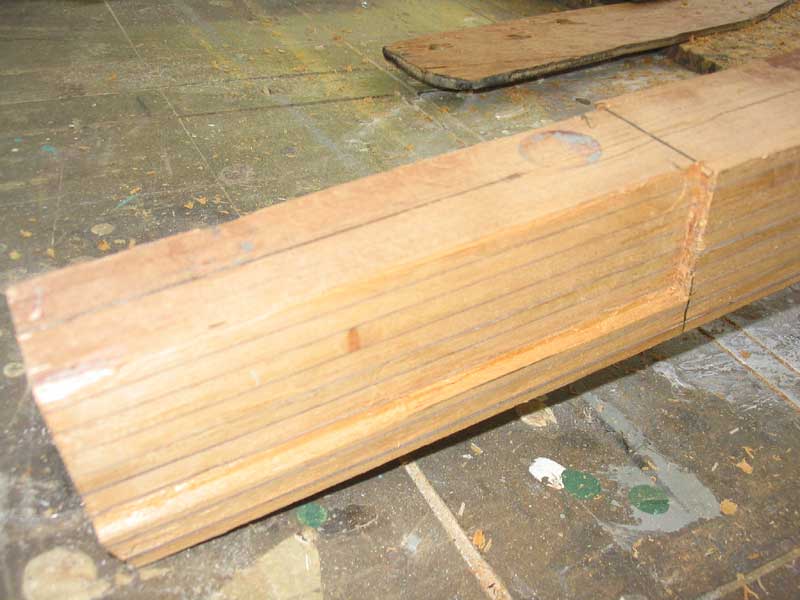
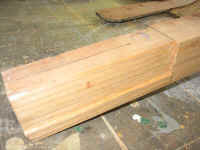
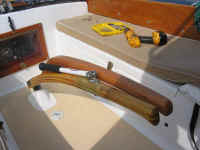
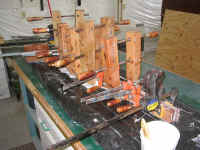 With
one successful tiller out of the way, I finally got around to making a
second one for myself, a week or two after making Nathan's. I
followed the same steps described above: soak the wood, clamp the
wood, dry the wood, and, finally, glue the strips together in two
different operations: five strips the first day, then four the day
after. These photos show the laminating process during the second
day, after all nine strips had been glued together. With
one successful tiller out of the way, I finally got around to making a
second one for myself, a week or two after making Nathan's. I
followed the same steps described above: soak the wood, clamp the
wood, dry the wood, and, finally, glue the strips together in two
different operations: five strips the first day, then four the day
after. These photos show the laminating process during the second
day, after all nine strips had been glued together. |
 I
learned a few things from building the first tiller. First, I had
found that the wooden screw clamps I used tended to stick to the tiller
blank with the epoxy, which had caused some tearout on Nathan's
tiller. It ended up OK, and eliminated by the time the whole
tiller was shaped, but I wanted to avoid that problem. I
learned a few things from building the first tiller. First, I had
found that the wooden screw clamps I used tended to stick to the tiller
blank with the epoxy, which had caused some tearout on Nathan's
tiller. It ended up OK, and eliminated by the time the whole
tiller was shaped, but I wanted to avoid that problem.
The fix was simple: place small
squares of plastic between the wooden clamp jaws and the top of the
tiller. Duh.
Also, I had mixed some microballoons into
the glue (along with cabosil for thickness) when gluing the first
tiller, thinking that the reddish color might be less visible against
the mahogany. It was OK, but the glue lines seemed to stand out a
bit, so I decided to use only cabosil when thickening the epoxy for my
second tiller. There was no guarantee that the white-ish color of
the cabosil-thickened epoxy would be less bothersome, but I decided it
was worth a try nonetheless. The reddish color wasn't bad--I just
thought I wanted something different. |
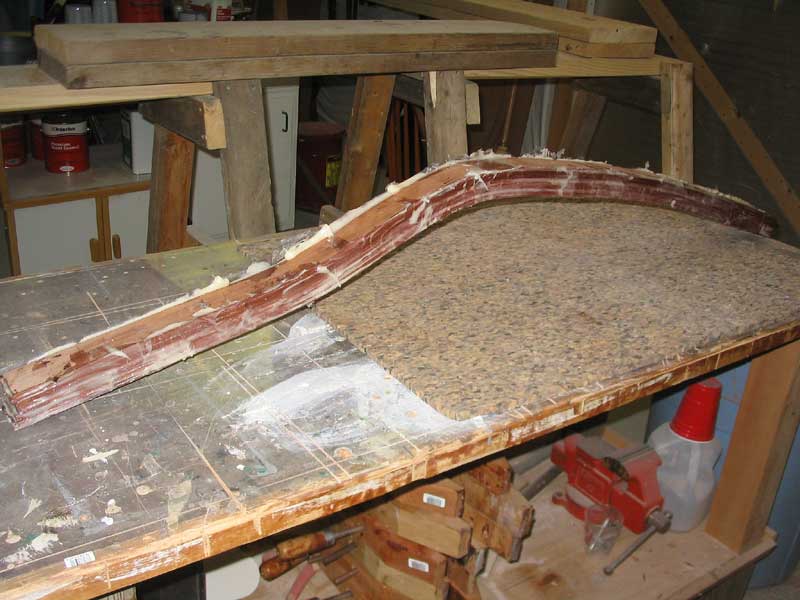
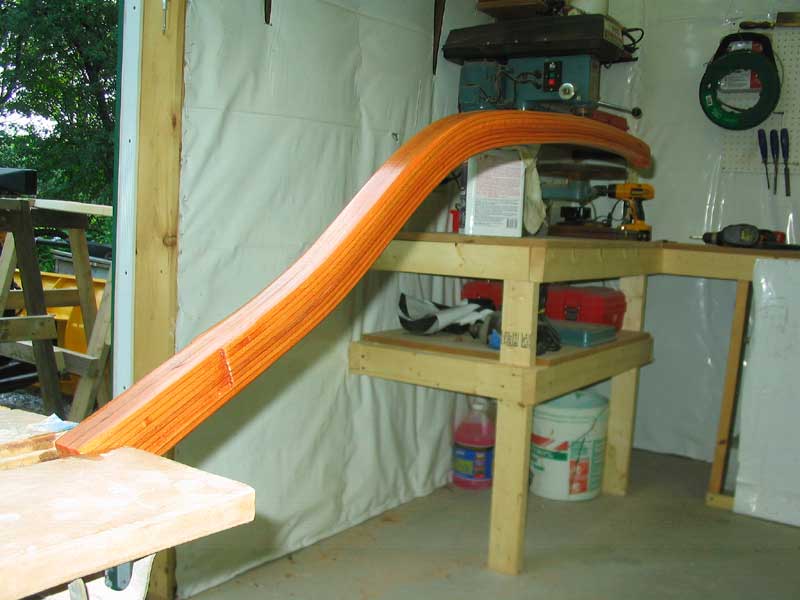
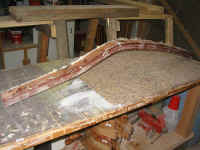 Once
all the strips were laminated together, and had had sufficient time
in the clamps, I removed the clamps and prepared to clean up and shape
the blank. The raw strips were 2" wide, to allow for plenty
of room for proper sizing and shaping; the actual tiller bracket, to
which the tiller would bolt, was only about 1-3/8" wide inside. Once
all the strips were laminated together, and had had sufficient time
in the clamps, I removed the clamps and prepared to clean up and shape
the blank. The raw strips were 2" wide, to allow for plenty
of room for proper sizing and shaping; the actual tiller bracket, to
which the tiller would bolt, was only about 1-3/8" wide inside.
|
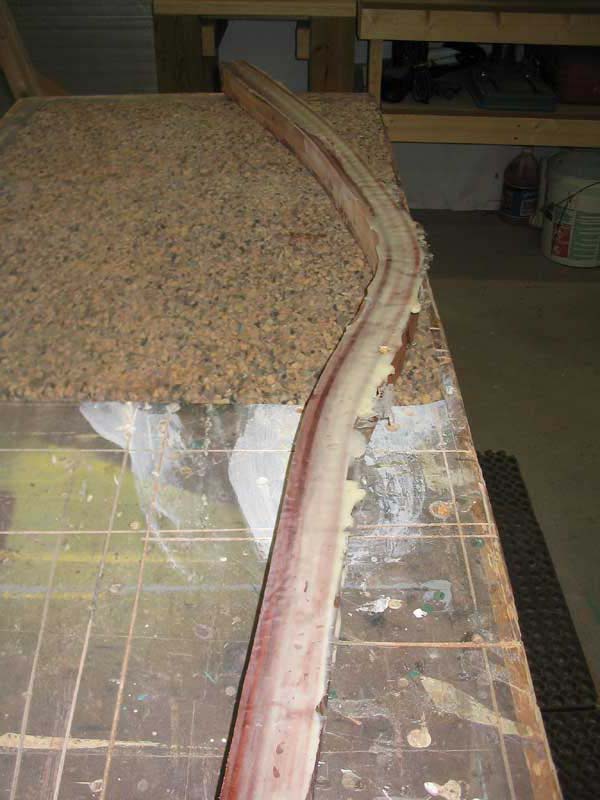
 I
began at the planer, where I worked first to smooth off the excess
epoxy. The side of the blank that had been facing down on the mold
was relatively flat and smooth, as the squeezed-out epoxy flattened out
against the plastic coating on the mold, so with that side on the planer
table, I had a flat enough surface so that the planer knives would cut the
opposite edge fairly smoothly. Once I had the initial roughness
removed from the edge opposite the planer table, I began flipping the
blank with almost every pass, so that I would not only remove stock
evenly, but so that it would ensure that I didn't transfer any unevenness
from one side to the other. I
began at the planer, where I worked first to smooth off the excess
epoxy. The side of the blank that had been facing down on the mold
was relatively flat and smooth, as the squeezed-out epoxy flattened out
against the plastic coating on the mold, so with that side on the planer
table, I had a flat enough surface so that the planer knives would cut the
opposite edge fairly smoothly. Once I had the initial roughness
removed from the edge opposite the planer table, I began flipping the
blank with almost every pass, so that I would not only remove stock
evenly, but so that it would ensure that I didn't transfer any unevenness
from one side to the other.
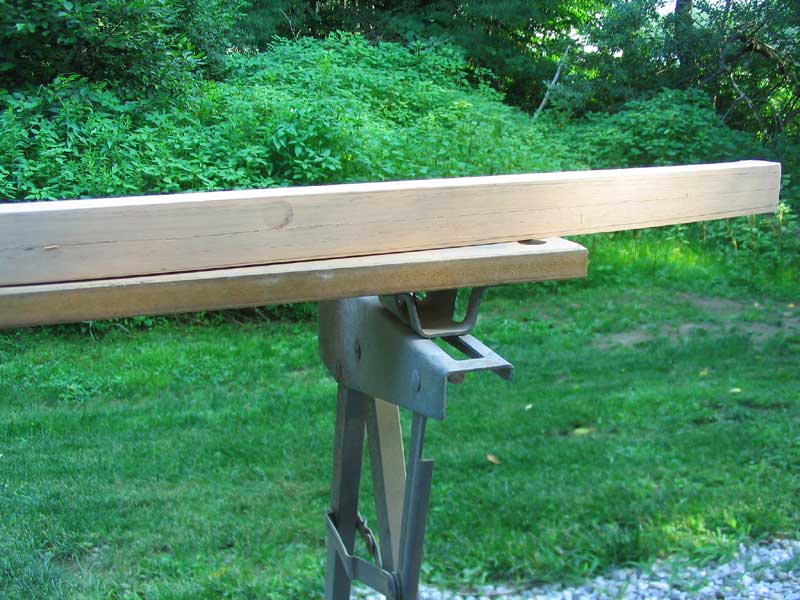
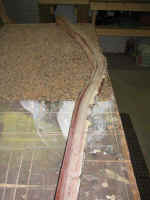
Once both sides were flat and parallel, I
continued planing until I reached my desired thickness: just over
1-1/2".
|
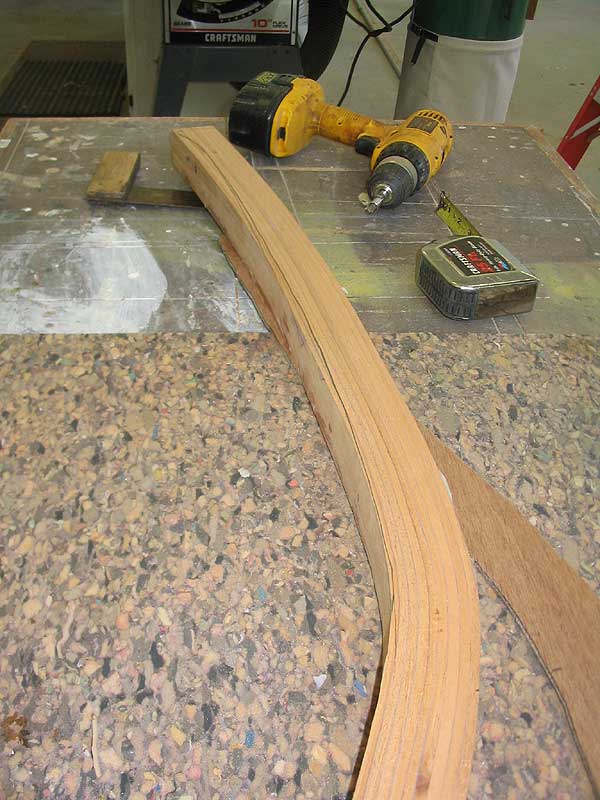
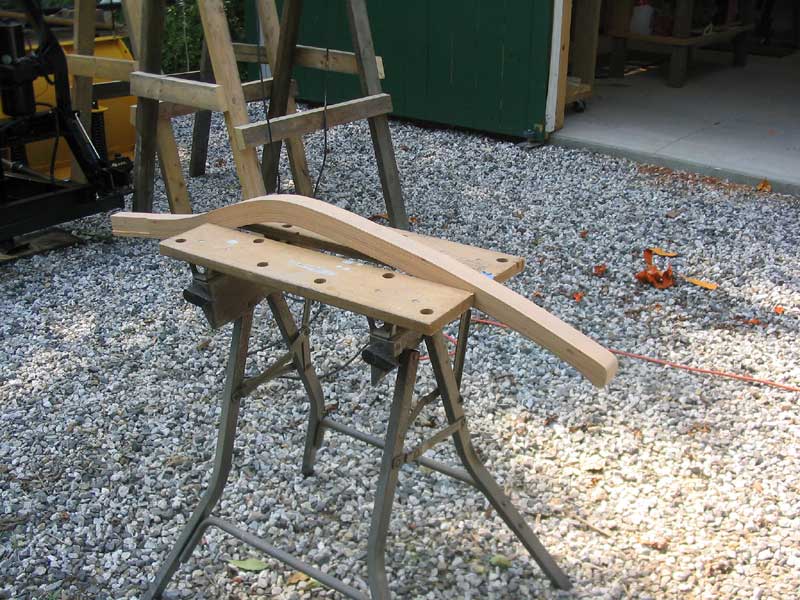
 Now
that the blank was sized to the correct maximum thickness, I used my Lauan
template to rough out the length of the blank, and to cut the excess ends
off at the correct point. Next, I worked to transfer some of the
shape of the template to the blank. I left the portion of the blank
from the butt end up to the topmost curve full-width, but penciled in a
smooth curve in the "handle" part of the tiller, most defined
near the tip, and the handhold--this to produce an attractive shape and,
more importantly, to reduce the diameter of the handle at the tip, for a
more comfortable handhold. Now
that the blank was sized to the correct maximum thickness, I used my Lauan
template to rough out the length of the blank, and to cut the excess ends
off at the correct point. Next, I worked to transfer some of the
shape of the template to the blank. I left the portion of the blank
from the butt end up to the topmost curve full-width, but penciled in a
smooth curve in the "handle" part of the tiller, most defined
near the tip, and the handhold--this to produce an attractive shape and,
more importantly, to reduce the diameter of the handle at the tip, for a
more comfortable handhold.
|
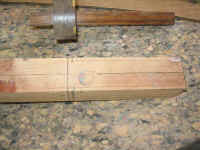 The
inside dimension of my tiller bracket was somewhere in the neighborhood
of 1-1/4 - 1=3/8"; I didn't measure it specifically, choosing
instead to use an old tiller that came with the boat (and which fits the
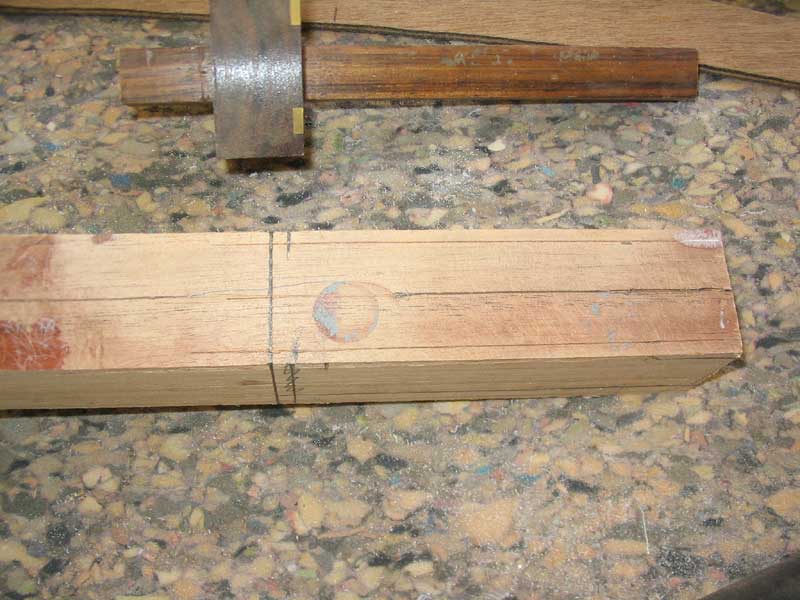
bracket) as a guide. Since I had left the tiller blank at
1-1/2" thickness, this meant that I needed to remove some material
at the butt end in way of the bracket location. To do this, I
first marked out a centerline on the tiller top; then, after determining
the width of the inside of the bracket (by using the old spare tiller),
I marked off the width of the material to be removed, and drew in the
general perimeter of the area on the sides of the tiller as well.
With a small router and a straight-cutting bit, I freehanded out the
bulk of the material, and then cleaned up the edges to the lines with a
chisel. The
inside dimension of my tiller bracket was somewhere in the neighborhood
of 1-1/4 - 1=3/8"; I didn't measure it specifically, choosing
instead to use an old tiller that came with the boat (and which fits the
bracket) as a guide. Since I had left the tiller blank at
1-1/2" thickness, this meant that I needed to remove some material
at the butt end in way of the bracket location. To do this, I
first marked out a centerline on the tiller top; then, after determining
the width of the inside of the bracket (by using the old spare tiller),
I marked off the width of the material to be removed, and drew in the
general perimeter of the area on the sides of the tiller as well.
With a small router and a straight-cutting bit, I freehanded out the
bulk of the material, and then cleaned up the edges to the lines with a
chisel. |
|
|
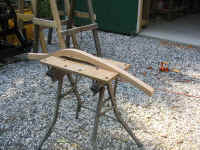 Next,
I worked on shaping the handle end of the tiller to the marks I had
made. I decided to leave the top edge of the tiller more or less
alone, since it already had the shape I was after in profile (i.e. the
molded shape). Therefore, most of the material to be removed came
from the bottom of the tiller--the concave side. I clamped the blank in a
small Workmate, and used a beltsander--across the grain--to rough out the
proper shape. Then, I finished to the lines--and to my eye--with a
variety of other sanders as necessary, till I was pleased with the
shape. I also rounded over the tip somewhat at this point. Next,
I worked on shaping the handle end of the tiller to the marks I had
made. I decided to leave the top edge of the tiller more or less
alone, since it already had the shape I was after in profile (i.e. the
molded shape). Therefore, most of the material to be removed came
from the bottom of the tiller--the concave side. I clamped the blank in a
small Workmate, and used a beltsander--across the grain--to rough out the
proper shape. Then, I finished to the lines--and to my eye--with a
variety of other sanders as necessary, till I was pleased with the
shape. I also rounded over the tip somewhat at this point.
|
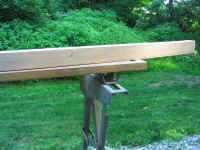 All
that remained was to shape the sides of the tiller. Again, I left
the blank more or less square and full-thickness from the butt end up to
the topmost curve. From this point, however, I drew in a straight
taper to reduce the blank's width to a total of one inch at the tip.
I used a flexible batten to mark the line, lining the batten up with my
chosen tangent point at the topmost curve, and the other end at a mark I
made at the tiller tip. I marked it top and bottom, and then sanded
away the excess to the lines, and cleaning it up so that it was true and
fair to my eye. All
that remained was to shape the sides of the tiller. Again, I left
the blank more or less square and full-thickness from the butt end up to
the topmost curve. From this point, however, I drew in a straight
taper to reduce the blank's width to a total of one inch at the tip.
I used a flexible batten to mark the line, lining the batten up with my
chosen tangent point at the topmost curve, and the other end at a mark I
made at the tiller tip. I marked it top and bottom, and then sanded
away the excess to the lines, and cleaning it up so that it was true and
fair to my eye.
|
 To
finish the shaping, I rounded over all edges of the tiller--excepting an
inch forward of the bracket location at the butt end--with a 1/4"
roundover bit in my router. Then, I increased the roundover radius
to 3/8" for the 12" or so around the tiller grip area, just aft
of the tip end. Finally, I sanded the whole thing smooth and fair,
paying particular attention to the handgrip section and the curved,
rounded tip to ensure that they would be pleasing to the eye and
comfortable to hold. After much sanding, I applied a sealer coat of
varnish (cut 50/50 with thinner) before bringing the blank to the boat for
a "real" test fit. To
finish the shaping, I rounded over all edges of the tiller--excepting an
inch forward of the bracket location at the butt end--with a 1/4"
roundover bit in my router. Then, I increased the roundover radius
to 3/8" for the 12" or so around the tiller grip area, just aft
of the tip end. Finally, I sanded the whole thing smooth and fair,
paying particular attention to the handgrip section and the curved,
rounded tip to ensure that they would be pleasing to the eye and
comfortable to hold. After much sanding, I applied a sealer coat of
varnish (cut 50/50 with thinner) before bringing the blank to the boat for
a "real" test fit.
|
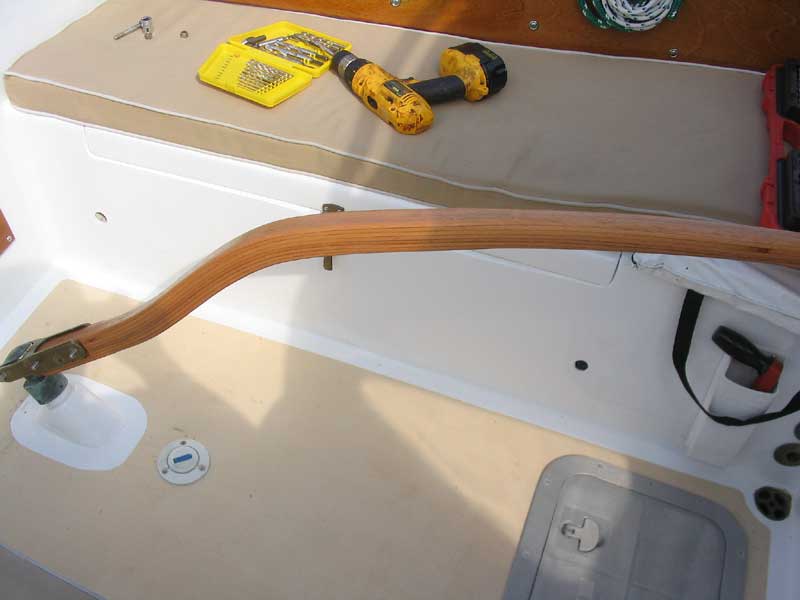
 The
next day, I brought the tiller out to the boat for a test fit.
Removing the old tiller from the bracket, I checked the fit with the new
tiller--a little looser than I had hoped, but close enough once the bolts
were tightened. The way the bronze tiller head is constructed, there
is a projecting flange on the forward side. This flange catches the inside
of the bronze tiller bracket and prevents it from dropping too far.
With the back of the tiller butted back as far as it could go, there was a
clearance problem with this flange--a problem I had had with the previous
tiller as well. I think I had simply forced the old tiller to pass
by the flange back in 2001 when I installed it, but the new one was
rubbing more firmly; therefore, I would have to dish out the butt end a
bit back at the shop. Not a problem. The
next day, I brought the tiller out to the boat for a test fit.
Removing the old tiller from the bracket, I checked the fit with the new
tiller--a little looser than I had hoped, but close enough once the bolts
were tightened. The way the bronze tiller head is constructed, there
is a projecting flange on the forward side. This flange catches the inside
of the bronze tiller bracket and prevents it from dropping too far.
With the back of the tiller butted back as far as it could go, there was a
clearance problem with this flange--a problem I had had with the previous
tiller as well. I think I had simply forced the old tiller to pass
by the flange back in 2001 when I installed it, but the new one was
rubbing more firmly; therefore, I would have to dish out the butt end a
bit back at the shop. Not a problem.
|
 Otherwise,
the fit was as expected, and I was pleased with the general appearance and
clearances afforded by the new design. I placed the old tiller next
to the new for a comparison of the two designs, and how they fit in the
cockpit. Otherwise,
the fit was as expected, and I was pleased with the general appearance and
clearances afforded by the new design. I placed the old tiller next
to the new for a comparison of the two designs, and how they fit in the
cockpit.
Securing my oldest (original, I think) oak
tiller in place in the bracket to hold the rudder while I left the boat (I
always tie the tiller), I returned to the shop with the new tiller and its
4 year-old counterpart, so that I could transfer the position of the
tiller extension to the new tiller in the comfort--and accuracy--of the
shop. I also wanted to reshape the handle portion of the new tiller
a bit, to make it a bit rounder and smoother, and closer in profile to the
older tiller.
|
 I reshaped the tiller as needed with a variety
of sandpaper grits, and then sanded the whole thing smooth, essentially
removing my previously-applied varnish sealer coat. Then, I marked
out the location for the through bolt that secures the tiller extension,
and, with a larger bit than necessary, drilled through the tiller. I
also overdrilled the bracket holes. I reshaped the tiller as needed with a variety
of sandpaper grits, and then sanded the whole thing smooth, essentially
removing my previously-applied varnish sealer coat. Then, I marked
out the location for the through bolt that secures the tiller extension,
and, with a larger bit than necessary, drilled through the tiller. I
also overdrilled the bracket holes.
|
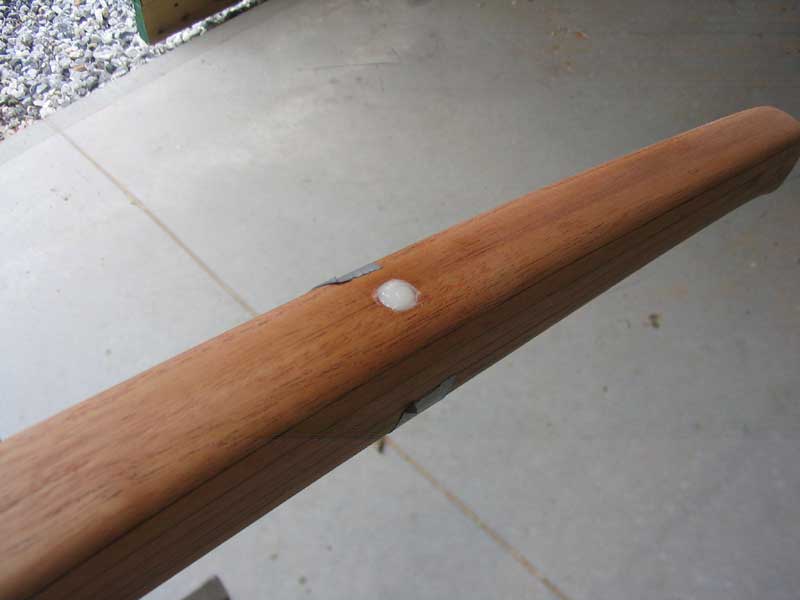
 I did this so that I could fill all four
holes with a thickened epoxy mixture, to not only seal the exposed wood
grain inside the holes (and therefore help prevent any moisture-related
problems later), but also to help strengthen the tiller in way of these
large holes. Taping over one side of the holes, I filled them with
epoxy thickened with plastic minifies, and left it to cure before
continuing. I did this so that I could fill all four
holes with a thickened epoxy mixture, to not only seal the exposed wood
grain inside the holes (and therefore help prevent any moisture-related
problems later), but also to help strengthen the tiller in way of these
large holes. Taping over one side of the holes, I filled them with
epoxy thickened with plastic minifies, and left it to cure before
continuing.
|
After the epoxy cured,
I applied six coats of gloss varnish over the next six days. Finally
deeming there to be sufficient varnish on the tiller for good looks and
adequate protection for the remainder of the season, I brought the new
piece to the boat for final installation.
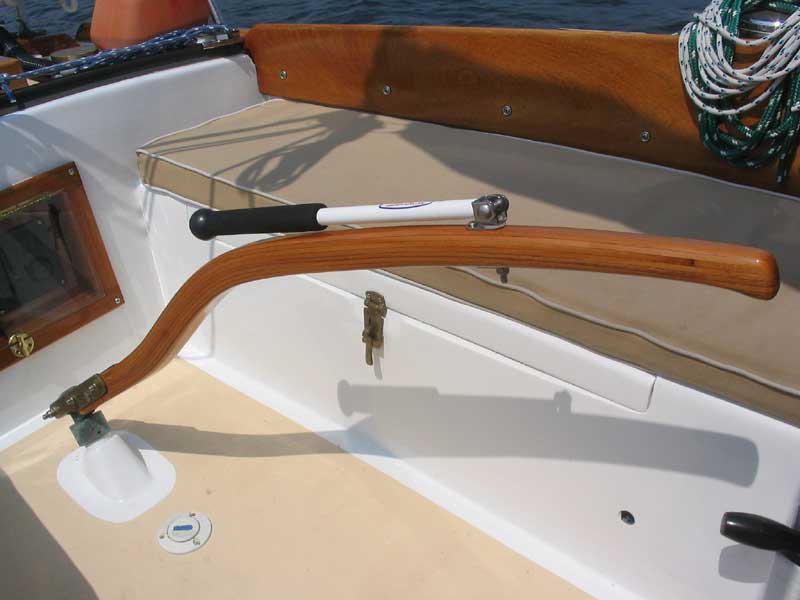
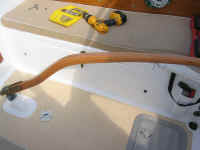
 Removing
the old tiller from the bracket, I dry-fit the bracket on the new tiller
and redrilled the holes through the epoxy plugs. This left a thin
band of epoxy around the entire perimeters of the holes, which should help
prevent any moisture intrusion into the laminations of the tiller.
Then, I bolted the bracket in place, and reattached it to the tiller
head. I also redrilled for the tiller extension and installed that. Removing
the old tiller from the bracket, I dry-fit the bracket on the new tiller
and redrilled the holes through the epoxy plugs. This left a thin
band of epoxy around the entire perimeters of the holes, which should help
prevent any moisture intrusion into the laminations of the tiller.
Then, I bolted the bracket in place, and reattached it to the tiller
head. I also redrilled for the tiller extension and installed that.
Looks good! Now all I have to do is
test it under sail. There will ample opportunity for that coming up.
|
|