|
Refit: Winter 2008-2009
|
Winter 2008-2009 Refit | Saturday, October 18, 2008
During the week, I managed to
sand the toerails and hatch surround and apply one more coat
of varnish on Thursday afternoon.
This morning, I began by
sanding the varnish again and cleaning up; I left the
varnishing for later in the day.
I had been noticing an odor
in the shop--a nasty gray-water sort of odor. I knew
this had to be from the galley sink sump, which still had a
mixture of salt and fresh water and antifreeze in it.
Since relocating this sump and reconfiguring the related
plumbing was high on my priority list for the winter's work
anyway, I decided now was the time to begin the project. |
 First,
though, I have to begin with a bit of history about the
galley sink on this boat. Bear with me; it's all
relevant to the current project. First,
though, I have to begin with a bit of history about the
galley sink on this boat. Bear with me; it's all
relevant to the current project.
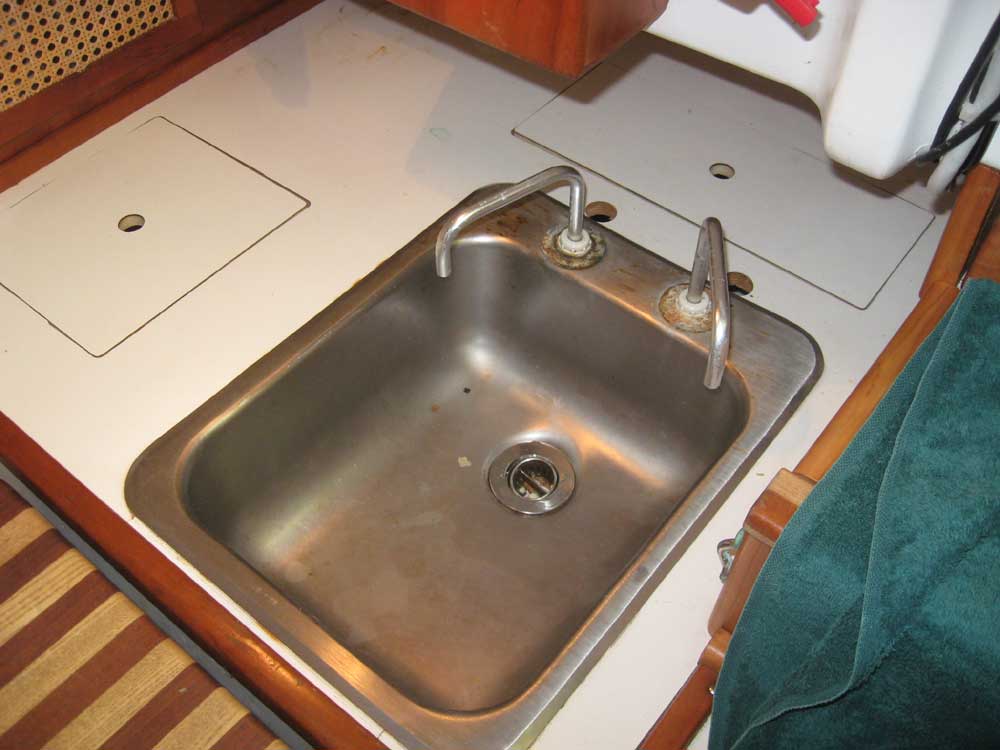
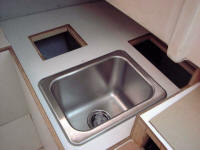
When I first built the galley, I installed a nice 13x7
sink with a 9-3/4" depth, plumbed directly overboard to a
through hull right beneath the galley. Unfortunately,
what I didn't take into account--never thought of, really,
until too late in the process--was that this deep sink would
end up actually below the waterline, meaning that there were
always several inches of water in the sink at rest.
Clearly, this was unacceptable. |
To address the immediate problem, I purchased--after quite a
bit of searching for the right thing--a 13x7 sink with a 5"
depth, and removed the deeper sink, replacing it with the
shallower version. This helped the problem somewhat,
as now the bottom of the sink was above the waterline (just
barely). We lived with this situation during the end
of our first season on the water and through the entire
second season, including our long 2-month cruise. But
this wasn't a long-term solution either, as it turned out;
the sink still drained poorly, and I had to close the
seacock underway to prevent water from entering the sink
when heeled on port tack.
After removing the deep sink,
I made considerable efforts to sell it. It took
forever, and eventually I sold it for a fraction of its
worth; what was I ever going to do with it?
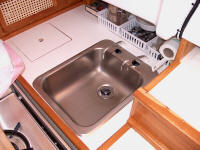 The
new sink came with an extended flange with large cutouts for
faucets, and at some point I moved the two spigots from the
original holes in the countertop (which worked with the old
sink) into the flange of the new sink to extend their reach
into the bowl. Because the flange holes were so large,
I had to use a pair of large washers over the spigot bodies
to sort of plug the flange holes. For whatever reason
at the time--probably availability--I used galvanized
washers for this. The
new sink came with an extended flange with large cutouts for
faucets, and at some point I moved the two spigots from the
original holes in the countertop (which worked with the old
sink) into the flange of the new sink to extend their reach
into the bowl. Because the flange holes were so large,
I had to use a pair of large washers over the spigot bodies
to sort of plug the flange holes. For whatever reason
at the time--probably availability--I used galvanized
washers for this.
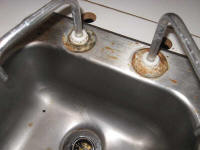
This worked, more or less,
but over time the washers began to corrode (we use salt
water extensively in the sink for washing dishes and so
forth), and they became ugly. In addition, the spigots
became a bit loose, but the washers had sort of affixed
themselves to the plastic bodies of the spigots, and besides
access to the area beneath the sink (where I'd have to reach
to tighten the nuts holding the spigots in place) was
virtually impossible. This problem became
progressively more annoying over the years. |
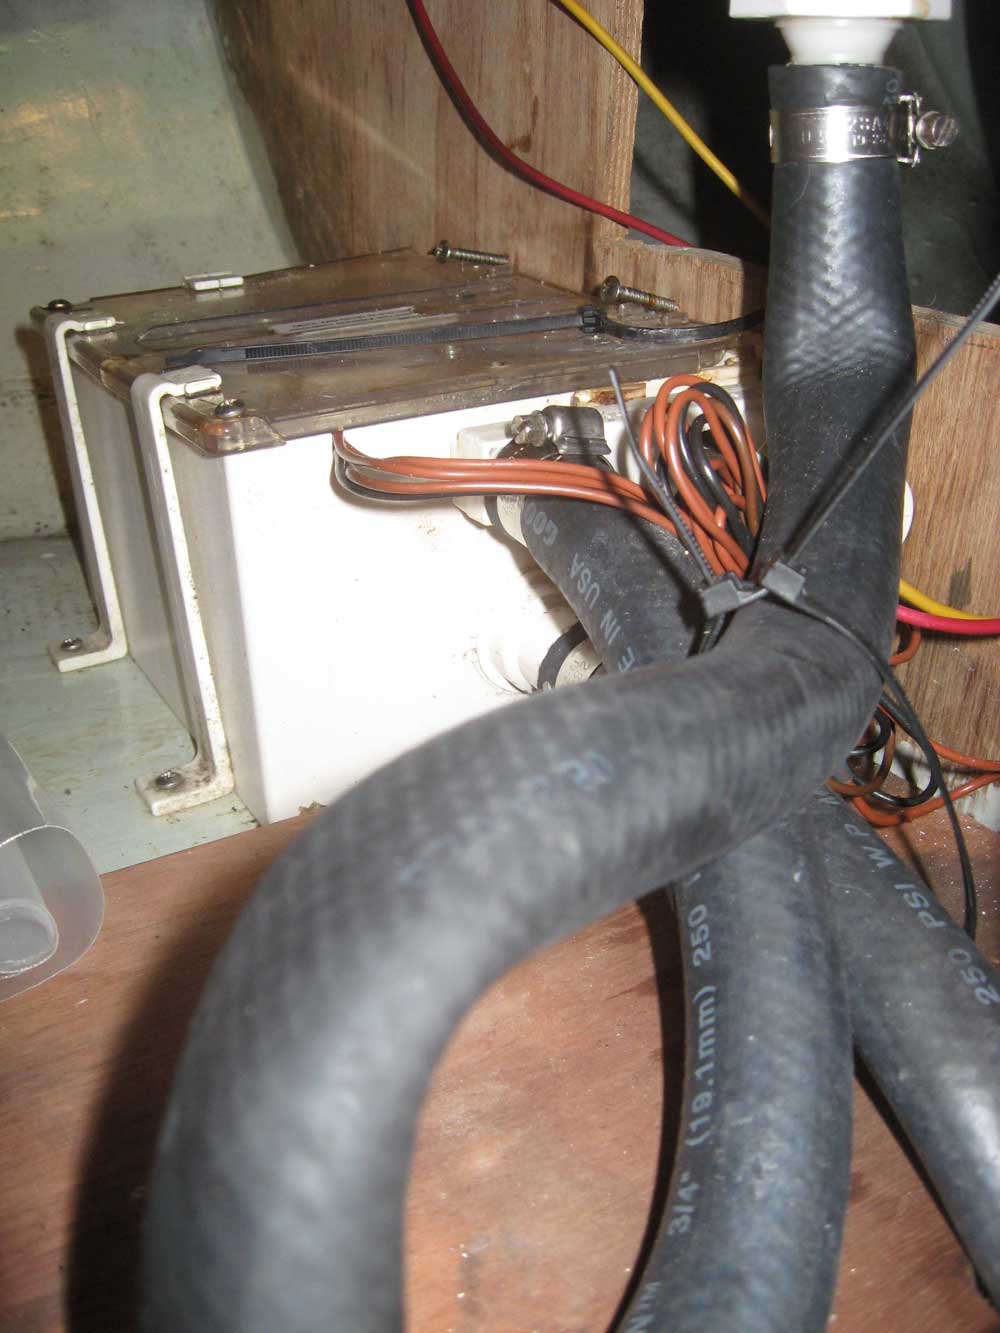
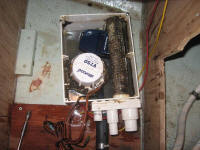
 Following
the 2002 season, I
replumbed the sink drain to a new electric sump pump
chamber that I installed in the cabinet immediately beneath
the sink. Eliminating the direct overboard discharge
meant that finally we could expect a dry sink. The
space beneath the existing sink was tight, but I found room
for the sump pump. Access was a real pain, though,
which meant that servicing the pump's strainer was harder
than need be--so I didn't do it much. Following
the 2002 season, I
replumbed the sink drain to a new electric sump pump
chamber that I installed in the cabinet immediately beneath
the sink. Eliminating the direct overboard discharge
meant that finally we could expect a dry sink. The
space beneath the existing sink was tight, but I found room
for the sump pump. Access was a real pain, though,
which meant that servicing the pump's strainer was harder
than need be--so I didn't do it much.
Worse, what began to happen
shortly thereafter was that the sink drain hose, needing to
take a very sharp bend in order to make it to the nearby
sump chamber, began to kink at the bend. At some
point, I replaced the hose I'd used originally with a
different kind, which I suppose must have helped for a
while. Still, the kinks continued, and at best, this
made drainage slower than it should have been; at worst, the
sink wouldn't drain at all, and I'd have to open up the
access door to the under-sink area (located at the side of
the engine room) and try and re-bend the hose to remove, at
least temporarily, the kink.
Enough was enough.
During the 2008 season, the kink became more the rule than
the exception, and with the loose faucets, gross corroded
galvy washers, and the other irritations, I made plans to
reconfigure the entire setup. This, finally, brings us
back to the present. |
|

 |
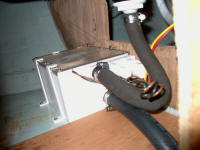
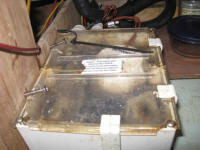
After removing the various items stored in the lockers under
the sink, I began the project by removing several screws
holding the sump pump chamber in place, and removed the sink
drain hose. The sump was full of water, and at this
close range it really began to stink; it became far worse
when I removed the plastic cover over the top of the
chamber--totally disgusting. Few things are nastier
than nasty gray water. At first, dumbly, I planned to
remove the sump and complete the project while leaving the
sink in place, so I began to bail out the water within the
sump so that I could remove it through the small opening in
the countertop--which would require tipping the sump on end.
This effort was relatively
fruitless, and entirely gross. Eventually, I inserted
a small chisel beneath the sink flange to test its adhesion
to the countertop; when I removed the original deep sink
years ago, the flange had been extremely well adhered, and I
caused some damage to the Formica during the removal.
I hoped to avoid this again this time.
I was surprised, therefore,
to discover that the seal was quite loose, and it was
actually a cinch to remove the sink. With the sink
loose, I could more easily reach the nuts securing the
spigots to the flange, and I removed these, allowing me to
completely remove the sink. Now I had good access to
the sump chamber through the large sink hole, so I removed
the overboard discharge line, snipped the electric wires,
and removed the stinking sump chamber. Disgusting.
Since the plastic top of
the chamber was broken in a couple places, and given the
overall disgustingness of the thing, I elected to remove,
clean, and save the electric pump and float switch as a
spare or for another use, but to throw away the chamber and
buy a new one. I ordered a replacement, along with
some hose that I'd need to plumb in the drain and overboard
discharge. |
|

|
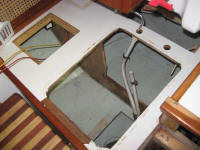
With everything out of the way, I spent some time cleaning
up the lockers beneath the sink (which are virtually
inaccessible and, particularly in the case of the after
locker, completely invisible with the sink in place).
I planned to relocate the new sump chamber in the bilge,
which would require a longer hose run but would ultimately
be a much more successful location: easier to access
and service, smooth hose runs without sharp bends
subject to kinking, and opening up room beneath the sink.
I confirmed that the new sump chamber would fit nicely in
the bilge.Right
around now, I also made the decision to replace the sink yet
again. Kicking myself repeatedly for selling my old
9-3/4" deep sink after removing it back in 2001, I placed an
order for an identical sink, since with the sump there was
no reason to limit the sink depth, and the deep sink was
what I'd wanted anyway, from the getgo. I wish I'd
considered the sump originally, instead of replacing the
sink, but there you have it. This also meant that I
could return the sink spigots to the holes I'd originally
drilled in the countertop.
For now, I'd moved as far
on this project as I could, and would resume after the
newly-ordered parts arrived. |
|
|
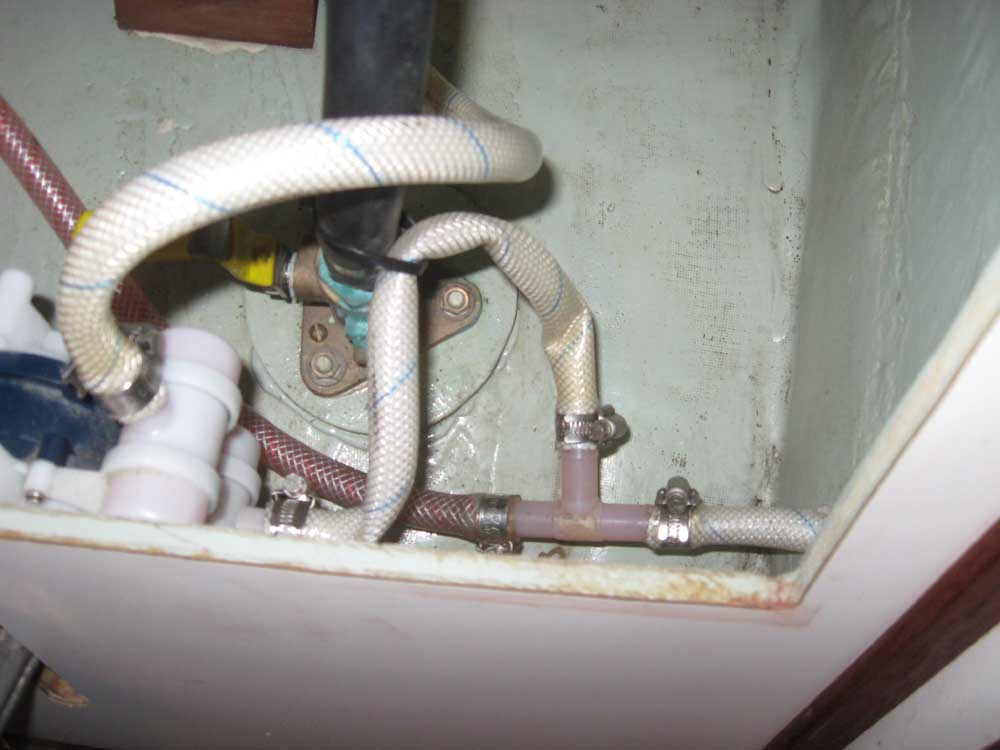
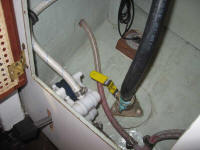
Similarly, last season had seen the arising of a problem
with the supply line to the head sink spigot. I
noticed early in the year that the foot pump didn't seem to
be working correctly; the pedal wouldn't return to the top
position very well on its own. Initially, I suspected
the pump might be failing, but closer inspection revealed
that the line running from the tee in the potable water line
to the pump had kinked badly, as the bend radius had been
too tight; 8 years of service in this position had kinked
the hose irrevocably.
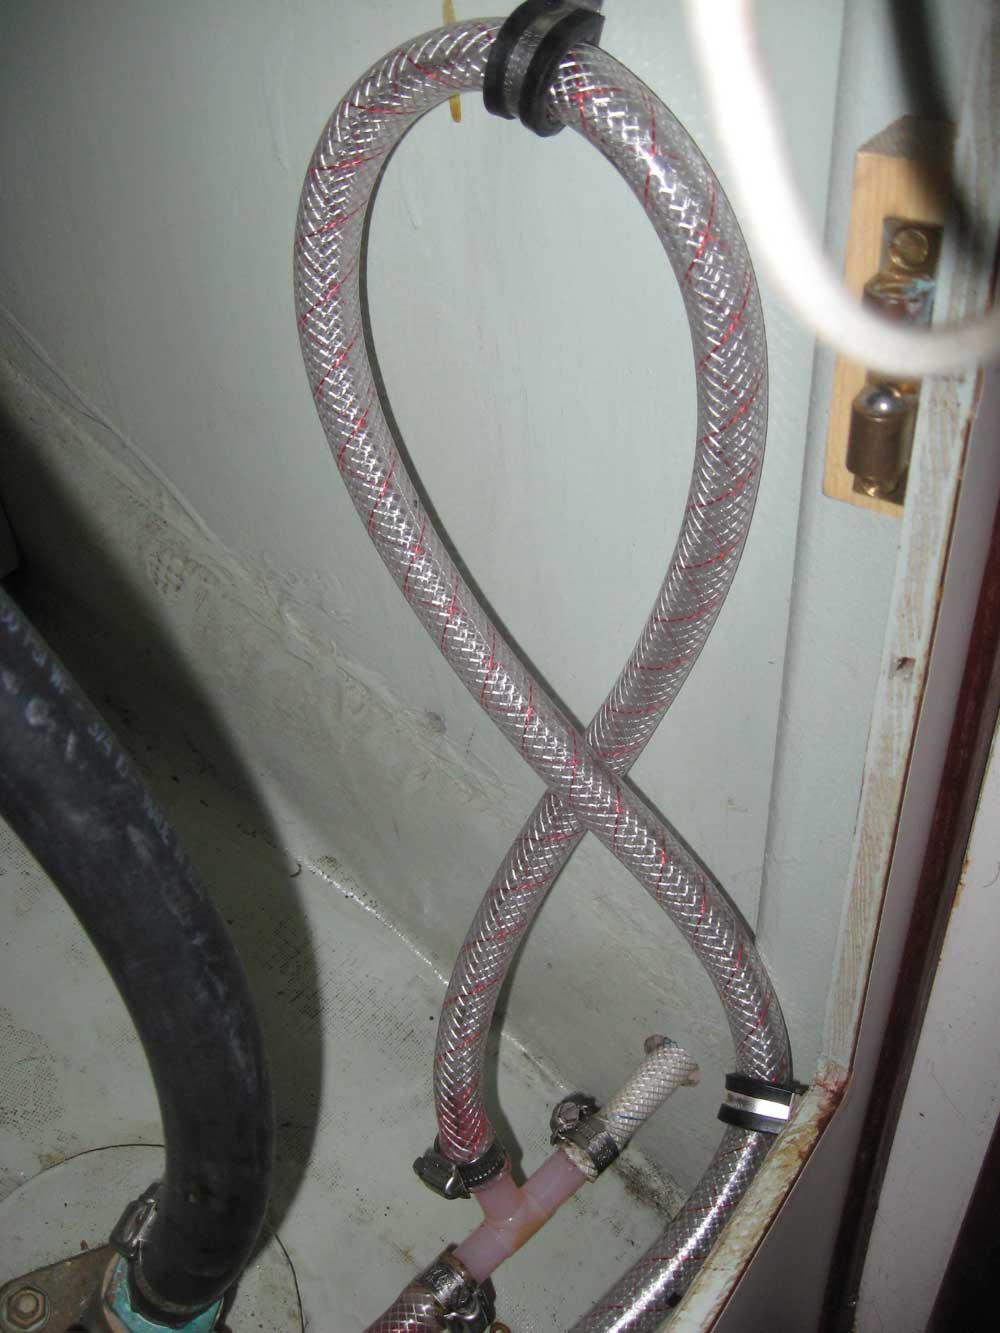
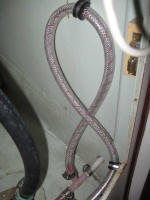
To get around the problem for
the season, I shortened the hose slightly and wire-tied it
to the sink drain line, which kept the hose open enough to
allow the foot pump to work correctly. But this was
only a short-term solution, so now I removed the hose and
installed a new length--much longer--which I looped up on
the bulkhead to allow easy bends that wouldn't kink. I also
secured the new line with a couple rubber-lined clamps, and
similarly rerouted the supply line from the pump to the sink
spigot, shortening it slightly and securing it to the
forward bulkhead out of the way.
I don't know why I ran the
hoses the way I did when I originally installed this stuff.
As I continue to repeat, there are many, many things about
the original work I did on the boat that I would change (and
am changing, as the need arises). |
|

|
While I was in the lockers beneath the galley sink, I came
across a 3-conductor sheathed cable that I'd originally run
to the
propane sniffer located beneath the stove. In
2002, mere months after installation, this useless device
began to malfunction, and at that time I disconnected it.
Seeing the wire reminded me of this, and I took the
opportunity to remove the useless sensor and cut the wire.
Later, I planned to remove the remainder of this wire run,
all the way back to the LPG panel.
Earlier, while sanding the
toerails, I'd noticed that the holding tank vent
fitting, located beneath the rubrail on the port bow, had
corroded badly, plugging it. I placed an order for a
new one, and added the job to the project list for the
winter.
I wrapped up the day by
applying another coat of varnish--the third so far--to the
forward hatch surround and the toerails. |
|
|
Total time on Thursday (sand and varnish): 1.5 hours
Total time today: 4.5 hours
Previous | Next |
|